Texting With A Teletype

How do you get the kids interested in old technology? By connecting it to a phone, obviously. Those kids and their phones. When [Marek] got his hands on an old-school teletype, he hooked it up to a GSM network, with all the bells and whistles including a 40mA current loop running at an impressive 50 baud.

The teletype in question here is a vintage T100 teletype manufactured in Czechoslovakia sometime in the ’70s. This was a gift to [Marek]’s workplace, the museum of Urban Engineering in Cracow, and this project is effectively an experiment to investigate the possibility of running this teletype as an interactive exhibit rather than an artefact from the age of current loops and phone systems.

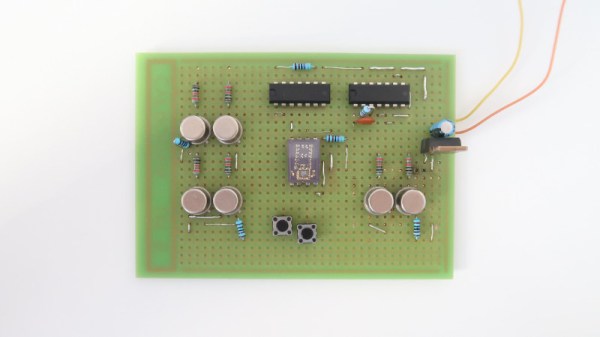
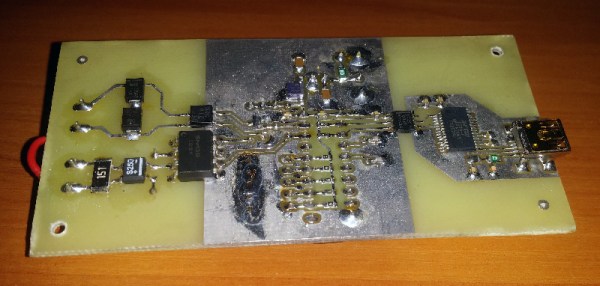
The current loop is, or was, the standard way of connecting a teletype to anything, so all [Marek] had to do was construct a box that translated the signals from a GSM modem to this current loop. For the prototype, the microcontroller in question is an old AT89C2051 (as that’s what was sitting in the parts drawer). This was moved over to a PIC32 microcontroller and a SIM800 GSM module. This is housed in a two-part enclosure, with the GSM interfaced housed in one half, with the current loop generator consisting of a simple DC power supply housed int the other half.

This interface is capable of receiving and sending messages from the keyboard to a GSM network, so it is theoretically possible you could text your friends using an old-school teletype. This functionality hasn’t been implemented yet, but it is just about the coolest thing you could possibly imagine. You can check out a video of the teletype in action below. Continue reading “Texting With A Teletype”

Making Microfluidics Simpler With Shrinky Dinks

It’s as if the go-to analogy these days for anything technical is, “It’s like a series of tubes.” Explanations thus based work better for some things than others, and even when the comparison is apt from a physics standpoint it often breaks down in the details. With microfluidics, the analogy is perfect because it literally is a series of tubes, which properly arranged and filled with liquids or gasses can perform some of the same control functions that electronics can, and some that it can’t.

But exploring microfluidics can be tough, what with the need to machine tiny passages for fluids to flow. Luckily, [Justin] has turned the process into child’s play with these microfluidic elements made from Shrinky Dinks. For those unfamiliar with this product, which was advertised incessantly on Saturday morning cartoon shows, Shrinky Dinks are just sheets of polystyrene film that can be decorated with markers. When placed in a low oven, the film shrinks about three times in length and width while expanding to about nine times its pre-shrunk thickness. [Justin] capitalized on this by CNC machining fine grooves into the film which become deeper after shrinking. Microfluidics circuits can be built up from multiple layers. The video below shows a mixer and a simple cell sorter, as well as a Tesla valve, which is a little like a diode.

We find [Justin]’s Shrinky Dink microfluidics intriguing and can’t wait to see what kind of useful devices he comes up with. He’s got a lot going on, though, from spider-powered beer to desktop radio telescopes. And we wonder how this technique might help with his CNC-machined microstrip bandpass filters.

Continue reading “Making Microfluidics Simpler With Shrinky Dinks”

Mowerbot Keeping The Lawn In Check Since 1998

Mowing the lawn is a chore that serves as an excellent character building excercise for a growing child. However, children are expensive and the maintenance requirements can be prohibitive. Many instead turn to robots to lend a hand, and [Rue Mohr] is no exception.

[Rue]’s creation goes by the name Mowerbot, and was first built way back in 1998. Steel angle and brushed DC motors are the order of the day, helping the ‘bot get around the garden and chop the grass down to size. Being of such a vintage, there’s no Raspberry Pi or Arduino running the show here. No, this rig runs on the venerable 386, chosen primarily as it can run off just 5 V. The original build ran off a 5 1/4″ floppy, though it was later upgraded to CF card storage instead.

It’s not the first robot mower we’ve seen, but is likely one of the longest serving. It’s still in use today, though [Rue] reports it’s due for some new batteries. Given it’s been chewing up the grass for over two decades now, that’s fairly impressive performance. We hope to see this 386-driven beast still cutting away long into the future.

The Simplest Of Pseudo Random Number Generators

A truly random number is something that is surprisingly difficult to generate. A typical approach is to generate the required element of chance from a natural and unpredictable source, such as radioactive decay or thermal noise. By contrast it is extremely easy to generate numbers that look random but in fact follow a predictable sequence. A shift register with feedback through an XOR of its output and one of its stages will produce a continuous stream of pseudo-random bits that repeat after a set period.

[KK99] has created the simplest possible pseudo-random binary sequence generator, using a three-bit shift register. It’s realised on a pleasingly retro piece of perfboard, with a CD4047 as clock generator and a 74HC164 shift register doing the work. Unusually the XOR gate is made from discrete transistors, 2N3053s in bulky TO39 packages, and for a particularly old-fashioned look a vintage HP LED display shows the currently generated number. A relatively useless pseudo-random sequence with a period of seven bits is the result, but the point of this circuit is to educate rather than its utility. You can see it in operation in the video below the break.

We had a demonstration of the dangers of using a pseudo-random sequence back in 2016. The German military cipher nicknamed “Tunny” by British codebreakers relied upon a mechanical sequence generator, and the tale of its being cracked led to the development of Colossus, the first stored-program electronic computer.

Continue reading “The Simplest Of Pseudo Random Number Generators”

Circuit-Level Game Boy: Upping Emulation Ante By Simulating Every Cycle

Usually when writing emulation software for a system like the Game Boy, one makes sure to take as many shortcuts as possible in order to reduce the resources required for the emulation. This has however the unfortunate side-effect that it reduces the overall accuracy of the emulation and with it the compatibility with games on the system.

This is the basic reasoning behind projects which seek to abandon simplistic abstractions in favor of cycle-accurate, full compatibility approaches, of which MetroBoy is probably the most extreme one. Instead of abstracting away the hardware, it instead does the emulation at the circuit level. As with such other projects, this means that the emulator requires a lot more CPU cycles to get things just right. On the bright side, one can likely still run this emulator on any modern system.

As the MetroBoy author explains, he implemented code in C++ which allowed him to construct circuits in an HDL-style manner, which should theoretically also allow him to generate a Verilog (or VHDL) softcore out of the project. As a demonstration of implementing HDL in C++ it’s decidedly interesting.

An approach like this is pretty much the exact opposite of a project like the UltraHLE (ultra high-level emulator) Nintendo 64 emulator, which used the knowledge that Nintendo 64 games are written in C as a first step to creating libraries that the code in the Nintendo 64 ROMs would call instead of the native (Nintendo) libraries. This allowed N64 games to directly run on the target system, with the graphic and system calls translated by UltraHLE into native OS calls, using the 3dfx Glide API for accelerated graphics.

While an approach like UltraHLE took allows for the most minimal use of system resources by essentially foregoing emulation completely, for retro systems like the Game Boy where games were implemented in assembly on bare hardware, using this circuit-level emulation ensures that one gets the most accurate match with the original handheld console experience.

As a word of caution to those who are now itching to try out MetroBoy, its Github site notes that it currently lacks support for game saves, uses a mixture of original Game Boy (DMG) and Game Boy Advance SP (AGS) hardware that confuses some games and has rather buggy sound support.

If playing around with software-defined Game Boy circuits isn’t enough and would like to literally look inside a real Game Boy, the X-ray image from the top of the article is something Chris over at Elektronaut pulled off several years ago.

Component Shelf Life: How To Use All That Old Junk

There are two types of Hackaday readers: those that have a huge stock of parts they’ve collected over the years (in other words, an enormous pile of junk) and those that will have one a couple of decades from now. It’s easy to end up with a lot of stuff, especially items that you’re likely to use in more than one design; the price breakpoints at quantities of 10 or 100 of something can be pretty tempting, and having a personal stock definitely speeds the hacking process now that local parts shops have gone the way of the dinosaur. This isn’t a perfect solution, though, because some components do have shelf-lives, and will degrade in some way or another over time.

If your stash includes older electronic components, you may find that they haven’t aged well, but sometimes this can be fixed. Let’s have a look at shelf life of common parts, how it can be extended, and what you can do if they need a bit of rejuvenation.

Continue reading “Component Shelf Life: How To Use All That Old Junk”

Get Your Acrylic Bends Just Right

Acrylic is a popular material. It’s easy to find, attractive, and available in all manner of colors, thicknesses, and grades. Being a thermoplastic, it’s also simple to apply heat and form it in various different ways. If you’re wanting to build parts out of sheet acrylic, you might find a purpose-built bender useful. [DIY Perspective] built just such a tool to get the job done.

Plywood is used as the base of the tool, and several off-the-shelf hinges are used to make the folding apparatus. Stops are cut out of scrap wood to allow the bender to accurately recreate angles of 45, 90, and 135 degrees. Heat is supplied via a nichrome wire, powered by a laptop power supply and a PWM controller. This allows the temperature of the wire to be controlled, to avoid melting or otherwise damaging the acrylic being bent.

If you find yourself routinely working with acrylic, you might find this tool useful to have around the workshop. Vacuum forming may also be relevant to your interests. Video after the break.

Continue reading “Get Your Acrylic Bends Just Right”