Pong-like Cabinet For Classic Dinosaur Jumper

Back when Google ran a functional search engine, there used to be all kinds of quirky, fun antics hidden in their products. From Easter eggs in certain search results, to a flight simulator hidden in Google Maps, to funny, engaging April Fools jokes, it was a lighter, less corporate time. Now, though, to recreate any of that early Google magic, we have to do it on our own, and [Paul] has come up with an arcade cabinet for the classic Google Chrome dinosaur game that does just that.

Although the Dinosaur Game is still available in modern versions of Google Chrome, it lends itself almost perfectly to an arcade cabinet. Built from 18 mm plywood, the cabinet is standard DIY arcade fare with a built-in shelf to house the electronics and a 4:3 flatscreen monitor for a display. The Raspberry Pi 3B is also just enough to run the game, but the software running on it is unique. The Pi runs an operating system called FullPageOS, which automatically loads a modified version of the Dino jumper in full-screen mode. It’s been changed to look more like an arcade game than a browser Easter egg, with features like a leaderboard and an automatic-play screensaver mode, and the build is rounded out by a cactus-shaped scratching post to accompany the cabinet.

As for gameplay, we couldn’t ask for a simpler user interface. A single button is all that’s needed for this game, and it’s surprisingly engaging. It is a bit large for a single-button game, even with its reduced-width cabinet, so if you’re looking for something smaller, you could always base it on a tabletop arcade system instead.

Write 2D And 3D Games In Modern MoonBASIC

One of the major strengths of the BASIC programming languages has always been their no-fuss setup and rich set of commands for operations that would take considerably more work in a bare-bones language like C. MoonBASIC continues this legacy with a BASIC variant optimized for both 2D and 3D game development.

Included in the package are Raylib, Box2D, and Jolt, whose functionality is exposed via over 4,200 commands in their respective namespaces. You can also download a whole IDE package based around VS Code, use it on the command line, or add it to an existing VS Code installation.

Continue reading “Write 2D And 3D Games In Modern MoonBASIC”

ESP32-driven Roulette Wheel Could Have Used A 555, But That Didn’t Have WiFi

Sometimes you see a project and immediately, before going into the details, your mind throws up the old refrain: “coulda used a 555” — well, [Hulk] actually agrees when it comes to his ESP32-based, 3D printed roulette wheel. The first version did use a 555, but then feature creep kicked in and the final project ended up with an ESP32 instead. We’ve all been there.

The roulette wheel circuit is retained from the 555 version, with the ESP32 providing clock pulses instead of the venerable oscillator chip — it uses a pair of decade counters to create the chase effect of the LED around the wheel. With a handsome printed enclosure, [Hulk] could have stopped there, but then he’d have to keep track of scoring and the like manually like some kind of dark age peasant. It’s the 21st century, we have computers to to that for us!

Now, even though the ESP32 is still driving the LED chase via the decade counters, it can keep track of where the “ball” of light lands, and reports that via WiFi or serial. While it would have been an option to run the whole game on the ESP32. [Hulk] just has those values put into an SQL database on a server, which also runs the game front-end via PHP. The resulting web page lets two players make their bets and track their wins and losses over time. You can see that in action in the video embedded below.

Overkill? Sure, but we suspect [Hulk] already had the equipment and experience to make this the fastest way to get a playable game. There are easy ways to serve web content from an ESP32, but the easiest tool to use is always the one in your back pocket, right?

Continue reading “ESP32-driven Roulette Wheel Could Have Used A 555, But That Didn’t Have WiFi”

Simple Games From A Simpler Time

Modern video games are nothing short of amazing. My son and I were playing through the one of the latest Zeldas, which involve a mix of combat and puzzle-solving that’s pretty much the hallmark of the franchise. But the most recent open-world Zelda is simply massive. Made by around 1,000 people at a development expense of $150,000,000, it takes probably 60-80 hours to play through if you’re not rushing, and more if you’re taking it easy. It has layers of game mechanics, and worlds in the sky, on land, and underground. It’s big in every way.

Contrast the games of my youth, which were a lot smaller. Written by a pair of people or maybe a handful, with playtimes in the single-digit hours, and of course fitting in the limited computing resources of the time. But the low-stakes nature of the early phases of the industry meant that software developers could take risks, and many of the games were consequently kinda idiosyncratic in this more innocent time.

I think there’s something to be said for small games. They don’t require a lifestyle commitment just to get through. They can still be fun, without taking all of your time. And honestly, when you’re done with a game quickly, you have more time for other stuff. Granted, some of this spirit lives on in the small indie games of today, but even so, game developers have the big studios’ products in the backs of their minds when they are working on their smaller oeuvres.

We were talking about preserving old games for posterity around Hackaday and on the podcast, and our conversations reminded me of a couple of educational games that, despite their rudimentary graphics, are still pretty good today. Both were electronics related, and both are still playable today thanks to efforts on emulation and software preservation. To get a feel for the 1980’s, give Rocky’s Boots a try. (I like the TRS-80 Color Computer version the best, but that may just be nostalgia.) Most of you grownups out there will get through it in an hour or so.

And if you want a challenge, try Rocky’s harder sequel: Robot Odyssey. If you already have a background in digital circuits, you’ll find it doable. Younger me hit a wall about two-thirds of the way through.

Both of these games stick with me because they taught me something, but also because they were simply quirky in a way that a game can only be when it’s written by a small team of folks who are just having fun programming it. If you pitched “a puzzle game about a raccoon who builds logic circuits to activate robot boots”, the boardroom would look at you like you’re out of your mind. But it’s just exactly the quirkiness and individuality of some of these early games that I cherish the most.

If you find yourself knee-deep in an endless modern game, take a side-quest off into a more naive time, and you’ll appreciate why people are putting efforts into archiving them.

Hacking Around The Financial Pain Of New 3DS XL Top Screens

With Nintendo’s 3DS experiencing a bit of a renaissance lately, prices for functioning systems have shot through the roof. Getting a busted one with a broken screen is a lot cheaper, but then you run into the eye-watering price difference between a replacement top screen for the regular version and the larger XL variant. The latter costs about the same as a whole new used 3DS, while the former goes for peanuts. Here the solution is obvious, with [Skawo] demonstrating how they hacked the cheaper, smaller top screen into a New 3DS XL.

The price difference on AliExpress as shown in the video is on the order of $120, with the smaller screen going for less than $10. Since they both use the same connector pin-out and display technology, you can plug either display into the New 3DS XL mainboard.

Where you’ll run into issues, other than the replacement display being obviously not XL, is the physically shorter flat flex cable for the controls that forces the display to be installed in an offset manner. You need jailbroken firmware like Luma3DS here to adjust for the screen offset. Filling in the missing screen real-estate is the other issue you have to patch over somehow, which was done here in barbaric fashion with some cardboard.

Beyond that it does work, and as a fix to at least get a broken New 3DS XL back into the game it’s worth considering. Do note that there’s a difference between regular 3DS and New 3DS (second generation) screens with neither being compatible, so be careful before you try such a fix.

Continue reading “Hacking Around The Financial Pain Of New 3DS XL Top Screens”

The Neo Geo Does Run DOOM After All

Demonstration of the DoomGeo port of Doom to the Neo Geo. (Credit: Sabino, GitHub)

Perhaps the most ridiculous statement that anyone can make is that a computer system with clearly enough processing power ‘cannot run DOOM‘. This is why we accept the premise that a PDP-11 cannot run this game, but something on the order of a Neo Geo gaming console with its 68000 processor and for the time impressive GPU definitely ought to be able to.

The stated problem here is a lack of RAM for a framebuffer, with the CPU only having 64 kB to play with. This limitation now has seen two different approaches to try and circumvent it, as covered by [Modern Vintage Gamer].

The first project here is Doom64kB, which as the name suggests tries to somehow work with this system RAM limitation. It uses the Doom8088 port for the original IBM PC and similar Intel 8088-based systems. This had to massively reduce the feature list, including the lack of texture mapping for floors and ceiling, no saving or loading, and no music.

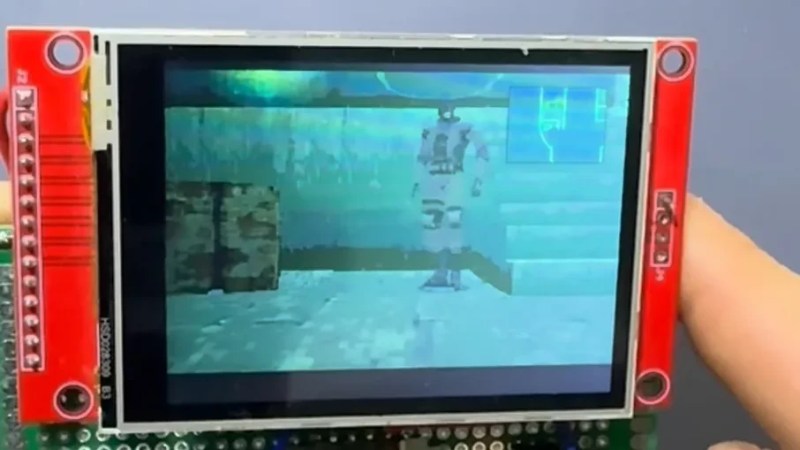
The other project is DoomGeo, which doesn’t try to bend the Neo Geo hardware to its will, but accepts the Neo Geo way of doing things: involving sprite strips, pre-baked graphics, fix-layer UI, and a minimum of runtime data. This of course drastically changes how the Doom game engine normally works, with its framebuffer-based rendering.

From this we can thus conclude that it’s not so much the processing power that limits where DOOM can run, but more of how framebuffer-friendly the system architecture is, yet with some ingenuity and a complete rewrite of the game engine even that is no major obstacle.

(Top image: Neo Geo AES console. Credit: Evan-Amos, Wikimedia)

Continue reading “The Neo Geo Does Run DOOM After All”

DIY Steam Controller Puck Offers Xbox, Switch, PlayStation Emulation Modes

Valve recently released a new version of the Steam Controller, which features a wired USB puck that serves both as charger and dedicated, low-latency wireless receiver. The downside is they aren’t currently available for purchase separately, but that’s not a worry because you can now make your own thanks to [safijari]’s OpenPuck project.

OpenPuck uses the highly affordable Pro Micro NRF52840 board, programmed to emulate the wireless receiver portion of the puck, meaning one can pair their Steam Controller to it just like they would with the factory puck. A major part of the project was naturally documenting the wireless protocol, but there’s also an array of extra features offered by OpenPuck.

OpenPuck offers features over and above the factory offering. [image: 3d printed case by jaki-gh]
Hitting button combos lets one conveniently emulate Xbox, Nintendo Switch, or Sony PlayStation controllers. Meaning OpenPuck can for example be plugged into a Nintendo Switch and it will see OpenPuck as an official wired controller, complete with motion sensor and haptic feedback.

Why is it necessary for this emulation to be done from OpenPuck? Because while the Steam Controller has tight integration with Steam Input — a sort of highly useful translation layer for controller inputs — that integration also means the controller’s best features only work while Steam is running. OpenPuck’s ability to emulate other console controllers makes it flexible in a way the factory puck isn’t, and a user can make the most of a single controller this way.

It’s worth noting that while the real puck has the ability to charge the controller (whether or not the user makes it walk itself), the OpenPuck doesn’t have this ability. Does that mean one must still use the factory puck for charging? Not at all, as the Steam Controller charges just fine over a USB-C connection.

There’s a short video below that demonstrates the flashing and setup, so check it out if you think it might be useful to you.

Continue reading “DIY Steam Controller Puck Offers Xbox, Switch, PlayStation Emulation Modes”