Hardware-based Security Keypad Keeps It Simple

hardware_keypad_lock

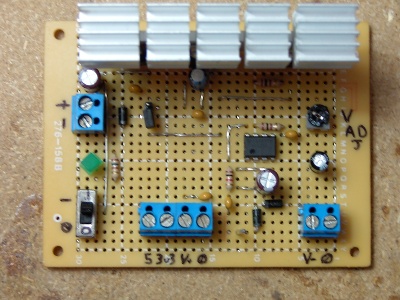
Instructables user [trumpkin] recently built an all-hardware based keypad lock for a contest he was entering, and we thought it was pretty neat. The lock uses mostly NAND gates and 555 timers to get the job done, which makes it a nice alternative to similar software-based projects we have seen in the past.

The lock has 6 keys on the keypad, which is connected to the main logic board. The keycode is set using a series of headers at the bottom of the board, and you get 10 chances to enter the proper code before the board locks up completely. If this occurs, a “manual” reset via a button built into the main board is required before any more attempts can be made.

As you can see in the video below, the lock works quite well, but suffers from one shortcoming. Any permutation of the key code can be used to deactivate the lock, which is something [trumpkin] says he would like to improve in the future.

If you are looking for some more security-related reading, be sure to check out these other hacks we have featured in the past.

Continue reading “Hardware-based Security Keypad Keeps It Simple”

Easy To Build Rig Prevents Reflow Soldering Mishaps

reflow_soldering_rig

[Erich aka VK5HSE] performs quite a bit of solder reflow work, but has always been concerned about bumping his circuit boards once the solder has liquified and is ready to be removed from the heat source. He says that removing workpieces from toaster ovens often results in the unintentional jarring of a circuit board full of components sitting on molten solder, and he wanted to find a solution.

Using some off-the shelf components from a local hardware store, he built a rig that fits on top of a hot plate, allowing him to move hot circuit boards away from the heat source in a smooth controlled motion. The rig is pretty simple, not only preventing unwanted workpiece movement, but also making it easy to regulate the amount of time a circuit board is allowed to heat.

He suggests that his design is not absolutely ideal, and that it can easily be improved upon in several ways without adding significant cost to the project.

Racking Up Miles On A Bicycle Odometer

[jonh] religiously tracks the miles he rides on his bicycle. When his odometer’s battery started getting low, he wanted a way to run the miles up to where they were before, since replacing the battery resets everything to zero. [jonh] used an Atmel microcontroller to run up the miles on his bike computer so he could pick right back up where he left off. There is definitely a Ferris Bueller’s Day Off joke in here somewhere.

The bike computer itself is designed to plug into a base that connects to a magnet-triggered reed relay. It uses a wheel-mounted magnet to count the number of revolutions made and thus the distance traveled. [jonh] hooked up a simple microcontroller-driven circuit to these connectors to trick the bike computer into thinking it was moving, and moving fast! Since he knew the number of miles he wanted to sandbag onto the odometer, he was able to program it to run up the proper amount of miles and then stop. There’s no source code listing for the project, but this shouldn’t be too hard to reproduce. He provides a pencil-drawn schematic for the connection to the cyclometer from the microcontroller. At the end, there’s also some sage advice for those of you who are interested in building a decent hardware hacking lab on the cheap.

Building A 555 Timer From Discrete Components

The 555 Design Contest shook a whole bunch of really creative circuits out of the trees, hence the 555-heavy content lately. While not technically part of the contest, [esalazar] wanted to know what made the 555 tick, literally! He started working on the project in a circuit simulator, then ultimately ended up building the three main logic blocks inside the familiar timer on pieces of copper-clad board. He’d built a 555 using discrete components.

While this isn’t 100% compatible with the classic 555 IC, it covers the basics pretty well, and [esalazar] gets extra-credit points for embracing the hacker spirit of seeing for himself how stuff works while documenting it well and citing his references.

DIY PIC Development Board And Web Server

websd

Inspired by a project featured here on Hack-a-Day, [arthurb] bought himself a PIC 24F and started experimenting once he learned the ins and outs of programming the chip. Using a breadboard and a nest of wires was fine for his first few projects, but as he advanced, he began to feel the need for a full-fledged development board. With a list of required features in mind he got to work, constructing a well thought out board as well as a handful of expansion boards that can be used for various other projects. His main development board includes Ethernet connectivity for use with his web server software, the ability to utilize an SD card for storage, and a USB port for programming. His expansion boards include a temperature sensor, a numeric touchpad, as well as a video output module. Overall it is a pretty impressive build, considering he had never programmed a PIC before starting this project. All of his boards are thoroughly documented, and he has included plenty of source code in hopes of helping other individuals just starting out in PIC programming.

You can see his web server in action here, but keep in mind that it is running off a PIC, so please be courteous in your usage.

Custom Enclosures Made Of Paper

[Sivan Toledo] needed a enclosure for a unique sized electronic project, not finding what he needed in off the shelf solutions, he went to the next best thing, … Papier Mâché!

Using a mold made out of standard corrugated cardboard, he slowly built up layers made of magazine paper, and ordinary “white glue” diluted with water. After getting near the thickness wanted he switched over to typing / copy type paper for a nice clean outer surface. Ports were made in the usual fashion when dealing with soft or thin material, drill a smaller hole, going back with successively larger holes, and then follow up with an appropriate file, all while taking things slow along the way to prevent unwanted results. Finishing up with layers of paper carefully cut into strips to meet the circumferences / edges, along with the final outer surface to make it all even.

The end result is awesome as it stands, but we cant help but wonder what some sanding and paint would look like on a enclosure made like this, though any way you finish it, the idea comes down to custom enclosures that do not need special tools or materials to complete (on the cheap).

Thanks [Drone]

Double The Hertz, Double The Pleasure

[tinhead] has opened up a Tekway DST1102B oscilloscope and doubled its bandwidth to 200MHz, sharing his work in the eevblog forum. This is great news to anyone who is looking for a faster sampling rate but can’t afford the high-end models. Mind you, for a lot of us even these Hanteks and Tekways are hard to afford but there are more appropriate options for the ramen-dependent hacker.

In the hacking guide [tinhead] includes comprehensive information on the different scopes he originally considered (a Rigol, Atten and UniTrend) before settling on the Tekway, as well as links to regional distributors for the hackable scope. Good quality benchtop units are invaluable for development and troubleshooting, and it pays off to understand their inner workings. It’s heartwarming to know that even the tools of hacking can be hacked.