Capacitive Touch Business Card

[Jay Kickliter] sent in his latest electronic business card. This time, his goal was to make it much cheaper so he could actually afford to give it away. He did pretty well considering the two week timeline he mentions. This card is using an MSP430 with the capsense library to light up some LEDs any time the card is handled. While he states that it is much cheaper than his last, it is still around $8 a card, so he won’t be tossing these into everyone’s hands.  He does point out though that it is always helpful to have hardware to show off at a hardware interview, and an electronic business card does that job very well.

As usual, you can read more details and download the files at his blog.

ATmega1284 As An 8-voice 32 KHz Synthesizer

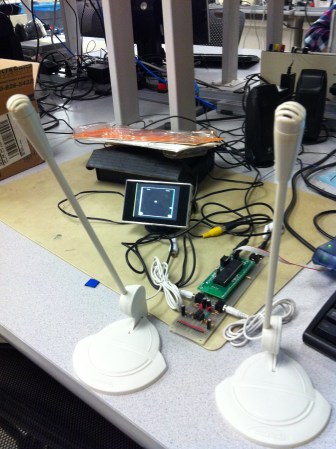
A couple of things strike us about this 8-voice 32 kHz synthesizer. First is the cleanliness of the prototype. As you can see, each part has plenty of room on its own board and all are interconnected by 10-pin IDC ribbon connectors. But you’ll have to see the video after the break to enjoy the impressive sound that this puts out. You’ll hear it play the Super Mario Bros. theme; it does it with passion!

To get audio from the digital microcontroller [Mike] built his own R2R digital to analog converter. The resistor ladder is built from sixteen resistors, which feed a rail-to-rail amplifier. The sound is mono but the playback is polyphonic thanks to the work done by the ATmega1284. It is reading MIDI commands coming in from an external controller (we assume it’s the computer on which the hardware is sitting). The chip’s 128 KB of Flash memory leave plenty of room to store samples, which are selected from a lookup table based on the MIDI data. If more than one sample is to be played the chip averages the data and sets the 8-bit output port accordingly.

Continue reading “ATmega1284 As An 8-voice 32 KHz Synthesizer”

Tell Us What Development Board You Love

Back in 2011 we did a short roundup of some popular development boards.  We promised a follow up at some point, and that time is near.  We would really like to make this a fairly comprehensive list and there are always suggestions sent in after the article that we overlooked.

This time, we’re asking that you tell us what dev boards you prefer and why. Either reply in the comments or email us directly at boards@hackaday.com. We’ll round up all of your suggestions and bring you the “development board brakedown for 4th quarter 2012”.

Please keep in mind that we can’t possibly know everything about every single board out there, so if there’s some special feature of a board that you love, be sure to let us know!

A PIC Powered Pair Of Electronic Dice

[Timothy] is honing his microcontroller skills with this electronic dice project. In addition to giving him an opportunity to work on some code, the use of an 8-pin chip provides a design challenge for driving the twelve pips and providing a user input.

The project started off with some $4 strings of LED Christmas lights. He promptly disassembled the strands, each yielding 100 LEDs. The microcontroller he chose to work with is a PIC 12F629. It’s DIP8 package provides six I/O pins to work with. When examined closely you will find that the pips on a die are always present in pairs with the exception of the center pip. This means that only four pins are needed to drive one die. You can see a pair of transistors above; one is a PNP, the other an NPN. These are both driven from the same uC line, which toggles between the pair of die. This accounts for 5 of the available pins, with the sixth monitoring the push button.

Driving An LCD Character Display Using Custom HID Codes

Here’s an external display meant to help you keep track of your computer’s status. It connects via USB and is driven by a PIC microcontroller. It listens for a small set of commands, using those to implement a simple control protocol to drive the screen.

[Andrew Gehringer] designed the device around a PIC 18F2550, which offers native USB control. He’s using Microchip’s USB stack to enumerate the module as an HID device. It listens for commands 0x10 through 0x23. These clear the display, write strings to each of the four lines of the display, and switch the LCD backlight. Of course the project includes a program [Andrew] wrote to feed the display. It  has a GUI which let’s him decide what information is displayed and how it is formatted. This helper app hangs out in the system tray for easy access.

Reading An N64 Controller With A Microcontroller

We’ve seen NES, SNES, Sega, and just about every weird controller Atari put out connected to microcontrollers, but connecting the N64 controller to a project has remained one of those seldom-seen, rarely copied endeavors, not often tackled by makers around the globe. [Pieter-Jan] decided to throw his hat in the ring and give reading an N64 controller with a PIC a try, and we’re pleased to report he’s been completely successful.

One of the difficulties of reading an N64 controller is simply the speeds involved; with only three pins on the controller port, the N64 controller uses a serial protocol to send 32 bits of controller data at a fairly fast rate. Armed with a PIC18F ‘micro, [Pieter] realized that programming in C would be too slow, he needed to go all the way down to the bare metal and program his micro in assembly.

Every time the N64 controller data needs to be read, the console sends out a 9-bit polling request. The controller responds in turn with a 32-bit sequence informing the console of the status of all the buttons and joysticks. Once [Pieter] got his micro sending the correct polling response, it was only an issue of parsing the data returned from the controller.

Right now, [Pieter] has a small demo board rigged up that flashes a LED whenever the A, B, or Z buttons are pressed. This can be expanded to the remaining buttons and joystick, but for now we’ll just enjoy [Pieter]’s demo after the break.

Continue reading “Reading An N64 Controller With A Microcontroller”

7400 Project Encrypts And Decrypts Data

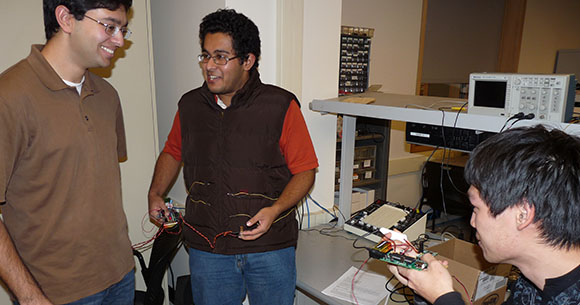
[Nakul], [Nikilesh], and [Nischal] just finished posting about their entry in the 2012 Open 7400 Logic competition. It’s an encryption system based entirely on 7400 logic chips. The device operates on 8-bit binary numbers, which limits its real-world applications. But we bet they learned a lot during the development process.

The encryption algorithm is based on a the concept of cellular automaton. This is a something with which we’re already familiar having seen many Conway’s Game of Life projects around here. What we’re not familiar with is this particular wing of the concept called ‘Rule 30‘. It works well with this project because a complex pattern can be generated from simple beginnings.

After conceptualizing how the system might work the team spent some time transferring the implementation to the chips they had available. The end result is a quartet of chip-packed breadboards and a rat’s nets of wires, but the system is capable of both encrypting and decrypting data.