Printing, Plating, And Baking Makes DIY Microlattices Possible

To be honest, we originally considered throwing [Zachary Tong]’s experiments with ultralight metallic microlattices into the “Fail of the Week” bucket. But after watching the video below for a second time, it’s just not fair to call this a fail, so maybe we’ll come up with a new category — “Qualified Success of the Week”, perhaps?

[Zachary]’s foray into the strange world of microlattices began when he happened upon a 2011 paper on the subject in Science. By using a special photocurable resin, the researchers were able to use light shining through a mask with fine holes to create a plastic lattice, which was then plated with nickel using the electroless process, similar to the first half of the electroless nickel immersion gold (ENIG) process used for PCBs. After removing the resin with a concentrated base solution, the resulting microlattice is strong, stiff, and incredibly light.

Lacking access to the advanced materials and methods originally used, [Zachary] did the best he could with what he had. An SLA printer with off-the-shelf resin was used to print the skeleton using the same algorithms used in the original paper. Those actually turned out pretty decent, but rather than electroless plating, he had to go with standard electroplating after a coat of graphite paint. The plated skeletons looked great — until he tried to dissolve the resin. When chemical approaches failed, into the oven went the plated prints. Sadly, it turns out that the polymers in the resin expand when heated, which blew the plating apart. A skeleton in PLA printed on an FDM printer fared little better; when heated to drive out the plastic, it became clear that the tortuous interior of the lattice didn’t plate very well.

From aerogels to graphene, we love these DIY explorations of new and exotic materials, so hats off to [Zachary] for giving it a try in the first place.

Continue reading “Printing, Plating, And Baking Makes DIY Microlattices Possible”

Model Railroad Engine Gets A Tiny OLED Rollsign While Showing Off Tidy Protoboard Skills

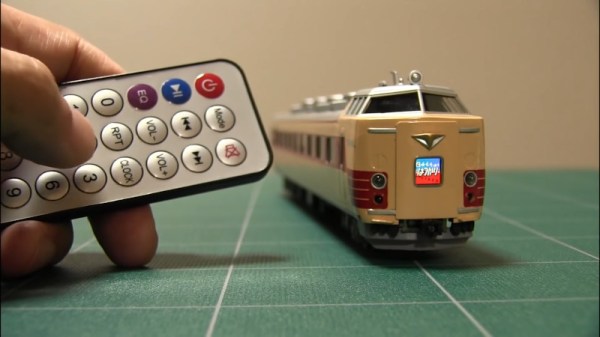
When catching public transport, it’s very helpful if the bus or train in question has a large display indicating the route or destination. While many transit lines now rely on flipdot or LED displays, the classic rollsign still gets the job done. [diorama111] wanted to emulate this on a model railroad, and set about building a simulacrum at tiny scale.

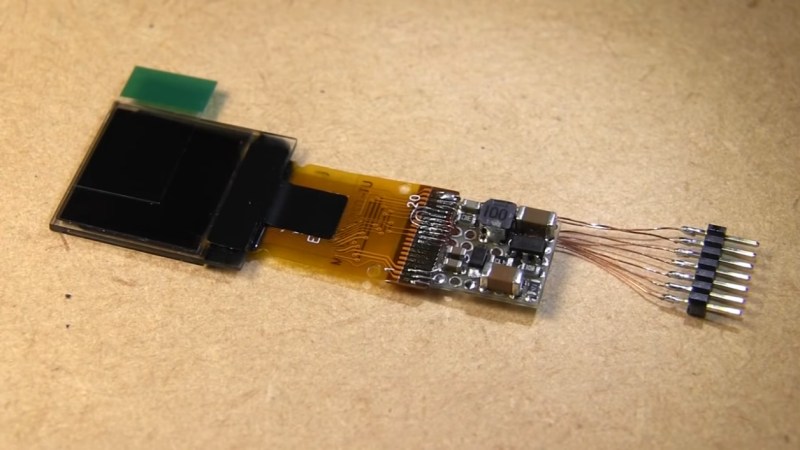
Intended to suit an HO-scale model train, the build makes use of a tiny 0.6 inch NHD-0.6-6464G OLED display. It’s wired up with a boost converter for power and hooked up to a tiny circuit consisting of an ATMEGA328p and an infrared receiver. The microcontroller is responsible for receiving commands from the remote control, and displaying the appropriate image on the screen. The hidden beauty of this one is well shown in the video below as [diorama111] cleanly and meticulously assembles the circuit on protoboard with just an iron and tweezers.

What makes this project great is how neatly it’s integrated into the body of the train. Nestled inside the locomotive, it almost looks like a stock part of the model. While the nature of the OLED display does come across a touch anachronistic, implementing the vertical scroll really does add a lot to the final effect.

We love to see creative scale modelling projects, and we’ve seen some great work from [diorama111] in the past, too. Video after the break.

Continue reading “Model Railroad Engine Gets A Tiny OLED Rollsign While Showing Off Tidy Protoboard Skills”

Modified Bricks Can House Energy, Too

What if building an emergency battery were as easy as painting conductive plastic onto bricks, stacking them, and charging them up? Researchers at Washington University in St. Louis have done just that — they’ve created supercapacitors by modifying regular old red bricks from various big-box hardware stores.

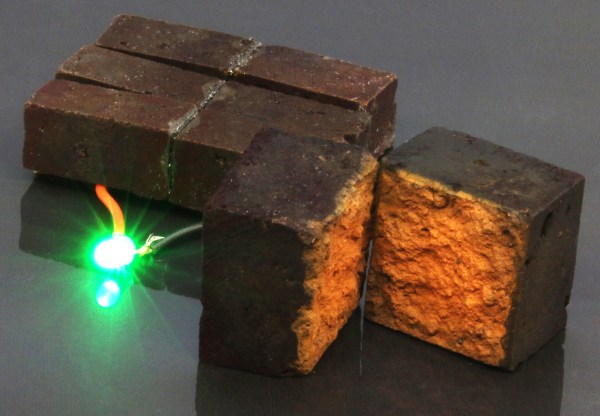
The bricks are coated in poly(3,4-ethylenedioxythiophene) polystyrene sulfonate (PEDOT:PSS), a conductive polymer that soaks readily into the bricks’ porous surface. When the coated brick is connected to a power source such as a solar panel, the polymer soaks up ions like a sponge. PEDOT:PSS reacts with the iron oxide in the bricks, the rust that gives them their reddish-orange color. Check out the demonstration after the break — it’s a time lapse that shows three PEDOT-coated bricks powering a white LED for ten minutes.

We envision a future where a brick house could double as a battery backup when the power goes out. The researchers thought of that too, or at least had their eye on the outdoors. They waterproofed the PEDOT-coated bricks in epoxy and found they retain 90% of their capacitance and are still efficient after 10,000 charge-discharge cycles. Since this doesn’t take any special kind of brick, it seems to us that any sufficiently porous material would work as long as iron oxide is also present for the reaction. What do you think?

If you can get your hands on the stuff, PEDOT:PSS has all kinds of uses from paper-thin conductors to homebrew organic LEDs.

Continue reading “Modified Bricks Can House Energy, Too”

E-Ink Moon Phase Viewer Keeps Interest From Waning

It’s a shame that so many cool things happen in the night sky, but we can’t see them because of clouds or light pollution. If you missed seeing the comet NEOWISE or this summer’s Perseid meteor showers, there’s not a lot to be done but look at other people’s pictures. But if it’s the Moon and its phases you keep missing out on, that information can be acquired and visualized fairly easily.

This project includes a bunch of firsts for [Jacob Tarr], like designing a custom PCB and utilizing a three-color E-ink screen to show the Moon in its current phase along with the date and time.

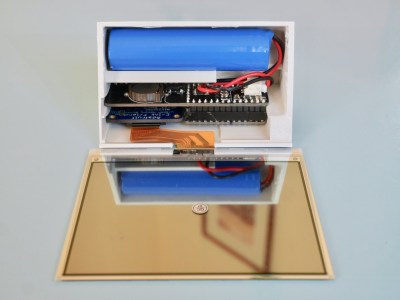
[Jacob]’s moon phase viewer runs on an ItsyBitsy M4 Express, which holds data pulled from NASA ahead of time to save battery. Every morning, the board dishes out the daily info on a schedule kept by a real-time clock module.

We particularly like the minimalist case design, especially the little shelf that holds the lithium-ion cell. This is just the beginning, and [Jacob] plans to add more detail for anyone who wants one for themselves.

If you want something more Moon-shaped, here’s a printed version that gets brighter in time with the real thing. Or you could just make a giant light-up full moon like Hackaday super alumnus [Caleb Kraft].

The Mask Launcher; Like An Airbag For Your Face

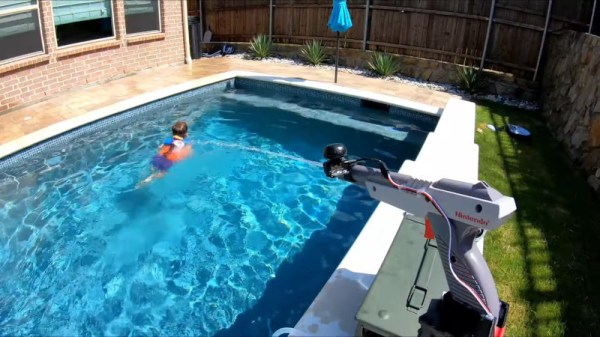
One of the most effective ways to slow the spread of pathogens like the novel coronavirus is to have individuals wear facemasks that cover the nose and mouth. They’re cheap, and highly effective at trapping potentially infectious aerosols that spread disease. Unfortunately, wearing masks has become a contentious issue, with many choosing to go without. [Allen Pan] was frustrated by this, and set out to make a launcher to quite literally shoot masks directly onto faces.

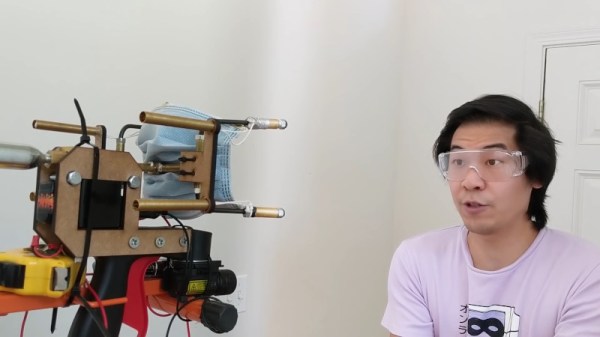
To fire the masks, Allan built a pneumatic system that gets its power from a compact CO2 canister. This is hooked up to a solenoid, which is fired by the trigger. The high-pressure CO2 then goes through a split to four separate barrels cleverly made out of brake line ([Allen] says it’s faster to get parts from the automotive supply than the home store these days). Each barrel fires a bola weight attached to one of the strings of the mask, in much the same way a net launcher works. The mask is then flung towards the face of the target, and the weights wrap around the back of the neck, tangling and ideally sticking together thanks to neodymium magnets.

Amazingly, the mask worked first time, wrapping effectively around a dummy head and covering the nose and mouth. Follow-up shots were less successful, however, but that didn’t deter [Allen] from trying the device on himself at point-blank range. Despite the risk to teeth and flesh, the launcher again fires a successful shot.

While it’s obviously never meant to be used in the real world, the mask launcher was a fun way to experiment with pneumatics and a funny way to start the conversation about effective public health measures. We’ve featured similar projects before, too. Video after the break.
Continue reading “The Mask Launcher; Like An Airbag For Your Face”

Six New HackadayU Courses Announced For Fall 2020

The fall lineup of HackadayU courses was just announced, get your tickets now!

Each course is led by expert instructors who have refined their topics into a set of four live, interactive classes plus one Q&A session we like to call Office Hours. Topics range from leveling up your Linux skills and learning about serial buses to building interactive art and getting into first-person view (FPV) drone flight.

Checkout the course titles, instructors, and details listed below. If you’d like to hear about each class from the instructors themselves, their teaser videos are embedded after the break.

  • Interactive Media Art with Light and Sensors
    • Instructor: Mirabelle Jones
    • Course overview: This course will cover how to develop interactive artworks, installations, and experiences based on sensor input.
  • Introduction to FPV Drones
    • Instructor: Ayan Pahwa
    • Course overview: We’ll get familiar with the multi-rotor category of Unmanned Aerial Vehicles (UAVs) including physics, aerodynamics, electronics, digital signal processing (DSP), and writing software that is involved.
  • Intro to LEDs Using Arduino and FastLED
    • Instructors: Cathy Laughlin & Mirabelle Jones
    • Course overview: Students will learn all about how LEDs work as well as how to program LED patterns using the Arduino IDE.
  • Linux + Electronics: A Raspberry Pi Course
    • Instructor: Pablo Oyarzo
    • Course overview: This course is for those who had wanted to go from Arduino to a Linux computer small enough to fit the project but greatly more powerful to full fill the project’s needs and don’t know where to start.
  • Embedded Serial Buses (Part 1)
    • Instructor: Alexander Rowsell
    • Course overview: This course will cover the I2C and 1-Wire serial buses. We will look at the hardware layer, the protocol layer, and the software/application layer for both bus types.
  • Art + Code
    • Instructor: Casey Hunt
    • Course overview: Students will grow their technical skills through mastery of the P5.js JavaScript library, and will also learn about aesthetics and art history in the digital space.

HackadayU courses are “pay-as-you-wish”. To help ensure the live seats don’t go to waste, the minimum donation for each class is $1. Proceeds go to charity and we’re happy to report a donation of $4,200 going to Steam Coders from the summer session of HackadayU. A new charity will be chosen for the fall classes, details to follow.

Each class will be recorded and made available once they’ve been edited. You can take a look at the excellent Reverse Engineering with Ghidra series right now. Videos of the Quantum Computing and KiCad + FreeCAD courses are coming soon.

Continue reading “Six New HackadayU Courses Announced For Fall 2020”

Drone Buoy Drifts Along The Gulf Stream For Citizen Science

It may be named after the most famous volleyball in history, but “Wilson” isn’t just a great conversationalist. [Hayden Brophy] built the free-drifting satellite buoy to see if useful science can be done with off-the-shelf hardware and on a shoestring budget. And from the look of the data so far, Wilson is doing pretty well.

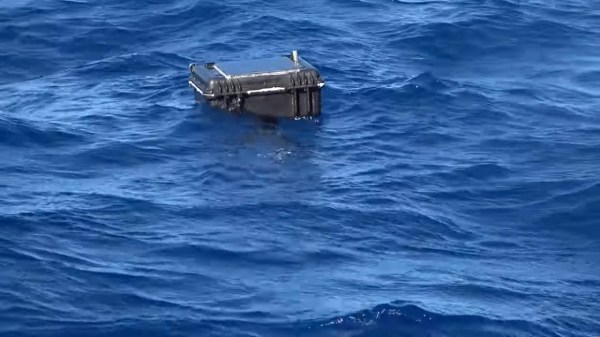
Wilson belongs to a class of autonomous vessels known as drifters, designed to float along passively in the currents of the world’s ocean. The hull of [Hayden]’s drifter is a small Pelican watertight case, which contains all the electronics: Arduino Pro Trinket, GPS receiver, a satellite modem, and a charger for the LiPo battery. The lid of the case is dominated by a 9 W solar panel, plus the needed antennas for GPS and the Iridium uplink and a couple of sensors, like a hygrometer and a thermometer. To keep Wilson bobbing along with his solar panel up, there’s a keel mounted to the bottom of the case, weighted with chains and rocks, and containing a temperature sensor for the water.

Wilson is programmed to wake up every 12 hours and uplink position and environmental data as he drifts along. The drifter was launched into the heart of the Gulf Stream on August 8, about 15 nautical miles off Marathon Key in Florida, by [Captain Jim] and the very happy crew of the “Raw Deal”. As of this writing, the tracking data shows that Wilson is just off the coast of Miami, 113 nautical miles from launch, and drifting along at a stately pace of 2.5 knots. Where the buoy ends up is anyone’s guess, but we’ve seen similar buoys make it all the way across the Atlantic, so here’s hoping that hurricane season is kind to Wilson.

We think this is great, and congratulations to [Hayden] for organizing a useful and interesting project.

Continue reading “Drone Buoy Drifts Along The Gulf Stream For Citizen Science”