Here’s one more use for the insanely handy LM555 chips. [Terry] put together a Tesla coil tuner around one. The 555 is used to generate a range of frequencies while a simple double LED arrangement indicates the presence of an output spike from a coil due to the resonance.
Misc Hacks4160 Articles
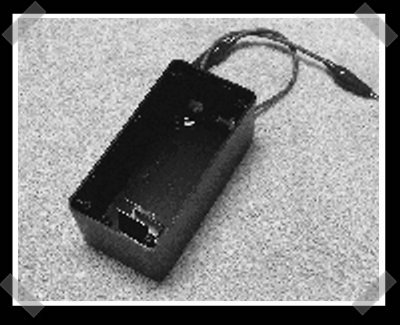
Laser Surveillance Defeater
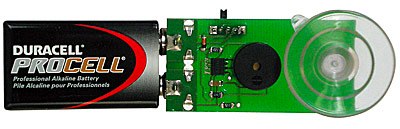
Imagine our chagrin when we first laid eyes on this “laser surveillance defeater.” It’s supposedly built to the security requirements of federal agencies. We don’t believe most government issue devices have exposed circuit boards or 9V batteries dangling from them. Laser surveillance works by bouncing the beam off of a room’s window. People speaking in the room cause the window to vibrate, which modulates the reflected laser beam. This device looks like it’s just a piezo buzzer meant to vibrate in vocal ranges. A quick search didn’t turn up any DIY projects, but it looks simple enough. Shomer-Tec would love you to purchase one for every window at $69 each. A small price to pay when you’re taking on people willing to spend $20.
[via Gizmodo]
Logicport Overview
As promised earlier, the Near Future Laboratory has published an overview of the Logicport Logic Analyzer. They’re using the Playstation 2 analysis as an example. The Logicport uses “interpreters” to define protocols. It has I2C/TWI, SPI, RS232, and CAN 2.0A/2.0B, but you can build your own interpreter based on these. You can specify bit order and the format you want the data in. Slave interpreters can be used for specific tasks: with the PS2 they were used to just show the fifth byte, which is the actual button press.
“Triggers” are used to signal specific activity. On the PS2, one was attached to the falling signal on the slave select line. This event means the master is about to start sending data.
The final area worth exploring is “measurements”. These can be frequency or arbitrary time intervals between events. The Logicport has multiple ground connections to eliminate noise from the signal and you’ll have to play with sample rate and logic level to get things running smooth. It’s nice to see how-tos written from the perspective of someone just getting started with the tool.
Air Hockey Robot
Don’t be ashamed, we suck at air hockey too. Luckily for us, we now have a robot opponent to blame or losing streak on. Engineers at Nuvation didn’t build this air hockey playing robot, they simply adapted a standard industrial robot arm for the task. It is controlled jointly by a ColdFire processor and a 9S08 microcontroller. An array of high power LEDs and a camera are positioned over the air hockey table, which captures the position of the puck. The robot reportedly wins 90% of its games, even against solid opponents. While this is more of project to show the power of ColdFire processors, we can’t help but think it will lead to a rash of unbeatable robot opponents. We’ve already been robo-owned at foosball; what’s next?
High Tech Coffee Tables

Time was, coffee tables were good for three things only: setting down your coffee, setting down your coffee table books, and maybe putting your feet up. To combat this perception, Born Rich has posted their top ten list of high tech coffee tables that are capable of these things and more.
Non-destructive Breakdown Voltage Tester

This applies more to older vacuum technology than your average solid state hardware, but [Richard] put together an interesting project. It’s designed to test a component for its breakdown voltage without destroying it. The general idea of the ‘BVT’ is to increase the voltage applied to a device until some current leakage is detected. Of course, any device that includes notes on probable arc length in relation to kilovolts is awesome by definition.
Turn Signal Jacket How-to

[Leah Buechley], whose work we’ve been covering since way back when, has built this lovely turn signal jacket. The project photos were posted in March, but she’s just added a well illustrated project guide. The jacket is based around a LilyPad Arduino, a lightweight Arduino board with radial pads designed to be used in wearable projects. You make your connections by sewing conductive thread through the pads. The how-to covers attaching the LilyPad parts properly and then insulating the wires with fabric paint after you’ve verified they work.
The guide has an interesting discussion about placing the power supply. The 4-ply silver coated thread used has a resistance of approximately 14ohms/foot. So, if you place the power supply one foot from the LilyPad, the two wires combine for 28ohms, causing a 1.4V drop. The power supply is only 5V, which means the LilyPad will be 3.6V. A voltage of 3.3V will cause the Arduino to reset. If your resistance is too high, you’ll have to add more thread.
The power supply on this jacket is under the collar. Each cuff has a single button plus an LED. The button will make the jacket flash the direction for 15 seconds (also indicated on the sleeve LED). If you press both buttons at the same time, it switches to night mode by flashing both directions at the same time to make you more visible.


