Old School Mechanical Pong Still Amazes

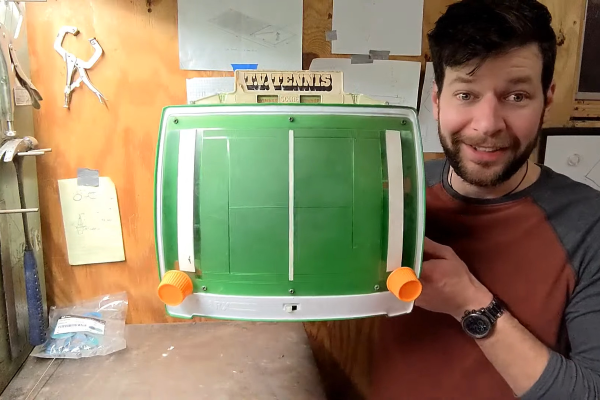
[Tom], of the YouTube channel ThingsTomLike, found a very sweet little mechanical Pong clone at a thrift store. It came in broken, but in only fifteen minutes of your time, [Tom] manages a complete teardown and repair. (Video, embedded below.)

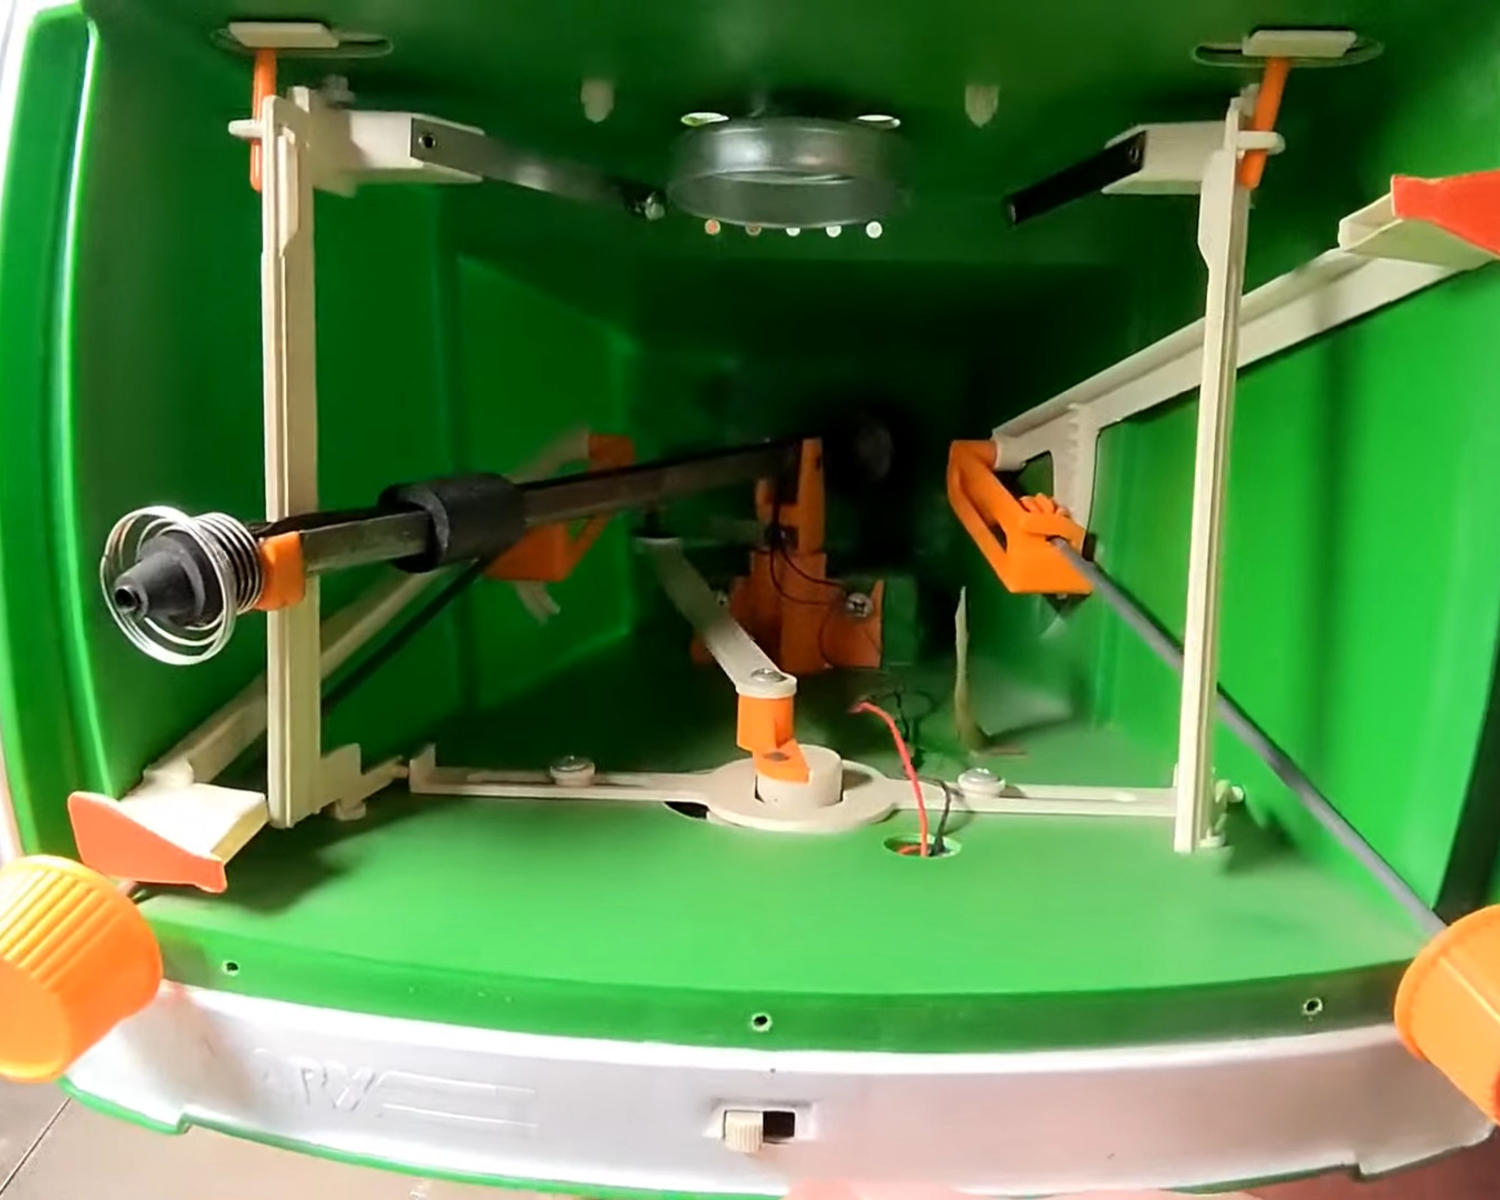
The game works by balancing a lightbulb on the end of a pivot arm that projects a “ball” onto a screen, while players move their paddles up and down to hit the spring that surrounds the light assembly. The ball arm gets periodically kicked by a DC motor and cam assembly, which makes it careen wildly back and forth across the screen.

It’s a marvel of simple, no-IC engineering. Ironically, it might have been cheaper than making it out of silicon at the time, but viewed from today’s economy, just the human labor in adjusting that counterweight so that the “ball” floats would blow the budget.

Why a screen and lightbulb? Because it’s emulating Pong, a video game, the new kid on the block. But even 45 years later, we think it has got a charm all of its own that the cold digital logic of Pong lacks, even if the gameplay suffers.

Continue reading “Old School Mechanical Pong Still Amazes”

Hackaday Podcast 004: Taking The Blue Pill, Abusing Resistors, And Not Finding Drones

Catch up on your Hackaday with this week’s podcast. Mike and Elliot riff on the Bluepill (ST32F103 boards), blackest of black paints, hand-crafted sorting machines, a 3D printer bed leveling system that abuses some 2512 resistors, how cyborgs are going mainstream, and the need for more evidence around airport drone sightings.

Stream or download Episode 4 here, and subscribe to Hackaday on your favorite podcasting platform! You’ll find show notes after the break.

Take a look at the links below if you want to follow along, and as always, tell us what you think about this episode in the comments!

Direct download (60 MB or so.)

Continue reading “Hackaday Podcast 004: Taking The Blue Pill, Abusing Resistors, And Not Finding Drones”

Massive Shift Register Switches Lights

Sometimes you have to switch a light. Maybe it’s an LED but sometimes it’s mains-powered. That’s not too hard, a transistor and a relay should do it. If you have to switch more lights, that’s not too bad either, as long as your microcontroller has enough free GPIOs. But, if you need to switch a large number of lights, like 256 of them, for example, you’re going to need something else.

[Jan]’s project didn’t switch quite that many lights, but 157 of them is still enough of a chore to need a creative solution so he decided to use a 256-bit shift register to do the legwork. The whole thing is powered by a NodeMCU ESP8266 and was professionally built on DIN rails in a metal enclosure.

The build is interesting, both from a technical point of view and from an artistic one. It looks like it uses more than a mile of wiring, too. The source code is also available on the project page if you happen to have a need for switching a huge number of lightbulbs. Incandescent blulbs aren’t only good for art installations and lamps, though, they can also be used in interesting oscillator circuits too.

Retrotechtacular: The Aerolux Light Corporation

The humble incandescent lightbulb is an invention just about anyone born in the 20th Century is more than familiar with. But it’s not the be all and end all of lighting technology – there are neon lights, compact fluorescent bulbs, and even LEDs are finally being adopted for interior lighting. But with the endless march forward, there are vintage throwbacks to the past – how many hipster cafes have you been to lately with great big industrial-looking filament bulbs hanging from the ceiling?

Even when switched off, they have a striking appearance.

However, that’s not all history has to give us. These gas discharge bulbs from yesteryear are absolute works of art.

The bulbs contain delicate floral sculptures in metal, coated with phosphor, and the bulbs are filled with neon or argon gas. Applying mains voltage to the electrodes inside the bulb causes the phospor to fluoresce, creating a glowing flower that is hauntingly beautiful.

These bulbs were manufactured by the Aerolux Light Company, from the 1930s to the 1970s. Once upon a time, they could be had for as little as 20 cents a bulb – nowadays you’re likely to pay over $50 on eBay or Etsy. The bulbs work by the glow discharge effect, not at all dissimilar to garden variety neon lamps.

While it’s not easy, it is possible to make your own vacuum tubes. Maybe it’s time to order some phospor powder and a tank of neon and get to work? Be sure to document your attempt on Hackaday.io.

Thanks to [Itay Ramot] for the tip!


How Many Drones Does It Take To Screw In A Lightbulb?

Imagine. There you are, comfortable in your lounge pants. Lounging in your lounge. Suddenly in the distance you hear a buzzing. Quiet at first, then louder. A light bulb goes on in your head.

You forgotten that you’d scheduled an Amazon drone repair service in partnership with The Home Depot and Dewalt. They break through the window, spraying you with shards. They paint the spots on the walls. Snap photos of the brands in your closet. Change the light bulbs. Place a bandaid on your glass wounds. Pick up the shards and leave. Repairing it on their way out.

Horrible.

Of course the first step before this dark future comes to be is to see if it can be done; which is what [Marek Baczynski] and a friend accomplished many broken light bulbs later. Using an off the shelf drone with three springy prongs glued to the top they try time and time again to both unscrew and screw in a light bulb. They try at first with a lighter drone, but eventually switch to a more robust model.

After a while they finally manage it, so it’s possible. Next step, automate. Video after the break.

Continue reading “How Many Drones Does It Take To Screw In A Lightbulb?”

Stealing WiFi From LED Lightbulbs

LIFX Wireless LED PCB

Back in 2012, the LIFX light bulb launched on Kickstarter, and was quite successful. This wireless LED lightbulb uses a combination of WiFi and 6LoWPAN to create a network of lightbulbs within your house. Context Information Security took a look into these devices, and found some security issues.

The LIFX system has a master bulb. This is the only bulb which connects to WiFi, and it sends all commands out to the remaining bulbs over 6LoWPAN. To keep the network up, any bulb can become a master if required. This means the WiFi credentials need to be shared between all the bulbs.

Looking into the protocol, an encrypted binary blob containing WiFi credentials was found. This binary could easily be recovered using an AVR Raven evaluation kit, but was not readable since it was encrypted.

After cracking a bulb apart, they found JTAG headers on the main board. A BusBlaster and OpenOCD were used to communicate with the chip. This allowed the firmware to be dumped.

Using IDA Pro, they determined that AES was being used to encrypt the WiFi credentials. With a bit more work, the key and initialization vector was extracted. With this information, WiFi credentials sent over the air could be decrypted.

The good news is that LIFX fixed this issue. Now they generate an encryption key based on WiFi credentials, preventing a globally unique key from being used.

[via reddit]

LED Bulb Reviews, Evaluations And Teardowns

LED Bulb Reviews

[ElectronUpdate] has posted many great reviews of commercial LED bulbs that one can purchase to replace standard E26 incandescent light bulbs. In his reviews he evaluates the light emitting performance and does a thorough and detailed teardown, evaluating and understanding the circuit technologies used. For the light emission evaluation he uses a light meter and some homemade graph paper to plot the lumens at different angles. Flicker is easily evaluated using a solar panel from a discarded solar path light connected to his oscilloscope. Any flicker will show up quite nicely and can be measured. Of course a kill-a-watt meter makes an appearance in most reviews to read watts and power factor.

Recently [ElectronUpdate] wanted to understand the meaning of CRI which is advertised on many of these commercial LED packages. CRI stands for color rendering index and deals with how colors appear when compared to a natural light source. After doing some researching he found that a CRI over 80 is probably good for LED lighting. The next dilemma was how to measure CRI without expensive scientific equipment. He found a website that we have featured before with free software and instructions on how to build a spectrometer. The web instructions include building a meter box from paper but he found it was much more reliable if built out of wood. We’ll let you follow [ElectronUpdate’s] recommended build if you like, but you’ll need a few items which he does detail.

After a short calibration procedure the final rig will measure power spectral line densities of your light source. [ElectronUpdate] is promising more details on how the colorful measurement data can be related to CRI ratings, but you can get a jump on the details at Full Spectrum Solutions. We also recommend you browse through all of [ElectronUpdate’s] LED bulb reviews on YouTube if the progressing performance and innards of LED bulbs fascinates you as much as it does us.