Cheap Acoustic Panel DIY

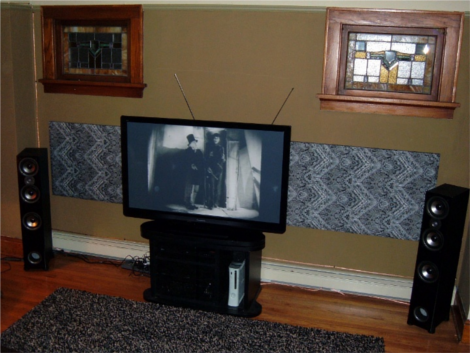
[Eric Wolfram] wrote in to let us know about a simple and cheap acoustic panel DIY he put together.  When installing a home theater acoustics are often neglected (especially if you spend so much on the TV you cannot afford any furniture for the room) resulting in reduced listening quality and poor spacial sound imaging from your surround system (also responsible for the furniture problem). The addition of sound absorbing panels helps control the acoustics of the room and may even class up the place a bit.  These are also come in handy for home studio usage where a low level of reverberation is preferred.

The panels are relatively simple to produce on a budget, just a sheet of 2″ thick dense fiberglass board glued into a wooden frame and covered in a sound-transparent fabric. [Eric] goes into a lot of the material selection process to help you along your way. The best part about the project (aside from its obvious utility) is that all of the materials can be found cheaply at your average home improvement store, with the exception of the fabric.  [Eric] mentions that you can substitute colored burlap if need be.  Once the panel is assembled and glued it just has to be hung on the wall of your choice like a large heavy picture frame. This could certainly help the acoustics and reduce some slap-back echo in your warehouse/shop. We might have to try this one over the weekend.

Thanks [Eric]!

Analog IPhone Amplifier Made From Recycled Trumpets

analog_telephonographer

It’s no secret that the audio quality of the iPhone’s built-in speakers isn’t exactly what you would consider to be hi-fi. Sound quality aside, there are plenty of times where even the volume doesn’t do the music justice. While you can always go out and buy a fancy dock to amplify your iGadget’s sound, artist [Christopher Locke] has a different take on the subject.

For a while now, he has been constructing what he calls “Analog Tele-Phonographers”, metal sculptures that can be used to amplify a mobile phone’s audio. Built out of steel and old trumpets, his audio sculptures require no electricity, instead utilizing the same amplification technology as the original phonographs.

While the Tele-Phonographers won’t make your iPhone sound like a high quality tube amp, they do undoubtedly increase the phone’s volume and they are nice to look at. We can certainly get behind this sort of recycling/reuse of old items.

Continue reading to see a quick video of his Analog Tele-Phonographer in action.

[Thanks, Chris]

Continue reading “Analog IPhone Amplifier Made From Recycled Trumpets”

Playing Dubstep On Real Instruments

When we first saw the live cover of Skrillex Scary Monsters And Nice Sprites by the band Pinn Panelle, we had to know how a band is able to play live dubstep on real instruments. We emailed the band and they spilled the beans on how to process the hell out of an instrument in a live environment.

First up is the bassist, [Nathan Navarro]. He wears a Source Audio Hot Hand on his right thumb. This little box is a two-axis accelerometer that communicates with his pedal board using RF frequencies. With the Hot Hand, he has control over two parameters on Hot Hand Pedals. The envelope effect is awesome, but it’s worth noting that [Nathan] is sponsored by Source Audio. We’re thinking it would be relatively easy to cram a Wii MotionPlus and microcontroller into a wristband. Tied to a computer and MIDI interface, the homebrew solution would do the same thing.

[Derek Song] is the guitarist and he’s used multieffects for most of his musical life He has a small Bluetooth keyboard and touchpad mounted to the front of his guitar that controls just about everything on his pedal board. The Bluetooth controller sends commands to [Derek]’s computer that outputs MIDI CC messages to his pedal board.

In a studio, Pinn Panelle’s cover would be impressive. The fact that it’s being played live opens up a number of doors as to what a band can do in real-time. If you’ve got a pedal board or electronic music build, send it into the tip line. Also, check out the videos after the break for a better demo of [Derek]’s Bluetooth setup.

Continue reading “Playing Dubstep On Real Instruments”

AVR Chiptune Project Turns This Simple Code Into Music

[Mark] had seen a few examples of algorithmic music generation that takes some simple code and produces complex-sounding results. Apparently it’s possible to pipe the output of code like this directly to audio devices on a Linux box, but [Mark] decided to go a different direction. His project lets you play simple algorithms as audio using AVR microcontrollers.

Now the code work for this is very simple, but he hardware implementation is where things get interesting. Ostensibly, [Mark] didn’t have the components available to build a filter to use PWM as an audio signal. Being that he’s a ham operator, he grabbed some radio equipment he had on hand and whipped up an alternative. He’s feeding the PWM from an Arduino into the voltage controlled oscillator on a board meant for high-altitude balloon telemetry. The signal broadcast by this board is then picked up by his radio receiver, and played on some speakers.

Rube-Goldberg contraptions aside, the effect is pretty interesting, as you can hear in the latter half of the video clip which we’ve embedded after the jump.

Continue reading “AVR Chiptune Project Turns This Simple Code Into Music”

Star Wars Imperial March Played By Dual Floppy Drives

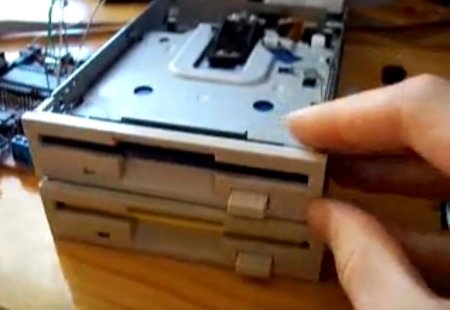
Although many have made some sort of music with improvised electronics, few sound as cool as this Imperial March from Star Wars played by two floppy drives. According to [Pawel], “It’s nothing new” and quite simple. This may be true as we’ve featured an Imperial March-playing floppy drive here before, but it was only one drive. Although it may not be the London Symphony Orchestra, the two drives together sound quite good!

According to him, the FDD has a fairly simple interface. To move the head, one simply needs to pull the DRVSB pin low and then activate the STEP pin on a falling edge.  This will make the head move one direction dependent on the DIR pin state. In this case, an ATMega microcontroller is moving everything. An explanation of the pins used in this hack can be found here.

Although it may look like an intimidating hack on the surface, something like this might be a neat project to try with some old hardware and an Arduino or other controller! [Pawel] did have the idea to hook up a 5 1/4″ and 8″ drive to make a full FDD orchestra, so we can’t wait to see what he comes up with! Continue reading “Star Wars Imperial March Played By Dual Floppy Drives”

Fully Fretted Guitar MIDI Controller

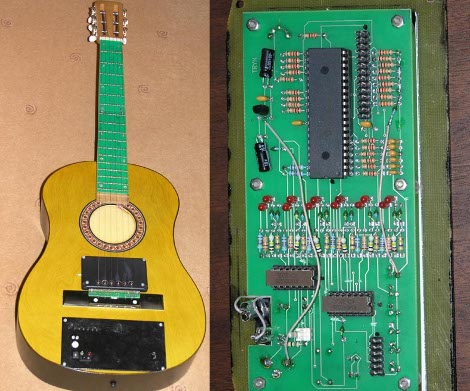
[Andy] came across this guitar midi controller project from way back and decided to send us a tip about it. The English version, translated from the original Russian, is easy to follow and documents the build process from first prototypes to the version you see above. It can connect via a standard MIDI cable and then be used to control anything you want. The only thing missing is the ability to transmit velocity data, but that’s certainly not a deal breaker.

The device has two sensory parts. The first is a set of pickups that can be seen underneath the strings near the bridge. These work like standard magnetic pickups but instead of extrapolating fret data from the pitch picked up on the string, there is a second sensor mechanism for every fret of each string. Since the strings are made of metal, it’s possible to detect which fret is depressed based on continuity sensing. Of course this means you need a conductor between every fret, and that’s why the fingerboard has been replaced with one made of printed circuit boards. All of this data is gathered, then sent to the MIDI device via a PIC 16F74 microcontroller.

If this leaves you wanting for more guitar hacks, don’t miss this one that adds addressable LEDs in between each fret.

CV Sequencer With A TV Out

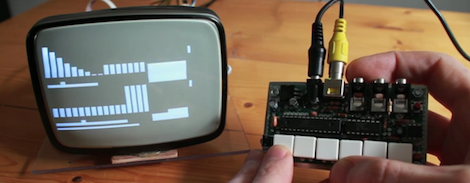
[gijs] sent in the control voltage sequencer he’s been working on that uses the TVout Arduino library to provide a graphical interface.

The sequencer doesn’t produce any sound on its own. Instead, it outputs a Control Voltage so other synths can be sequenced with [gijs]’ TVSCV. Before MIDI came around, CV was the standard to connect synthesizers and drum machines together. Even today, a lot of boutique synths have at least one jack for CV. [gijs]’ build is really interesting because of the user interface – the TVout Arduino library was used in conjunction with a tiny CRT to change values, timing and speed of the CV output. The TVSCV is able to sequence two different channels of CV at 10 bit resolution with 16 steps per bank.

From the video after the break, the TVSCV sounds like it can produce what would be the trippiest soundtrack ever conceived for an Atari or NES game. It’s a great bit of kit, especially when connected to an Atari punk console or a TR-808 and a glitch delay.

Continue reading “CV Sequencer With A TV Out”