Emulating A GameBoy Advance Inside Of A Gameboy Advance

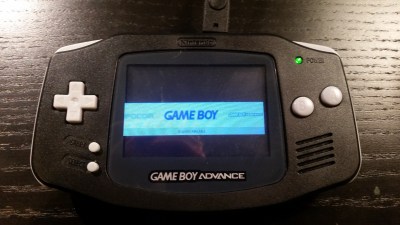
[Ryzee119]’s GBA might not look so different at first glance. The screen is way better than you remember, but that may just be your memory playing tricks on you. The sound comes out of the speakers. It feels the right weight. It runs off AA batteries. Heck, even the buttons feel right.

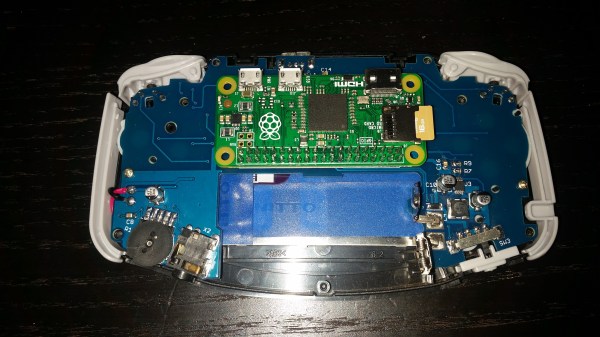
emulating-gba-inside-gbaIt’s not until you notice that it really shouldn’t be playing any games without a cartridge inserted that you know something is not right in the Mushroom Kingdom. When you look inside you see the edge of a Raspberry Pi Zero instead of the card edge connector you expected.
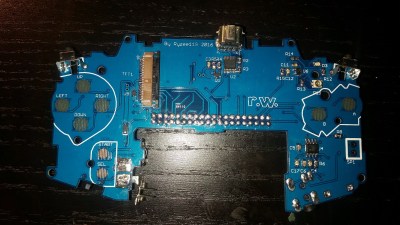
It took a lot of work for [Ryzee119] to convert a dead, water damaged, GBA to a thriving emulation station based around a Pi Zero. The first step was desolder the components he couldn’t find anywhere else. The LR buttons, the potentiometer, and even the headphone jack. The famously hard to see screen, of course, had to go.  It was replaced by a nice TFT. Also, the original speaker was too corroded from the water and he sourced a replacement.

Custom replacement PCB

Next he took a good photo of the GBA’s circuit board. We wonder if he used the scanner method mentioned in the comments of this article? He spent a lot of time in Dassault’s DraftSight, a 2D CAD program, outlining the board. Then, after thoroughly verifying the size of the board for the Nth time he imported the outlines to EagleCAD.

He managed to cram quite a bit onto the board while remaining inside the GBA’s original envelope. The switches, potentiometer, and jack went back to their original locations. Impressively, he made his own pad traces for the A, B, and D-Pad buttons. The mod even handles slowly decreasing battery voltages better than the original.

In the end it all snaps together nicely. He’s configured it to boot into the emulator right at start-up. If you’d like one for yourself, all his files are open source. 

Simple Game Boy IPhone Mod Is Simple

We’ve featured the work of [Modpurist] before, but his latest hack is wonderful in its simplicity. He wanted to create a more authentic Game Boy feel on his iPhone, so he printed out and stuck a skin on the front that makes it look like a Game Boy. Or rather, a Phone Boy, as the form factor is a bit different.

By measuring out the on-screen buttons and using light photo paper, he was able to have buttons on the skin as well: the touch screen still works through it.  You can download his printable templates… and the finishing touch is a similar print for the back of the phone to gives that genuine Game Boy feel. Okay, feel is not the right term since the classic d-pad and red buttons are still just capacitive and have no throw. But this is a clever step in a fun direction.

Check out his other hacks while you are at it, including the Game Boy Fridge.

Continue reading “Simple Game Boy IPhone Mod Is Simple”

Game Pie Advance Brings Retro Gaming To Your Fingertips

We love our Game Boy and RetroPie mods here at Hackaday because the Raspberry Pi Zero has made it easier than ever to carry a pocket full of classic games. [Ed Mandy] continues this great tradition by turning a matte black Game Boy Advance into a RetroPie handheld.

Details are scant on how [Mandy] built his Game Pi Advance, but we can glean a few details from the blog post and video. A Raspberry Pi Zero running RetroPie appears to be piggybacking on a custom PCB that slots neatly into the GBA case. This provides easy access to the Pi Zero’s USB and micro HDMI via the cartridge slot to connect to an external screen, as well as a second controller to get some co-op NES and SNES action on. It’s worth noting here that [Mandy] has foregone adding X and Y buttons in the current version.

Continue reading “Game Pie Advance Brings Retro Gaming To Your Fingertips”

Fly With A Game Boy Classic

How many grown-up hardware hackers whiled away their youth playing Tetris or Mario on their Game Boy? Fond memories for many, but unless you are lucky your Game Boy will probably be long gone. Not for [Gautier Hattenberger] though, he had an unexpected find at his parents’ house; his Game Boy Classic, unloved and forgotten for all those years. Fortunately for us his first thought was whether he could use it as a controller for a drone, and better still he’s shared his work for all of us to see.

How to connect a drone and a Game Boy

Back in the day a would-be Game Boy hacker would have been deterred by Nintendo’s legal defences against game piracy, but with the benefit of a couple of decades the handheld console’s hardware is now an open book. Unfortunately for [Gautier], he seems to be the first to use one as a flight controller, so he had to plough his own furrow. His Game Boy Game Link serial port feeds an Arduino/FTDI combination that converts Game Link  to USB, which is then sent to his laptop on which a small piece of software converts them to commands for the drone through the Paparazzi UAV framework.

All his code is in a GitHub repository, and he’s posted a video of his work which you can see below the break. For a child of the early ’90s, the mere thought that their handheld console could do this would have been mindblowing!

Continue reading “Fly With A Game Boy Classic”

Beware Of Tall Grass: Pokemon Go On The Gameboy Pocket

[Pepijn de Vos] was excited to interact with the world’s most popular augmented reality pedometer, Pokemon Go, and was extremely disappointed to find that his Blackberry couldn’t run it. Still, as far as he could tell from behind his wall of obsolete technology, Pokemon Go is all about walking distractedly, being suspicious, and occasionally catching a Pokemon. That should be possible.

Not a stranger to hacking Pokemon on the Gameboy, [Pepijn] put together a plan. Using his TCPoke module, he took it a step further. Rather than just emulating the original gameboy trade signals over the internet, he hacked a Pokemon Red ROM with some custom Z80 assembly to add some features to the Cable Club in the game.

After some waiting for the delivery man to bring a flashable cartridge and along with some Arduino code, he could now translate the steps he took in the game to his steps in the real world. Well, mostly. He could pick the location where he would like to catch a Pokemon. The character stands there. Somewhere around 100m the game will trigger a random pokemon battle.

[Pepijn] is now no longer a social outcast, as you can see in the video after the break. On a simple trip to the grocery store he caught two Pokemon!

Continue reading “Beware Of Tall Grass: Pokemon Go On The Gameboy Pocket”

Gameboy Case Lives On With A Pi Zero

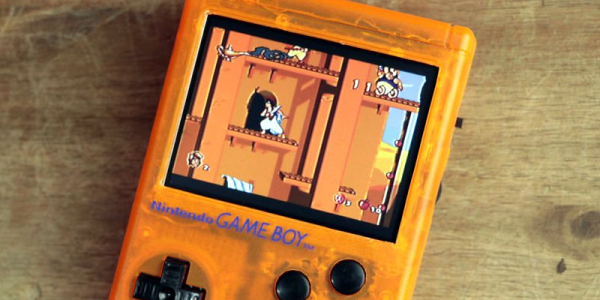
After scoring a non-functioning Gameboy in mint condition for $10, [Chad] decided it was time for a fun electronics project, so he ordered an LCD and bought a Pi Zero.

He started with a 3.5″ LCD off eBay for about $25, and got it running with the Pi Zero. It’s only 320×240 resolution, but hey, we’re recreating a Gameboy — not a smartphone. The next step was rather finicky: cutting up the case to fit the new components in.

Using a collection of files he whittled down the screen opening in the case to make room for the LCD, a few hours later and it looked surprisingly good.

From there he started laying out the components inside of the case, trying to figure out the best layout for everything to fit nicely. To power the unit he’s using a lithium ion battery from a Samsung Note which should give him some serious play-time. It fits right in where the game card is suppose to go.

To add some extra control functionality he’s added the game-pad buttons from a SNES onto the back where the battery door is, he’s also got a USB port on the side, a MicroSD card slot, and even a new audio pre-amp with potentiometer for controlling the speaker volume.

In case you can’t find a mint condition Gameboy case like [Chad] did, you could just print one from scratch

Continue reading “Gameboy Case Lives On With A Pi Zero”

Building A Better Game Boy With A Pi

The most collectible Game Boy, by far, would be the Game Boy Micro. This tiny Game Boy is small enough to lose in your pocket. It can only play Game Boy Advance games, the screen is tiny, but just look at the prices on eBay: it’s one of the few bits of consumer electronics that could be seen as an investment in retrospect.

The popularity of the Game Boy Micro, the ability for the Raspberry Pi to emulate old game consoles, and the introduction of the Raspberry Pi Zero could only mean one thing. It’s the PiGrrl Zero, a modern handheld to play all your retro games.

The design goals for the PiGRRL Zero were simple enough: a 2.2 inch 320×240 display, a d-pad, four buttons on the face and two shoulder buttons. There’s a big battery, audio output, and a 3D printed case. This would be somewhat unremarkable if it weren’t for the PCB designed for PiGRRL Zero. It’s designed to be soldered directly onto the Raspberry Pi Zero, taking advantage of the mostly component-free back side of this tiny single board computer.

With this PCB, the Pi Zero is turned into a tiny battery-powered computer running emulations of all the classics. NES, SNES, Sega, and of course Game Boy Advance games are readily playable on this devices, and for a price that’s a fair bit lower than what a mint condition Game Boy Micro goes for. Our judges thought it was cool enough to be one of the winners of the Pi Zero Contest. Check it out!


Raspberry_Pi_LogoSmall

The Raspberry Pi Zero contest is presented by Hackaday and Adafruit. Prizes include Raspberry Pi Zeros from Adafruit and gift cards to The Hackaday Store!
See All the Entries