Hackaday Prize Entry: A Charlieplexed Wristwatch

If there’s one thing we like, it’s blinky stuff, and you’re not going to get anything cooler than a display made of tiny SMD LEDs. That’s the idea behind this wristwatch and Hackaday Prize entry. It’s a tiny board, loaded up with an ATmega, a few buttons, and a bunch of LEDs in a big charlieplexed array.

The big feature of this display is the array of LEDs. This is a 16×5 array of 0603 LEDs packed together as tightly as possible. That’s a tiny, high-resolution LED display, but even with the ATmega88 microcontroller powering this board, all the LEDs are individually addressable, and a proper font for displaying the time, or anything else, is already mapped out.

LED matrices are pretty common around these parts, but building a custom display out of SMD LEDs is another level entirely. The best one we’ve seen was this unofficial badge from two DEF CONs ago. That was done the cheater’s way with a bunch of serially addressable LED drivers. This charlieplexed version goes above and beyond, and we’re eagerly awaiting the board files so this display can be replicated easily.

Multi Sensor Security Camera Has You Covered

Security in the home — especially a new home — is a primary concern for many. There are many options for security systems on the market, but for those will the skills, taking matters into your own hands can add peace of mind when protected by a system of one’s own design. [Armagan C.] has created  their near-ideal multi-sensor security module to keep a watchful eye out for would-be burglars.

Upgrading from their previous Arduino + Ethernet camera — which loved to trigger false alarms — [Armagan] opted for a used Raspberry Pi model B+ camera module and WiFi connection this time around. They also upgraded the unit with a thermal sensor, LPG & CO2 gas sensor, and a motion tracking alarm. [Armagan] has also set up a live streaming  feature that records video in 1hr segments — deleting them daily — and circumvented an issue with file descriptor leak by using a crashed drone’s flight controller to route the sensor data via serial port. It is also proving superior to conventional alarms because the custom software negates the need to disarm security zones during midnight trips to the washroom.

Continue reading “Multi Sensor Security Camera Has You Covered”

Hackaday Links: August 21, 2016

Are you in New York? What are you doing this week? Hackaday is having a party on Wednesday evening. come on out!

How about a pub in Cambridge? Hackaday and Tindie will be there too, on Wednesday evening. It’s a bring-a-hack, so bring a hack and enjoy the company of your fellow nerds. If this goes late enough we can have a trans-Atlantic Hackaday meetup.

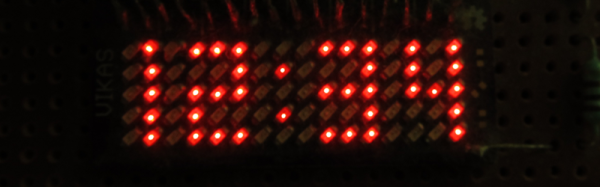
Portable emulation machines are all the rage, and [Pierre] built one based on the Raspberry Pi Zero. It’s small, looks surprisingly comfortable to hold, and is apparently it’s fairly inexpensive to build your own.

For the last year or so, the Raspberry Pi Zero has existed. This came as a surprise to many who couldn’t buy a Raspberry Pi Zero. In other news, Ferraris don’t exist, and neither do Faberge egg omelets. Now, the Raspberry Pi shortage is officially over. They’re in stock everywhere, and we can finally stop listening to people who call the Pi Zero a marketing ploy.

No Starch Press is having another Humble Bundle. Pay what you want, and you get some coding books. They have Python, Haskell, and R, because no one should ever have to use SPSS.

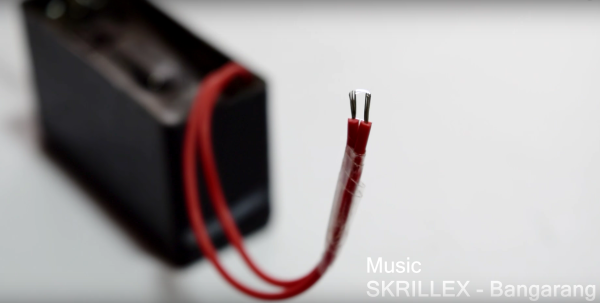
[Reg] wrote in to tell us about something interesting he found while cruising eBay. The used and surplus market is awash in Siemens MC45/MC46 cellular modem modules. They’re a complete GSM ‘cellular modem engine’, with an AT command set, and cost about $10 each. Interfacing them with a board requires only two (strange) connectors, SIM and SD card sockets, and a few traces to through-hole pads. Anyone up for a challenge? A breakout board for this cellular modem could be very useful, should someone find a box full of these modules in a surplus shop.

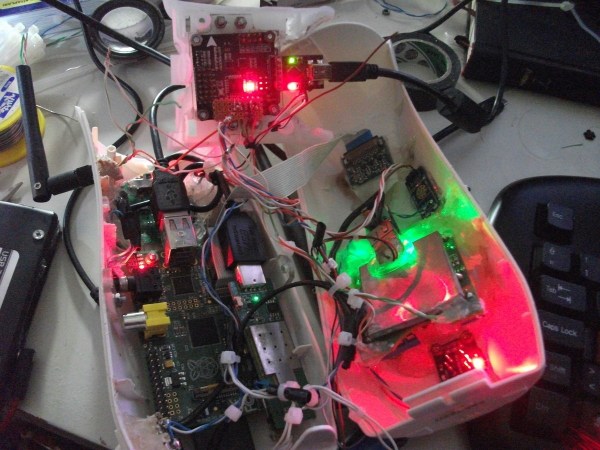
On this page, about halfway down the page, is an LCD driver board. It turns a video signal into something a small, VGA resolution LCD will understand. This driver board is unique because it is completely hand-made. This is one of those small miracles of a soldering iron and copper clad board. If anyone out there is able to recognize these parts, I’d love for you to attempt an explanation in the comments.

A few weeks ago, the RTL8710 WiFi module showed up on the usual online marketplaces. Initially, we thought it was a competitor to the ever-popular ESP8266, offering a small microcontroller, WiFi, and a bunch of useful output pins. A module based on the RTL8710, the RTL-00, is much more than a competitor. It’s pinout compatible with the ESP8266. This module can be swapped into a project in place of the ESP-12, probably the most popular version of the ESP8266. This is genius, and opens the door to a lot of experimentation with the RTL8710.

Hacked Furby Knows When You’re Near

One of the classics of circuit bending is to mess around with the clock chip that drives the CPU in simple noise-making toys. [Goran] took this a step further with his Furby hack. Skip down to the video embedded below if you just want to see the results.

After first experiments modifying the Furby’s clock with a string of resistors (YouTube), [Goran] decided to opt for more control, overriding the clock entirely with a square wave coming out of an Arduino. And then, the world became his oyster.

The Furby’s eyes were replaced with ultrasonic distance sensors, and what looks like a speaker was hot-glued into its mouth. Since this particular Furby only “talks” when you pull its tail, he naturally wired in tail-switch control to boot. As [Goran] suggests, a light show is the obvious next step.

If you haven’t pulled apart an electronic toy and played around with glitching it, you don’t know what you’re missing. We’ve got a classic intro to circuit bending, as well as projects that range from the simple to the ridiculously elaborate. It’s a fun introduction to electronics for the young ones as well. Grab a toy noisemaker and get hacking.

Continue reading “Hacked Furby Knows When You’re Near”

Building A DIY Heat Pipe

Once the secret design tool for aerospace designers, the heat pipe is a common fixture now thanks to the demands of PC CPU cooling. Heat pipes can transfer lots of energy from a hot side to a cold side and is useful when you need to cool something where having a fan near the hot part isn’t feasible for some reason. Unlike active cooling, a heat pipe doesn’t require any external power or pumps, either.

[James Biggar] builds his own heat pipes using copper tubing. You can see a video of one being made, below. There’s not much to it, just a copper pipe with some water in it. However, [James] gets the water boiling to reduce the pressure in the tube before sealing it, which is an interesting trick.

One limitation of his technique is that there is no internal wick. That means the tube can only be installed vertically. If you haven’t looked at heat pipes before, most of them do have a wick. The idea is that some working fluid is in the pipe. You select that fluid so that it boils at or below the temperature you want to handle. The hot vapor rushes to the cool side of the pipe (carrying heat) where you have a large heatsink that may have a fan or active cooling system. The vapor condenses and–in this case–drops back to the bottom of the tube. However, if there is a wick, capillary action will return the fluid to the hot end of the tube.

You might think that using water as the working fluid would limit you to 100°C, but remember, [James’] technique lowers the pressure in the tube. At a lower pressure, the water will boil at a lower temperature.

We’ve seen heat pipes and wine chillers used to cool a PC before. In fact, we’ve even seen them in builds of completely fanless PCs.

Continue reading “Building A DIY Heat Pipe”

Bare-bones Musical Tesla Coil Is Tiny And Tinny

We’ve seen musical Tesla coils aplenty on these pages before, and we’ll be the first to point out that [Kedar Nimbalkar]’s musical high-voltage rig doesn’t quite qualify as a Tesla coil. But it’s dirt cheap, and might make a pretty cool rainy-afternoon-with-the-kids project.

Chances are good you have the parts needed for this build lying around the house. All that’s needed is an audio power amplifier and a high-voltage source. [Kedar] used a Class D amp board and a 3V to 7kV high-voltage module sourced from eBay for a couple of bucks; if you really want to go cheap, tear down that defunct electronic fly swatter gathering dust on top of your fridge and harvest the high-voltage module inside. The output of the amp feeds the high-voltage module, the HV leads are placed close together to get an arc, and the glorious high-fidelity sound will wash over you. Or not – sounds pretty awful to us. Still, it looks like a fast, fun build.

If this project gets you in the mood to go the full Tesla, check out this coil big enough to produce 12-foot arcs, or even this musical Tesla hat.

Continue reading “Bare-bones Musical Tesla Coil Is Tiny And Tinny”

Fly With A Game Boy Classic

How many grown-up hardware hackers whiled away their youth playing Tetris or Mario on their Game Boy? Fond memories for many, but unless you are lucky your Game Boy will probably be long gone. Not for [Gautier Hattenberger] though, he had an unexpected find at his parents’ house; his Game Boy Classic, unloved and forgotten for all those years. Fortunately for us his first thought was whether he could use it as a controller for a drone, and better still he’s shared his work for all of us to see.

How to connect a drone and a Game Boy

Back in the day a would-be Game Boy hacker would have been deterred by Nintendo’s legal defences against game piracy, but with the benefit of a couple of decades the handheld console’s hardware is now an open book. Unfortunately for [Gautier], he seems to be the first to use one as a flight controller, so he had to plough his own furrow. His Game Boy Game Link serial port feeds an Arduino/FTDI combination that converts Game Link  to USB, which is then sent to his laptop on which a small piece of software converts them to commands for the drone through the Paparazzi UAV framework.

All his code is in a GitHub repository, and he’s posted a video of his work which you can see below the break. For a child of the early ’90s, the mere thought that their handheld console could do this would have been mindblowing!

Continue reading “Fly With A Game Boy Classic”