Find Your Level – Extracting NES Game Data Using Python

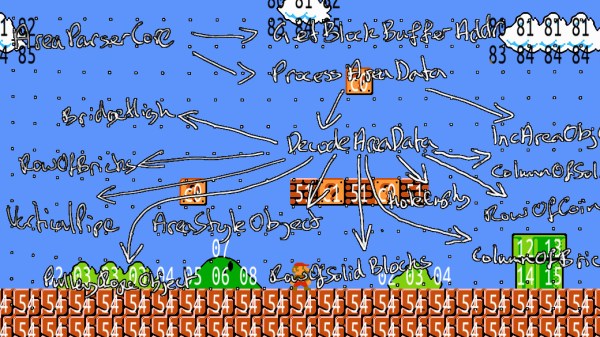
Just this summer, the Nintendo Entertainment System had its 35th release anniversary, and even after years of discontinuation, it is still going strong in the hacker community. Exhibit A: [Matthew Earl]. For one of his upcoming projects, [Matthew] needed to get his hands on the background images of the NES classic Super Mario Bros. Instead of just getting some ready-rendered images and stitching them together, he decided to take care of the rendering himself, once he extracts the raw game data.

Since there is no official source code available for Super Mario Bros, [Matthew] used a disassembled version to get started looking for the image data. To avoid reading through thousands of lines of assembly code, and to also see what actually happens during execution, he wrapped the game’s ROM data into py65emu, a Python library emulating the 6502, the CPU that drives the NES. By adding a simple wrapper around the emulator’s memory handler that tracks reads on uninitialized data, [Matthew] managed to find out which parameters he needs to feed to the parser routine in order to get the image tile data. After an excursion into the Picture Processing Unit (PPU) and its memory arrangements, [Matthew] had everything he needed to create the Python script that will render the game background straight from its ROM data.

Even if extracting NES game data is not your thing, the emulator concept [Matthew] uses might be still worth a read. On the other hand, if you want to dig deeper into the NES, you should definitely have a look at emulating an SNES game on a NES, presented on the NES itself.

Add-On Board Brings Xbox 360 Controllers To N64

Many of the games released on the Nintendo 64 have aged remarkably well, in fact a number of them are still considered must-play experiences to this day. But the years have not been so kind to the system’s signature controller. While the N64 arguably defined the console first person shooter (FPS) genre with games like “Goldeneye” and “Perfect Dark”, a modern gamer trying to play these classics with the preposterous combination of analog and digital inputs offered by the N64 controller is unlikely to get very far.
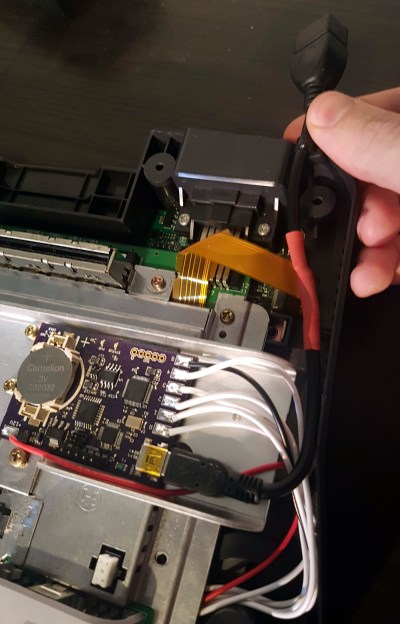
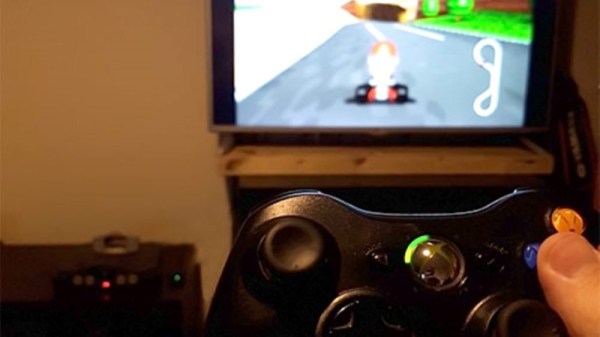
Of course, you could play N64 games in an emulator and use whatever controller you wish. But where’s the challenge in taking the easy way out? [Ryzee119] would much rather take the insanely complex route, and has recently completed work on an add-on board that let’s you use Xbox 360 wireless controllers on Nintendo’s 1996 console. He’s currently prepping schematics and firmware for public release, with the hope that support for additional USB controllers can be added by the community.

Nintendo historians may recall that the N64’s controllers had an expansion port on the bottom where you would connect such accessories as the “Rumble Pak” and “Controller Pak”. The former being an optional force feedback device, and the latter a rather oddly named memory card for early N64 games which didn’t feature cartridge saves. Only “90’s Kids” will recall the struggle of using the “Rumble Pak” when a game required the “Controller Pak” to save progress.

Thankfully [Ryzee119] has solved that problem by adding battery backed storage to his adapter along with some clever code which emulates the “Controller Pak”. Similarly, the “Rumble Pak” is emulated by the Xbox 360 controller’s built-in force feedback and a bit of software trickery. Specific button combinations allow for enabling and disabling the various virtual accessories on the fly.

But the best part of this modification might be how unobtrusive the whole thing is. Not only does it allow you to still use the original controllers and accessories if you wish, but it only requires soldering a handful of wires to the console’s motherboard. Thanks to the surprising amount of dead space inside the system’s case, it’s not even a challenge to fit the board inside. You do need to use the official USB Xbox 360 controller receiver, but even here [Ryzee119] opted to put a USB port on the board so you could just plug the thing in rather than having to cut the connector off and trying to solder it to the board yourself.

It probably won’t come as a surprise that this isn’t the first time [Ryzee119] has fiddled with the internals of a classic Nintendo system. We’ve previously covered his fantastic custom PCB to fit a Raspberry Pi Zero into a GameBoy Advance.

[Thanks to Gartral for the tip.]

Thinking Inside The (Cardboard) Box With Nintendo Labo Hacks

Cardboard is one of the easiest ways to build something physical, far easier than the 3D printing and laser cutting we usually write about here. So when Nintendo released their Labo line of cardboard accessories, it doesn’t take a genius to predict the official product would be followed by a ton of user creations. Nintendo were smart enough to provide not only an internet forum for this creativity to gather, they also hold contests to highlight some of the best works.

The most impressive projects in the winner’s circle combined the one-of-a-kind cardboard creations with custom software written using Toy-Con Garage, the visual software development environment built into the Nintendo Switch console. Access to the garage is granted after a user runs through Nintendo Labo’s “Discover” activities, which walk the user behind the scenes of how their purchased Labo accessories work. This learning and discovery process thus also serves as an introductory programming tutorial, teaching its user how to create software to light up their custom cardboard creations.

It’s pretty cool that Nintendo opened up a bit of the mechanism behind Labo activities for users to create their own, but this is only a tiny subset of Nintendo Switch functionality. We have different hacks for different folks. Some of us enjoy reverse engineering details of how those little Joy-Cons work. Others hack up something to avoid a game puzzle that’s more frustrating than fun. And then there are those who are not satisfied until they have broken completely outside the sandbox.

[via Engadget]

Continue reading “Thinking Inside The (Cardboard) Box With Nintendo Labo Hacks”

N64 Emulated In VR Makes Hyrule Go 3D

The Nintendo 64 had some groundbreaking and popular 3D games, and [Avaer Kazmer] felt it was only right to tamper with things just enough to trick an emulator into playing Ocarina of Time in VR, complete with stereoscopic 3D. The result is more than just running an emulator on a simulated screen in virtual reality; the software correctly renders a slightly different perspective of the world of Hyrule to each eye in order to really make the 3D pop in a way the original never could, and make it playable with VR controllers in the process. The VR emulator solution is called Emukit and works best with Exokit, a JavaScript web browser for AR and VR environments for which [Avaer] is a developer.

It turns out that there were a few challenges to work around and a few new problems to solve, not least of which was mapping VR controllers to control an N64 game in a sensible way. One thing that wasn’t avoidable is that the N64’s rendered world may now pop in 3D, but it still springs forth from a rectangular stage. The N64, after all, is still only rendering a world in a TV-screen-sized portion; anything outside that rectangular window doesn’t really exist, and there’s no way around it as long an emulated N64 is running the show. Still, the result is impressive, and a video demo is embedded below where you can see the effect for yourself.

Continue reading “N64 Emulated In VR Makes Hyrule Go 3D”

Nintendo Switch Gets Internal Trinket Hardmod

If you haven’t been following the Nintendo Switch hacking scene, the short version of the story is that a vulnerability was discovered that allows executing code on all versions of the Switch hardware and operating system. In fact, it’s believed that the only way to stop this vulnerability from being exploited is for Nintendo to release a new revision of the hardware. Presumably there are a lot of sad faces in the House of Mario right about now, but it’s good news for us peons who dream of actually controlling the devices we purchase.

To run your own code on Nintendo’s latest and greatest, you must first put it into recovery mode by shorting out two pins in the controller connector, and then use either a computer or a microcontroller connected to the system’s USB port to preform the exploit and execute the binary payload. It’s relatively easy, but something you need to do every time you shut the system down. But if you’re willing to install an Adafruit Trinket M0 inside your Nintendo Switch, you can make things a little easier.

Stemming from work done by [atlas44] and [noemu], the final iteration of this mod was created by [Quantum-cross]. The general idea is to strip down the Trinket M0 board to as small as possible by removing the USB port and a few capacitors, and then install it inside the Switch’s case. By wiring it up to power, the back of the USB-C connector, and the controller connector, the Trinket can interact with all the key components involved in the exploit.

You can even use the Switch’s USB port to update the firmware on the Trinket to load different payloads, though in his walkthrough video after the break, [xboxexpert] mentions eventually this won’t really be necessary as the homebrew software environment on the Switch matures. Indeed, there will almost certainly come a time when performing this exploit on every boot of the system will be made unnecessary, rendering this modification obsolete. But until then, this is a pretty slick way of getting your feet wet in the world of Switch hacking.

It was only six months or so back that we were reading about the first steps towards running arbitrary code on the Nintendo Switch, and just a few months prior to that we saw people experimenting with controlling the system with a microcontroller.

Continue reading “Nintendo Switch Gets Internal Trinket Hardmod”

Unlocking Animal Crossing’s Debug Mode

Originally released on the Nintendo 64 in 2001, Animal Crossing was the first entry into what has become a massively successful franchise. But while the game has appeared on more modern Nintendo consoles, most recently Android and iOS, the version released on the GameCube holds a special place in many fan’s hearts. The GameCube version was the first time those outside of Japan got a taste of the unique community simulation offered by Animal Crossing, and maintains a following nearly 20 years after its release.

[James Chambers] has recently been investigating creating mods for the GameCube version of Animal Crossing, and in the process uncovered some interesting references to a debug mode. That launched a deep dive into the game’s assembly code in an attempt to find what the debug functions did and if they could be enabled without having to patch the game ROM. In the end, he was able to find a push button code that enables debug mode on the retail copy of the game.

[James] starts by using the debugger provided by the Dolphin GameCube emulator to poke around and figure out exactly what flags need to be modified to activate the debug mode. This leads to a few interesting finds, such as being able to pop up a performance monitor graph and some build info. Eventually he finds the proper incantation to bring up a functional debug display in the game, but there was still the mystery of how you do it on the real hardware with a retail copy of the game.

It wouldn’t be unreasonable to think that some special dongle or development version of the GameCube would be required to kick the game into debug mode. But through careful examination of the code path, [James] was able to figure out that hitting a specific combination of buttons on the controller was all that was required to use the debug mode on the stock game. Once the debug mode is started, a controller plugged into the second port allows the user to navigate through options and perform tasks. Not everything is currently understood, but some progress has been made, such as figuring out how to add items to your inventory.

It’s hardly Nintendo’s most popular console, but there’s still a healthy interest in GameCube hacking as the machine approaches its 20th anniversary. We recently saw some impressive work being done to reverse engineer the system’s wireless controllers, though some people are more interested in just cutting the thing in half.

[Thanks to Tim Trzepacz for the tip.]

Reverse-Emulating NES: Nintendception!

This is a stellar hack, folks. [Tom7] pulled off both full-motion video and running a Super Nintendo game on a regular old Nintendo with one very cute trick. And he gives his presentation of how he did it on the Nintendo itself — Nintendo Power(point)! The “whats” and the “hows” are explained over the course of two videos, also embedded below.

In the first, he shows it all off and gives you the overview. It’s as simple as this: Nintendo systems store 8×8 pixel blocks of graphics for games on their ROM cartridges, and the running program pulls these up and displays them. If you’re not constrained to have these blocks stored in ROM, say if you replaced the cartridge with a Raspberry Pi, you could send your own graphics to be displayed.

He demos a video of a familiar red-haired English soul-pop singer by doing just that — every time through the display loop, the “constant” image block is recalculated by the Raspberry Pi to make a video. And then he ups the ante, emulating an SNES on the Pi, playing a game that could never have been played on an NES in emulation, and sending the graphics block by block back to the Nintendo. Sweet!

The second video talks about how he pulled this off in detail. We especially liked his approach to an epic hack: spend at least a day trying to prove that it’s impossible, and when you’ve eliminated all of the serious show-stoppers, you know that there’s a good chance that it’ll work. Then, get to work. We also learned that there were capacitors that looked identical to resistors used in mid-80s Japan.

These are long videos, and the first one ends with some wild speculation about how a similar human-brain augmentation could take a similar approach, replacing our “memories” with computed data on the fly. (Wait, what?!? But a cool idea, nonetheless.) There’s also another theme running through the first video about humor, but frankly we didn’t get the joke. Or maybe we just don’t know what’s funny. Comments?

None of that matters. A SNES game was played in an NES by pushing modified graphics from a “ROM” cartridge in real-time. And that’s awesome!

If you want more Nintendo-in-Nintendo goodness, check out this NES ROM that’s also a zip file that contains its own source code. If you compile the source, you get the zip file, which if you unzip gives you the source to compile. Right?

Continue reading “Reverse-Emulating NES: Nintendception!”