laser cut acrylic coaster with rgb leds inside

Your Mug Will Like This Glowy Coaster

[Charlyn] wanted to highlight their friends beautiful mug collection, so the Glowy Coaster was born.

The coaster is made up of six layers of laser cut acrylic. The top and bottom layer are cut out of clear acrylic, providing a flat surface for the coaster. A top pattern layer made of pearl acrylic has a thin piece of vellum put underneath it to provide diffusion for the LED strip sandwiched inside. The middle layers are made of peach acrylic and have their centers hollowed out to provide room for the electronics inside. The top pearl acrylic layer gives the coaster, as [Charlyn] writes, a “subtle touch of elegance”. The coaster itself is screwed together by an M3 screw at each point of the hexagon that feed through to heat-set inserts.
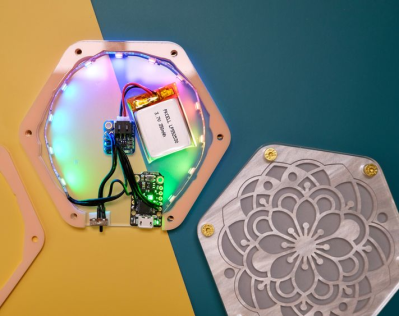
inside of glowy coaster with electronics exposed

The electronics consist of a short NeoPixel strip, cut to include 12 LEDs pointed in towards the center of the coaster. The LEDs are driven by a Trinket M0 microcontroller with a LiPo “backpack” to provide power, attachment points for the exposed power switch and recharging capability to the 110 mAh 3.7 V battery. The code is a slightly modified NeoPixel “rainbow” wheel loop (source available as a gist). The design files are available through Thingiverse.

Creations like these highlight how much care and work goes into a project with minimal beauty, where decisions, like the opacity and thickness of the acrylic or countersinking the M3 screws, can have huge consequences for the overall aesthetic. [Charlyn] has an attention to detail that brings an extra touch of professionalism and polish to the project.

Coasters are a favorite for laser cutting and we’ve covered many different types, including
coaster bots, coaster engravers and even a color changing, drink sensing coasters.

Continue reading “Your Mug Will Like This Glowy Coaster”

Panic Button Is An Audio-Visual Parachute Out Of Zoom Calls

Everyone has been learning how to stream this year whether they want to or not. This has given rise to the embarrassment paradox, which states that the more urgently you need to kill your camera and microphone feeds in a videoconference call, the more difficult and time-consuming it will be. Zoom in particular will toggle the mic and camera with keyboard shortcuts, but when your toddler waddles into the room swinging a used diaper around in the air, keyboard shortcuts will seem woefully under-powered.

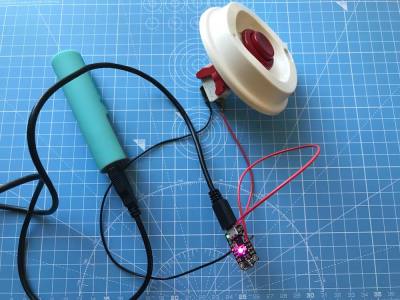
What you need is a single sturdy button that sends both of these toggle commands as quickly as possible. [Simon Prickett]’s panic switch does exactly that. It’s a delightfully tactile arcade button connected to a Trinket M0, which can emulate a keyboard quite easily as an Arduino or CircuitPython device.

This little keyboard doesn’t send these macros directly, because that would be way too risky. What if you were reading Hackaday instead of staring into the tiled faces of your coworkers? Then it wouldn’t work, because Zoom is out of focus.

Instead, it sends an obscure four-key macro to the computer that triggers an AppleScript. [Simon]’s AppleScript checks to see if Zoom is running. If not, it has the system announce the fact. If it is running, then the script sends cmd+shift+a and cmd+shift+v to Zoom directly to toggle the audio and video. Check out the demo after the break.

As you might expect, we’ve seen a couple of videoconference survival hacks over the past few months. Need to show something or work with your hands, but only have one camera? All you need is a mirror, a clothespin, and a length of wire for a simple split-screen setup.

Continue reading “Panic Button Is An Audio-Visual Parachute Out Of Zoom Calls”

Baby Keyboard Is Really Three Boards

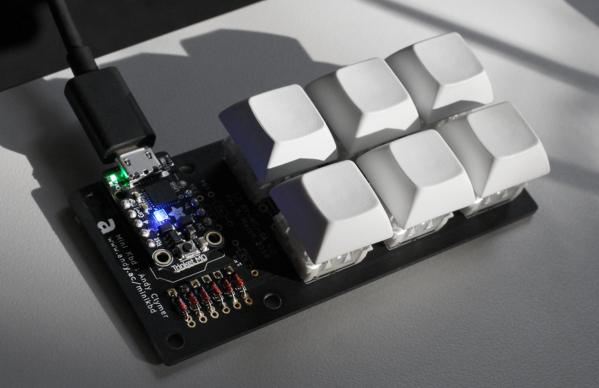
Just when we think we’ve peeped all the cool baby keebs out there, another think comes along. This bad boy built by [andyclymer] can be configured three different ways, depending on what kind of control you’re after.

As designed, the PCB can be used as a six-switch macro keyboard, or a rotary encoder with two switches, or a pair of rotary encoders. It’s meant to be controlled with Trinket M0, which means it can be programmed with Arduino or CircuitPython.

This could really only be cooler if the key switch PCB holes had sockets for hot-swapping the switches, because then you could use this thing as a functional switch tester. But hey, you can always add those yourself.

If you’re in the market for purpose-built add-on input device, but either don’t have the purpose nailed down just yet, or aren’t sure you want to design the thing yourself, this board would be a great place to start. Usually, all it takes is using someone else’s design to get used to using such a thing, at which point it’s natural to start thinking of ways to customize it. [andyclymer] is selling these boards over on Tindie, or you can roll your own from the repo.

Need just a few more inputs? We’ve got you covered.

Don’t Hang Christmas Lights, Embed Them

Finding it hard to get into the holiday spirit this year? Maybe you just need a timely project to light up the evenings until Santa (or Krampus) pays your house a visit. Whoever visits this season, delight or distract them with a 3D printed tree featuring embedded RGB LEDs.

[MakeTVee] printed this tree in four stages to make it a little bit easier to wire everything up. Each stage has six LEDs embedded in a 5mm transparent layer at the bottom. The top stage has a second color change to make a tree topper that holds a single LED. The color change feature in PrusaSlicer 2.0 made it easy to pause the print, insert the wired-up LEDs, and resume seamlessly in green filament. There’s a hidden base of what appears to be appropriately delicious cinnamon filament that holds the Trinket M0 and the power switch.

This lil’ tree looks great, especially considering how fiddly and nerve-wracking the wiring and assembly must have been. [MakeTVee] made it easier on himself with a printed wiring stencil that holds the LEDs in their star formation while he solders them up with magnet wire (a solid choice in our book). He thoughtfully included that stencil in the files which are up on the Prusa site. Dim the lights, grab a hot beverage, and check out [MakeTVee]’s build video after the break.

If you want a holiday hack that people can play with, invite them to paint your addressable tree.

Continue reading “Don’t Hang Christmas Lights, Embed Them”

The PewPew Console Is Coming To EuroPython 2019

EuroPython is a community-run developer conference, which began back in Belgium in 2002. In 2019, it’s happening in Basel, Switzerland from July 8 to 14, and there’s a special surprise in store for attendees this year. Conference attendees with be provided with a PewPew console for their hacking pleasure!

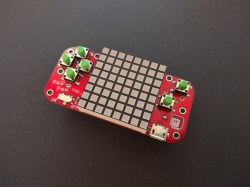
An earlier version of the PewPew handheld. There have been many and varied revisions of the hardware.

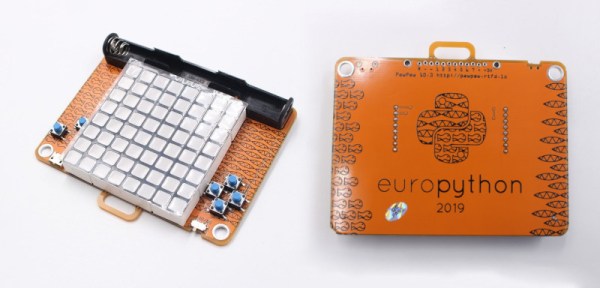
We’ve featured the project before on these hallowed pages; the earlier PewPew Featherwing console was a finalist in the 2017 Hackaday Prize Best Product Competition. At EuroPython, attendees will get to tinker with a special conference edition, which is the latest version of a long line of development versions. It runs the same microcontroller – ATSAMD21E18A – as the Adafruit Trinket M0, and is programmable with CircuitPython. The conference edition comes with a large 60 mm x 60 mm LED matrix, as well as an orange PCB with blue buttons to match the color scheme of the event.

We wager that conference attendees will enjoy hacking on the handheld console, and it makes a great platform for anyone who is new to embedded development with the Python language. Similar to badges, it makes a great pack-in for patrons, and the conference should be all the more enjoyable for it!

A Classy USB Knob For The Discerning Computerist

The keyboard and mouse are great, we’re big fans. But for some tasks, such as seeking around in audio and video files, a rotary encoder is a more intuitive way to get the job done. [VincentMakes] liked the idea of having a knob he could turn to adjust his system volume or move forward and backwards through a stream in VLC, but he also wanted to be able to repeatedly enter keyboard commands with it; something commercial offerings apparently weren’t able to do.

So he decided to build his own USB knob that not only looks fantastic, but offers the features he couldn’t find anywhere else. It’s another project which proves that DIY projects don’t have to look DIY. In fact, they can often give their commercial counterparts a run for their money. But this “Infinity USB Knob” isn’t just a pretty face, it allows the user to do some very interesting things such as quickly undo and redo changes to see how they compare.

As you might imagine, the electronics for this project aren’t terribly complex. The main components are the Adafruit Trinket M0 microcontroller and the EC11 rotary encoder itself. To provide nice visual feedback he added in a NeoPixel ring, but that’s not strictly necessary if you’re trying to rig this up yourself. Though we have to say the lighting effects are a big part of what makes this build look so good.

Though certainly not the only part. The aluminum enclosure, combined with the home theater style knob on the encoder, really give the finished product a professional look. We especially like his method of drilling out the top of the case and filling in the holes with epoxy to create easy and durable LED diffusers. Something to keep in mind for your next control panel build, perhaps.

[VincentMakes] has done an excellent job of documenting the hardware and software sides of this build on Hackaday.io, and gives the reader enough information that replicating this project should be pretty straightforward for anyone who’s interested. While we’ve seen several rotary encoder peripherals for the computer in the past, we have to admit this is one of the most compelling yet from a visual and usability standpoint. If this build doesn’t make you consider adding a USB knob to your arsenal, nothing will.

Continue reading “A Classy USB Knob For The Discerning Computerist”

Nintendo Switch Gets Internal Trinket Hardmod

If you haven’t been following the Nintendo Switch hacking scene, the short version of the story is that a vulnerability was discovered that allows executing code on all versions of the Switch hardware and operating system. In fact, it’s believed that the only way to stop this vulnerability from being exploited is for Nintendo to release a new revision of the hardware. Presumably there are a lot of sad faces in the House of Mario right about now, but it’s good news for us peons who dream of actually controlling the devices we purchase.

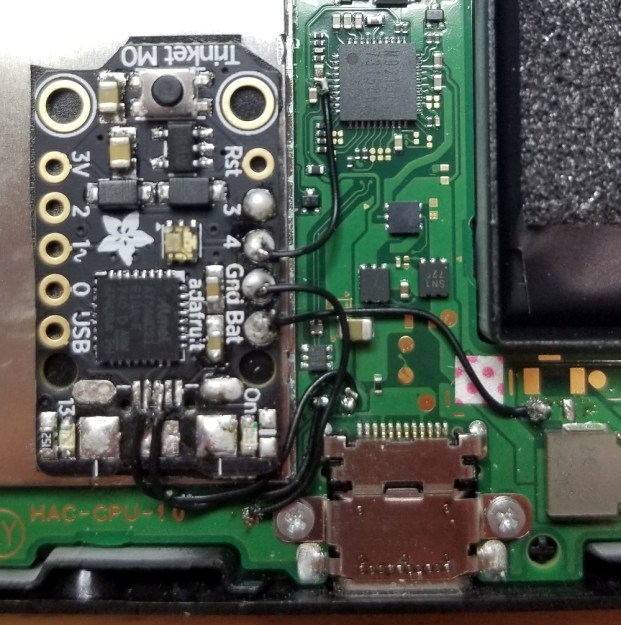
To run your own code on Nintendo’s latest and greatest, you must first put it into recovery mode by shorting out two pins in the controller connector, and then use either a computer or a microcontroller connected to the system’s USB port to preform the exploit and execute the binary payload. It’s relatively easy, but something you need to do every time you shut the system down. But if you’re willing to install an Adafruit Trinket M0 inside your Nintendo Switch, you can make things a little easier.

Stemming from work done by [atlas44] and [noemu], the final iteration of this mod was created by [Quantum-cross]. The general idea is to strip down the Trinket M0 board to as small as possible by removing the USB port and a few capacitors, and then install it inside the Switch’s case. By wiring it up to power, the back of the USB-C connector, and the controller connector, the Trinket can interact with all the key components involved in the exploit.

You can even use the Switch’s USB port to update the firmware on the Trinket to load different payloads, though in his walkthrough video after the break, [xboxexpert] mentions eventually this won’t really be necessary as the homebrew software environment on the Switch matures. Indeed, there will almost certainly come a time when performing this exploit on every boot of the system will be made unnecessary, rendering this modification obsolete. But until then, this is a pretty slick way of getting your feet wet in the world of Switch hacking.

It was only six months or so back that we were reading about the first steps towards running arbitrary code on the Nintendo Switch, and just a few months prior to that we saw people experimenting with controlling the system with a microcontroller.

Continue reading “Nintendo Switch Gets Internal Trinket Hardmod”