The Wiimote is a fantastic tool for hackers, given their affordability and how easy they are to work with. [Gareth] had a “eureka” moment while working on another Wiimote-based project, and with some alterations, converted it into an electronic whiteboard.
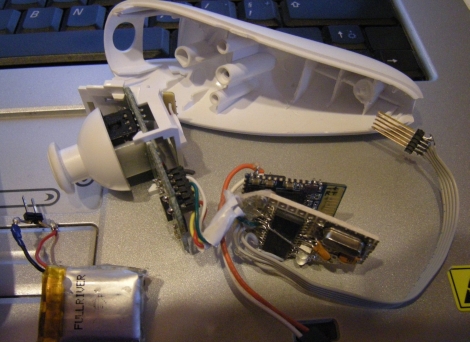
The whiteboard was built using the IR sensor he extracted from a Wiimote, which is wired to an EasyProp board to process the input. The Wiimote is aimed at a LCD screen, which can be “drawn” upon using a light pen he constructed from an IR led and a few batteries. Any movement of the pen is tracked by the Wiimote’s IR sensor and converted to an XY coordinate, which is then painted on the screen. The sensor has the ability to track up to four points at a time, so you can theoretically use up to four pens simultaneously.
[Gareth] points out that the sensor is not limited to tracking small displays, as the white board can be easily scaled up in size using any kind of rear projection device.
Continue reading to see a video of his whiteboard in action.
Continue reading “Wiimote-based Whiteboard Lets You Write On Any Surface”