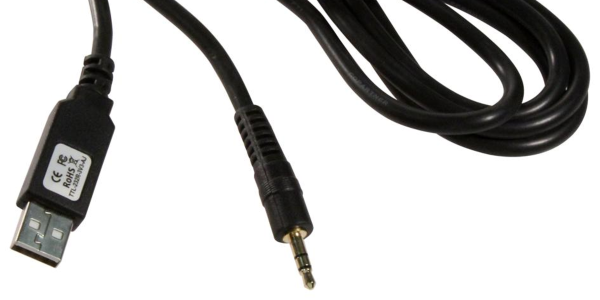
What is the easiest way to get audio from a WAV file into a line-level format, ready to be plugged into the amplifier of a HiFi audio set (or portable speaker)? As [Konrad Beckmann] demonstrated on Twitter, all you really need is a UART, a cable and a TRS phono plug. In this case a USB-TTL adapter based around the FTDI FT232R IC: the TTL-232R-3V3-AJ adapter with 12 Mbps USB on one end, and a 3 Mbps UART on the other end.
[Konrad] has made the C-based code available on GitHub. Essentially what happens underneath the hood is that it takes in a PCM-encoded file (e.g. WAV). As a demonstration project, it requires the input PCM files to be a specific sample rate, as listed in the README, which matches the samples to the baud rate of the UART. After this it’s a matter of encoding the audio file, and compiling the uart-sound binary.
The output file is the raw audio data, which is encoded in PDM, or Pulse-Density Modulation. Unlike Pulse-Code Modulation (PCM), this encoding method does not encode the absolute sample value, but uses binary pulses, the density of which corresponds to the signal level. By sending PDM data down the UART’s TX line, the other side will receive these bits. If said receiving device happens to be an audio receiver with an ADC, it will happily receive and play back the PDM signal as audio. As one can hear in the video embedded in the tweet, the end result is pretty good.
If we look at at the datasheet for the TTL-232R-3V3-AJ adapter cable, we can see how it is wired up:
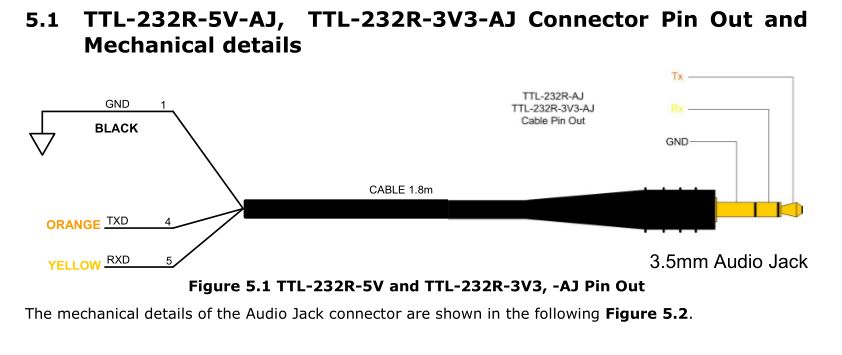 When we compare this to the wiring of a standard audio TRS jack, we can see that the grounds match in both wirings, and TX (RX on the receiving device) would match up with the left channel, with the right channel unused. A note of caution here is also required: this is the 3.3V adapter version, and it lists its typical output high voltage as 2.8V, which is within tolerances for line-level inputs. Not all inputs will be equally tolerant of higher voltages, however.
Plugging random TRS-equipped devices into one’s HiFi set, phone or boombox is best done only after ascertaining that no damage is likely to result. Be safe, and enjoy the music.
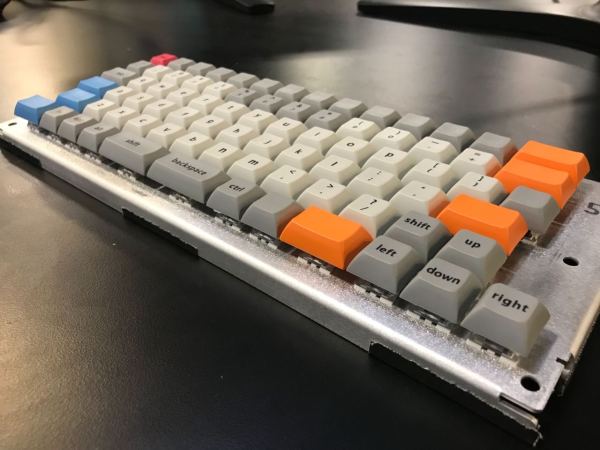
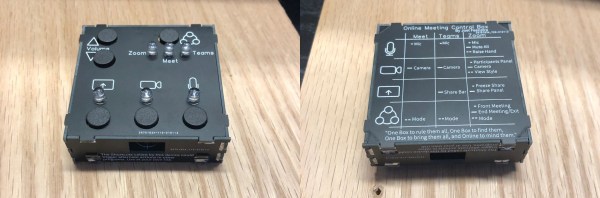
 Feature wise all the usual hallmarks of a well designed keyboard are here. The Launch uses hostswap sockets to make it easy to install the usual Cherry MX compatible switch options, and includes per-key RGB backlighting courtesy of SK6805 LEDs. The ATmega32U4 runs the popular and extremely capable QMK firmware instead of something bespoke, so it should be easy to customize to the user’s desire.