A giant, 3D-printed key switch that sends F to pay respects.

Big ‘F’ Key To Pay Big Respects

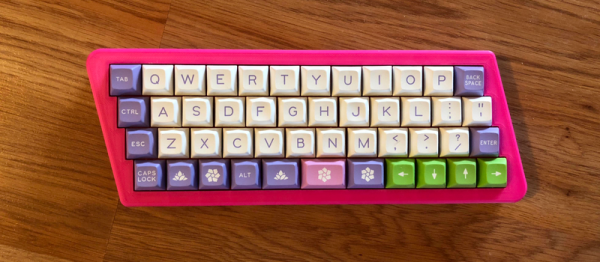
So your ally was slain. Your comrade has fallen. And somehow, that capital F coming from that tiny key is supposed to convey your respect? Please. What you need is a giant, dedicated F key that matches the size of your respect. And [Jaryd_Giesen] is gonna teach you how to build your own. Well, kind of. Between the Thingiverse build guide and the hilarious build video below, you’ll get the gist.

Making a custom spring using a drill and a 3D printed dowel.
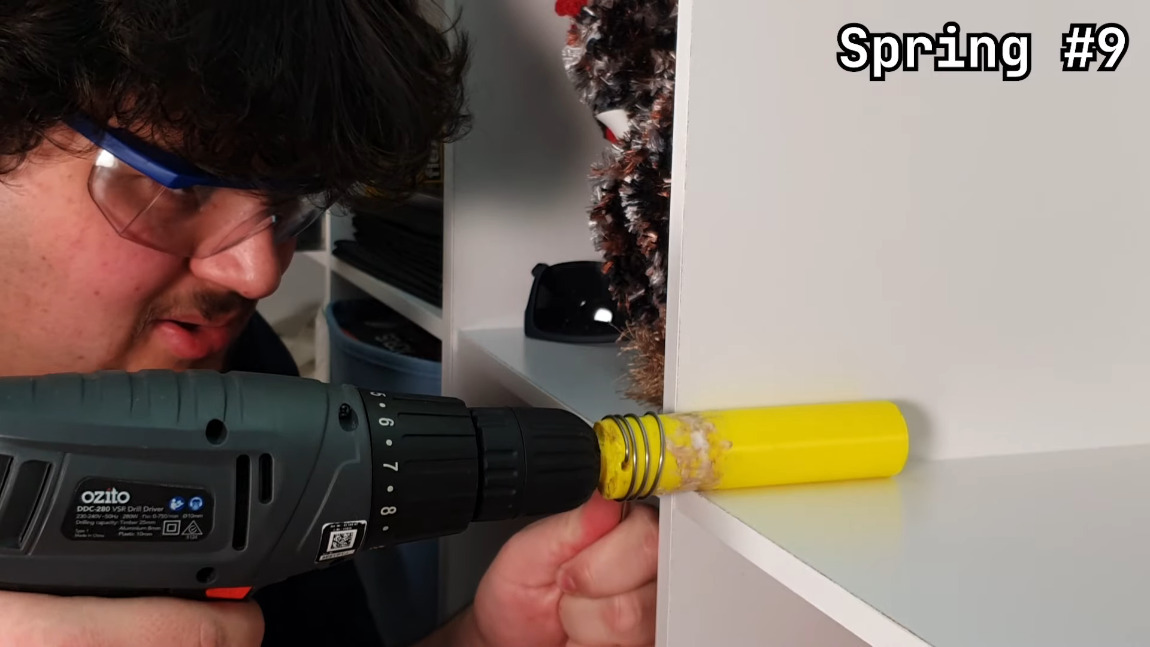
One of the coolest things about this build is the custom spring. Between a birthday time crunch and lockdown, there was just no way to source a giant spring in two days, so [Jaryd] printed a cylinder with a hole in it to chuck into a drill and stand in for a lathe. Ten attempts later, and the perfect spring was in there somewhere.

We love the level of detail here — making a pudding-style keycap to match the main keyboard is the icing on this clacky cake. But the best part is hidden away inside: the stem of the giant switch actuates a regular-sized key switch because it’s funnier that way. Since it’s a giant Gateron red, it doesn’t exactly clack, but it doesn’t sound linear, either, mostly because you can hear the printed pieces rubbing together. Check out the build video after the break, and hit up the second video if you just want to hear the thing.

Seeing things embiggened is one of our favorite things around here. Some things are just for looks, but other times they’re useful tools.
Continue reading “Big ‘F’ Key To Pay Big Respects”

Micro Macro Keyboard Is ‘Mega-Based

There’s a certain kind of joy that comes in throwing something together from spare parts, or from finding utility in a proof of concept for another project. [Clewsy] is cooking up something clacky and built this baby keeb to prove some stuff out, such as reading a key matrix. Now it’s become a music/media controller that looks great next to a giant matching volume knob.

Beneath the gently backlit Gateron blues is a custom ATMega32u4-based board, which is viewable through the clear acrylic bottom plate. That’s a nice touch. We’re not sure if the wood came from a picture frame, but if not, they seem like a great candidates for enclosure material.

This keeb looks fantastic, and we are partial to both the clear and the chrome keycaps. We can only hope [Clewsy] sends the details of the next build our way.

If you want to get started building keyboards, you can’t go wrong with a macro keyboard like this one. If you have way more than four macros in mind, build something bigger, like a custom game pad with a joystick.

Inputs Of Interest: X-Bows Ergo-Mechanical Keyboard

Okay, let’s just get this out of the way up front, shall we? This ergonomic mechanical keyboard was a free sample offered to me by X-Bows. They contacted me after I expressed interest in trying one in the comments of my post about the Kinesis Advantage. I had my doubts about this keyboard as far as my own personal ergonomic needs go, which are admittedly on the extreme side. TL;DR: I won’t be abandoning my curvy girls anytime soon. But I will say that I’m definitely impressed by the X-Bows.

X-Bows was founded by a doctor who saw a lot of RSI issues in programmers and writers and decided to take matters into his own hands. The keyboard was born on Kickstarter in 2017 and now comes in three models. They sent me the mid-range model called The Knight, which retails for $249, but seems to be on permanent sale for $199. The top-of-the-line Knight Plus has a magnetic, detachable 10-key that can attach to either side. Continue reading “Inputs Of Interest: X-Bows Ergo-Mechanical Keyboard”

Micro Macro Keyboard Makes A Major Difference

Media keyboards are nice in theory. But in practice they never have all the keys you want, and they almost always have a few you don’t. Sure, you could maybe reassign the ones you don’t use, but then the caps are wrong, and it’s a whole thing. So really, the only winning move is to make a micro macro keyboard as [littleSilvr] did to make all your shortcuts one-button accessible.

This lovely input has an Arduino Pro Micro for a brain, and Gateron browns for brawn. That knob there is a rotary encoder, not a potentiometer, because endless volume knob twiddling is just so much nicer. In case you’re wondering, those shortcuts open Fusion 360 and Cura, but we’re still not sure what the hyphen does.

Can we talk about those keycaps, though? [littleSilvr] used [Make Anything]’s process of of printing in multi-color with a single extruder. The technique involves building a vector for each color, each of which gets its own STL file. Then you add retraction as you go up through the layers, slow the print speed, change filament colors while the nozzle and bed are still warm, and voila, a vibrant canvas of colors.

If you don’t have a printer and you don’t mind a bit of compromise on the number of inputs, try basing your build on an existing input, like an old rotary telephone dialer.

Via r/duino

Custom Game Pad Can Reprogram Itself

In the heat of the moment, gamers live and die by the speed and user-friendliness of their input mechanisms. If you’re team PC, you have two controllers to worry about. Lots of times, players will choose a separate gaming keyboard over the all-purpose 104-banger type.

When [John Silvia]’s beloved Fang game pad went to that LAN party in the sky, he saw the opportunity to create a custom replacement exactly as he wanted it. Also, he couldn’t find one with his desired layout. Mechanical switches were a must, and he went with those Cherry MX-like Gaterons we keep seeing lately.

This 37-key game pad, which [John] named Eyetooth in homage to the Fang, has a couple of standout features. For one, any key can be reprogrammed key directly from the keypad itself, thanks to built-in macro commands. It’s keyboard-ception!

One of the macros toggles an optional auto-repeat feature. [John] says this is not for cheating, though you could totally use it for that if you were so inclined. He is physically unable to spam keys fast enough to satisfy some single-player games, so he designed this as a workaround. The auto-repeat’s frequency is adjustable in 5-millisecond increments using the up /down macros. There’s a lot more information about the macros on the project’s GitHub.

Eyetooth runs on an Arduino Pro Micro, so you can either use [John]’s code or something like QMK firmware. This baby is so open source that [John] even has a hot tip for getting quality grippy feet on the cheap: go to the dollar store and look for rubber heel grippers meant to keep feet from sliding around inside shoes.

If [John] finds himself doing a lot of reprogramming, adding a screen with a layout map could help him keep track of the key assignments.

Arduino Keyboard Is Gorgeous Inside And Out

While the vast majority of us are content to plod along with the squishy chiclet keyboards on our laptops, or the cheapest USB membrane keyboard we could find on Amazon, there’s a special breed out there who demand something more. To them, nothing beats a good old-fashioned mechanical keyboard, where each key-press sounds like a footfall of Zeus himself. They are truly the “Chad” of the input device world.

But what if even the most high end of mechanical keyboards doesn’t quench your thirst for spring-loaded perfection? In that case, the only thing left to do is design and build your own. [Matthew Cordier] recently unveiled the custom mechanical keyboard he’s been working on, and to say it’s an elegant piece of engineering is something of an understatement. It may even look better inside than it does on the outside.

The keyboard, which he is calling z.48, is based around the Arduino Pro Micro running a firmware generated on kbfirmware.com, and features some absolutely fantastic hand-wiring. No PCBs here, just a rainbow assortment of wire and the patience of a Buddhist monk. The particularly attentive reader may notice that [Matthew] used his soldering iron to melt away the insulation on his wires where they meet up with the keys, giving the final wiring job a very clean look.

Speaking of the keys, they are Gateron switches with DSA Hana caps. If none of those words mean anything to you, don’t worry. We’re through the Looking Glass and into the world of the keyboard aficionado now.

Finally, the case itself is printed on a CR-10 with a 0.3 mm nozzle and 0.2 mm layers giving it a very fine finish. At 70% infill, we imagine it’s got a good deal of heft as well. [Matthew] mentions that a production case and a PCB are in the cards for the future as he hopes to do a small commercial run of these boards. In the meantime we can all bask in the glory of what passes for a prototype in his world.

We’ve seen some exceptionally impressive mechanical keyboards over the years, including the occasional oddity like the fully 3D printed one and even one that inexplicably moves around. But this build by [Matthew] has to be one of the most elegant we’ve ever come across.

An Awesome Open Mechanical Keyboard

Who doesn’t want a little added functionality to their  lives? Feeling a few shortcut keys would make working in Eagle a bit smoother, [dekuNukem] built his own programmable mechanical keypad: kbord.

It sports vibrant RGB LED backlight effects with different animations, 15 keys that execute scripts — anything from ctrl+c to backdoors — or simple keystrokes, up to 32 profiles, and a small OLED screen to keep track of which key does what!

kbord is using a STM32F072C8T6 microcontroller for its cost, speed, pins, and peripherals, Gateron RGB mechanical keys — but any clear key and keycaps with an opening for the kbord’s LEDs will do — on a light-diffusing switch plate, and SK6812 LEDs for a slick aesthetic.

Check out the timelapse video tour of his build process after the break! (Slightly NSFW, adolescent humor for a few seconds of the otherwise very cool video. Such is life.)

Continue reading “An Awesome Open Mechanical Keyboard”