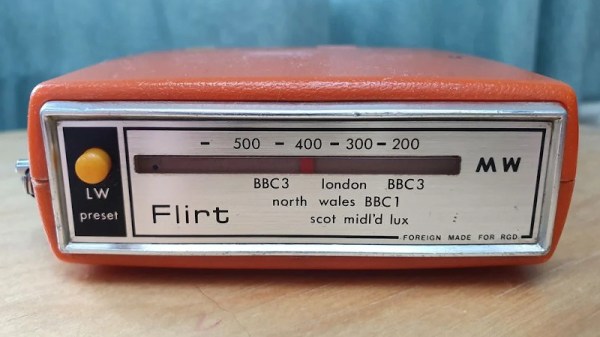
Monitor Your 3D Printer With Node-RED And Tasker

Anyone with a desktop 3D printer knows that it can be a bit nerve-wracking to leave the machine alone for any extended period of time. Unfortunately, it’s often unavoidable given how long more complicated prints can take. With big prints easily stretching beyond the 20 hour mark, at some point you’re going to need to leave the house or go to sleep. We hope, anyway.

In an effort to make his time away from his printer a bit less stressful, [Mat] from NotEnoughTECH has put together a comprehensive framework for monitoring his machine on the go. After looking at existing remote monitoring solutions, he found none gave him the level of information he was after. His system collects up an incredible number of data points about the printer’s current status and pushes it all to his Android phone as a rich notification. Best of all, he’s documented the entire system in exquisite detail for anyone else who might want to follow in his footsteps.

There’s a considerable amount of hardware and software involved in this system, and getting it up and running won’t be quite as straightforward as using some of the turn-key solutions out there. Octoprint is responsible for controlling and monitoring the printer, and [Mat] is pulling data from its API using Node-RED. That data is formatted and ultimately delivered to his Android device as a notification with Tasker. On the hardware side he’s got a Sonoff POW R2 to not only turn the printer on and off but measure its energy consumption, a USB camera to provide a live view of the printer, and a couple of Raspberry Pis to run it all.

Even if you don’t have a 3D printer, or maybe just don’t leave the house to begin with, the video [Mat] has put together after the break that shows how all the elements of this system are pulled together in Node-RED is a fascinating look at the flow-based visual programming tool. Similarly, it’s a great demonstration on how Tasker can be used to add some very slick Android notifications for your project without having to commit to developing a native application for the platform.

If you like the idea of remotely monitoring your printer but aren’t ready to dive into the deep end like [Mat], there are easier options. With a Raspberry Pi running Octoprint added to your 3D printer and one of the existing mobile monitoring and control front-ends installed, you’ll be well on the way to tackling those big prints without having to pitch a tent in the lab.

Continue reading “Monitor Your 3D Printer With Node-RED And Tasker”

Not All Raspberry Pi Laptops Have QWERTY Keyboards And Screens

Our recent coverage of a Raspberry Pi Zero inside the official Pi keyboard prompted a reader to point us to another far more unusual keyboard with a Pi Zero inside it. It may be a couple of years old, but [Mario Lang]’s Braille keyboard and display with built-in Pi is still an interesting project and one that should give sighted readers who have not encountered a Braille display an introduction to the technology.

The model in question is a Handy Tech Active Star 40, which seems to have been designed to have a laptop sit on top of it. A laptop was not the limit of its capabilities, because it also has a compartment with a handy USB connector that was intended to take a smartphone and thus makes a perfect receptacle for a Pi Zero. Sadly the larger boards are a little tall with their connectors.

If this hack were preformed today he would undoubtedly have used a Pi Zero W, but since the Zero he had did not possess WiFi he relied upon a Bluetooth dongle for connectivity to the outside world. The BRLTTY screen reader provides a Braille interface to the Linux console, resulting in an all-in-one Braille computer in a very compact form factor.

This is one portable Braille computer, but it’s by no means the only one we’ve seen. Thanks [Simon Kainz] for the tip, and here’s a nod to the Pi keyboard that inspired him.

Here’s The First Person To Put A Pi In The Raspberry Pi Keyboard

Last week, the Raspberry Pi foundation released the first official Raspberry Pi-branded keyboard and mouse. As a keyboard, it’s probably pretty great; it’s clad in a raspberry and white color scheme, the meta key is the Pi logo, there are function keys. Sure, the Ctrl and Caps Lock keys are in their usual, modern, incorrect positions (each day we stray further from God’s light) but there’s also a built-in USB hub. Everything balances out, I guess.

The Pi keyboard started shipping this week, and it took two days for someone to put a Pi zero inside. Here’s how you do it, and here’s how you turn a Pi keyboard into a home computer, like a speccy or C64.

The parts required for this build include the official Pi keyboard, a Pi Zero W, an Adafruit Powerboost, which is basically the circuitry inside a USB power bank, and a LiPo battery. The project starts by disassembling the keyboard with a spudger, screwdriver, or other small wedge-type tool, disconnecting the keyboard’s ribbon cables, and carefully shaving down the injection molded webbing that adds strength to the keyboard’s enclosure. The project is wrapped up by drilling holes for a power LED, a button to turn the Pi on and off, and the holes for the USB and HDMI ports.

One shortcoming of this build is the use of a male-to-male USB cable to connect the keyboard half of the circuitry to the Pi. This can be worked around by simply soldering a few pieces of magnet wire from the USB port on the Pi to the USB input on the USB hub. But hey, doing it this way gives the Official Pi keyboard a convenient carrying handle, and when one of the ports breaks you’ll be able to do it the right way the second time. Great work.

Raspberry Pi Tracks Humans, Blasts Them With Heat Rays

Given how long humans have been warming themselves up, you’d think we would have worked out all the kinks by now. But even with central heating, and indeed sometimes because of it, some places we frequent just aren’t that cozy. In such cases, it often pays to heat the person, not the room, but that can be awkward, to say the least.

Hacking polymath [Matthias Wandel] worked out a solution to his cold shop with this target-tracking infrared heater. The heater is one of those radiant deals with the parabolic dish, and as anyone who’s walked past one on demo in Costco knows, they throw a lot of heat in a very narrow beam. [Matthias] leveraged a previous project that he whipped up for offline surveillance as the core of the project. Running on a Raspberry Pi with a camera, the custom software analyzes images and locates motion across the width of a frame. That drives a stepper that swivels a platform for the heater. The video below shows the build and the successful tests; however, fans of [Matthias] should prepare themselves for a shock as he very nearly purchases a lazy susan to serve as the base for the heater rather than building one.

We’re never disappointed by [Matthias]’ videos, and we’re always impressed by his range as a hacker. From DIY power tools to wooden logic circuits to his recent Lego chocolate engraver, he always finds ways to make things interesting.

Continue reading “Raspberry Pi Tracks Humans, Blasts Them With Heat Rays”

Let Your Pi Make A Pie Chart For Your Pie

March 14th is “Pi Day”, for reasons which should be obvious to our more mathematically inclined readers. As you are not reading this post on March 14th, that must mean we’re either fashionably late to Pi Day 2019, or exceptionally early for Pi Day 2020. But in either event, we’ve got a hack for you that celebrates the day using two things we have it on good authority most hackers overindulge in: food and needless complexity.

This project comes from [Mike MacHenry], and it’s just as straightforward as it looks. Put simply, he’s using a load cell connected to the Raspberry Pi to weigh an actual pie and monitor its change over time. As the pie is consumed by hungry hackers, a pie graph (what else?) is rendered on the attached screen to show you how much of the dessert is left.

One might say that this project takes a three dimensional pie and converts it to a two dimensional facsimile, but perhaps that’s over-analyzing it. In reality, it was a fun little hack [Mike] put together just because he thought it would be fun. Which is certainly enough of a motive for us. More practically though, if you’re looking for a good example for how to get a load cell talking to your non-edible Raspberry Pi, you could do worse than checking this out.

We’ve also got to give [Mike] extra credit for including the recipe and procedure for actually baking the apple pie used in the project. While we’re not 100% sure the MIT license [Mike] used is actually valid for foodstuffs, but believe it or not this isn’t the first time we’ve seen Git used in the production of baked goods.

A Raspberry Pi Terminal Fit For Fallout 76

The Fallout series of video games provide a wonderful alternative history that answers the question of what might have happened had the microchip never been invented. Yes, most things run on tubes, and apparently you can implement an AI that passes a Turing test in tubes (does the Turing test apply if you’re comparing it against NPCs?). Of course, as with all of computer history, the coolest parts of Fallout are the computer terminals, so [Pigeonaut] decided to build one. All the files are available, and if you have a Pi sitting around this is a good weekend project.

This terminal has a host of features that are well-suited for the modern vault dweller. Of note, the entire case is 3D printed, in multiple pieces. Sure, considering the display is an LCD it’s a tiny bit thick, but you don’t get the Atomic age aesthetic without a big CRT, do you? The keyboard is a standard, off-the-shelf mechanical keyboard for clicky goodness with vintage-style keycaps. There’s a 3.5″ USB floppy drive, because there’s nothing that will survive a nuclear holocaust like magnetic media. The rest of the build is a Raspberry Pi 3B+, which is more than enough compute power to open a door shaped like a gear.

As for what you would do with a retro-inspired Pi terminal, well, it would make a good computer for the workbench, and since the case is already designed for a 3.5″ drive, you could use this to archive some old media. If there’s one thing the apocalypse tells us, it’s that these old terminals will still be kicking after a few hundred years.

Social Media Jacket Puts Your Likes On Your Sleeve

The great irony of the social media revolution is that it’s not very social at all. Users browse through people’s pictures in the middle of the night while laying in bed, and tap out their approval with all the emotion of clearing their spam folder. Many boast of hundreds or thousands of “friends”, but if push came to shove, they probably couldn’t remember when they had last seen even a fraction of those people in the real world. Assuming they’ve even met them before in the first place. It’s the dystopian future we were all warned about, albeit a lot more colorful than we expected.

But what if we took social media tropes like “Likes” and “Follows”, and applied them to the real world? That’s precisely what [Tuang] set out to do with the “Social Touch Suit”, a piece of wearable technology which requires a person actually make physical contact with the wearer to perform social engagements. There’s even a hefty dose of RGB LEDs to recreate the flashy and colorful experience of today’s social media services.

Every social action requires that a specific and deliberate physical interaction be performed, which have largely been designed to mimic normal human contact. A pat on the shoulder signifies you want to follow the wearer, and adding them as a friend is as easy as giving a firm handshake. These interactions bring more weight to the decisions users make. For example, if somebody wants to remove you as a friend, they’ll need to muster up the courage to look you in the eye while they hit the button on your chest.

The jacket uses an Arduino to handle the low level functions, and a Raspberry Pi to not only provide the slick visuals of the touch screen display, but record video from the front and rear integrated cameras. That way you’ve even got video of the person who liked or disliked you. As you might expect, there’s a considerable energy requirement for this much hardware, but with a 5200 mAh LiPo battery in the pocket [Tuang] says she’s able to get a run time of 3 to 4 hours.

Considering how much gadgetry is packed into it, the whole thing looks remarkably wearable. We wouldn’t say it’s a practical piece of outerwear when fully decked out, but most of the electronic components can be removed if you feel like going low-key. [Tuang] also points out that for a garment to be functional it really needs to be washable as well, so being able to easily strip off the sensitive components was always an important part of the design in her mind.

The technology to sensors wearable and flexible is still largely in its infancy, but we’ve very excited to see where it goes. If projects like these inspire you, be sure to check out the presentation [Kitty Yeung] gave at the Hackaday Supercon where she talks about her vision for bespoke wearable technology. Continue reading “Social Media Jacket Puts Your Likes On Your Sleeve”