Ok, now this is something special. This is a home network and security system that would make just about anyone stop, and with jaw hanging agape, stare, impressed at the “several months of effort” it took [timekillerjay] to install their dream setup. Just. Wow.
Want a brief rundown of the diverse skill set needed to pull this off? Networking, home security, home automation, woodworking, running two thousand feet(!) of cat 6a cable, a fair hand at drywall work for the dozens upon dozens of patches, painting, staining, and — while not a skill, but is definitely necessary — an amazingly patient family.
Ten POE security cameras monitor the premises with audio recording, infrared, and motion detection capabilities. This is on top of magnetic sensors for five doors, and eleven windows that feed back to an ELK M1-Gold security system which effortlessly coordinates with an Insteon ISY994i smart home hub; this allows for automatic events — such as turning on lights after dark when a door is opened — to occur as [timekillerjay]’s family moves about their home. The ELK also allows [timekillerjay] to control other things around the house — namely the sprinkler system — via relays. [timekillerjay] says he lost track of how many smart switches are scattered throughout his home, but there are definitely 39 network drops that service the premises.
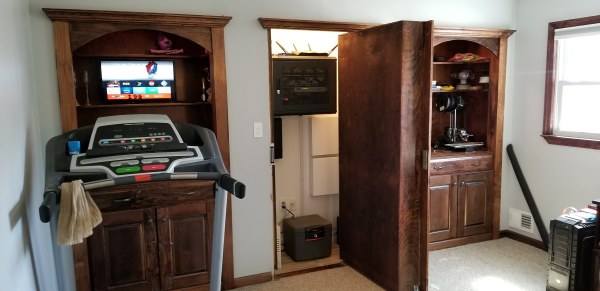
All of the crucial components are hidden in his office, behind a custom bookshelf. Building it required a few clever tricks to disguise the bookshelf for the secret door that it is, as well as selecting components with attention to how much noise they generate — what’s the point of a hidden security system if it sounds like a bunch of industrial fans?
An uninterruptible power supply will keep the entire system running for about 45 minutes if there is a power outage, with the cameras recording and system logging everything all the while. Not trusting the entrance to his vault to something from Batman, he’s also fitted the bookshelf with a 600lb magnetic lock that engages when the system is armed and the door already closed. A second UPS will keep the door secured for 6+ hours if the house loses power. Needless to say, we think this house is well secured.
[Via /r/DIY]