2023 Halloween Hackfest: Ouija Robot Is Even Creepier Than The Real Thing

When you’re a kid, nothing says spooky like turning off the lights and bringing out the Ouija board. For decades, this mystifying oracle has purported to channel the dead by spelling out messages using a board with numbers, letters, yes/no, and a heart-shaped windowed bit of plastic called a planchette.

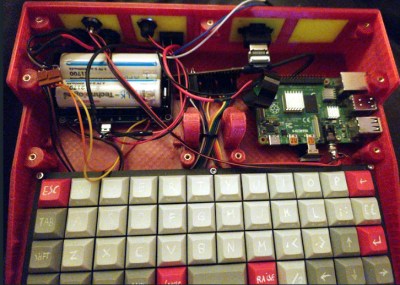
While the action of a standard Ouija board owes itself to something called the ideomotor phenomenon, this motorized Ouija robot by [Ronald McCollum] is powered by tweets.

That’s right, the mannequin hand uses the planchette to spell out the tweets with a rather crisp snap of the wrist. [Ronald] impressively coded all the positions by hand, with each letter being comprised of both a hand position and planchette position.

This project utilizes both an Adafruit Crickit board and a Raspberry Pi, mostly because [Ronald] wanted to use the Crickit for something, and added the Pi to spell out the tweets on the display in real time. Check it out in action after the break, and stick around for a bonus video of the numbers being laser-cut.

Speaking of creepy motion, here’s a refrigerator clock that uses those colorful alphanumeric magnets.

Continue reading “2023 Halloween Hackfest: Ouija Robot Is Even Creepier Than The Real Thing”

RP2040 picture on left by Phiarc, CC BY-SA 4.0, via Wikimedia

Kaluma Puts JavaScript On The RP2040

With a simple firmware update, Kaluma puts a lightweight JavaScript runtime on the Raspberry Pi Pico (which uses the RP2040 microcontroller), providing handy modules for file systems, graphics, networking, and more. Code for a simple LED blink can then look like:

// index.js
const led = 25;
pinMode(led, OUTPUT);
setInterval(() => {
digitalToggle(led);
}, 1000);

Development can then be done using tools that are very familiar to JavaScript developers, such as npm and flashing new code to a USB-connected Pico with the (Node.js-based) Kaluma command-line interface. Take a look at the GitHub repository for the project, or browse some of the projects made with Kaluma.

Much like with MicroPython, there’s value to be had in putting implementations of high-level languages on microcontrollers. Each new language opens embedded programming to a whole new group of coders. But it’s not just languages making their way to the RP2040. Wonderful projects such as emulating the ZX Spectrum on an RP2040 also happen.

Thanks to [Shri Hari Ram] for the tip!

Overclocking Raspberry Pi 5’s SoC To 3 GHz And 1 GHz GPU

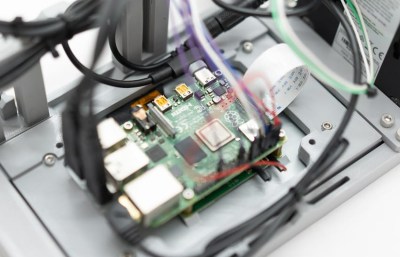
Overclocking computer systems is a fun way to extract some free performance, or at least see how far you can push the hardware before you run into practical limitations. The newly released Raspberry Pi 5 with BCM2712 SoC is no exception here, with Tom’s Hardware having a go at seeing how far both the CPU and GPU in the SoC can be pushed. The BCM2712’s quad Cortex-A76 CPU is normally clocked at 2.4 GHz and the VideoCore VII GPU at 800 MHz. By modifying some settings in the /boot/config.txt configuration file these values can be adjusted.

In order to verify that an overclock was stable, the Stressberry application was used, which fully loads the CPU cores. Here something like a combination of stress-ng and glxgears could also be used, to stress both the CPU and GPU. With the official actively cooled heatsink the CPU reached a temperature of 74°C with a whole board power usage of about 10 Watts. At idle this dropped to 3 Watts at 46°C. At these speeds, the multiple Raspberry Pi 5 units OCed by Tom’s Hardware were mostly stable, though one of the team’s boards experienced a few crashes. This suggests that this level of OCing could still be subject to luck of the draw, and long-term stability would have to be investigated as well.

As for the practical use cases of OCing your Raspberry Pi 5, benchmarks showed a marked uplift in compression and Sysbench benchmark scores, but OCing the GPU had no real positive impact on YouTube or 3D performance, leading even to a massive increase in dropped frames with video playback. This probably means that increasing the CPU clock may be beneficial, but OCing the GPU could be futile without also OCing the RAM frequency, if at all possible.

Realistically, the Raspberry Pi SoCs never were speed monsters, with even the Raspberry Pi 4B’s SoC being beaten handily in 2020 by a budget dual-core Intel CPU.  The current Intel Alder-Lake-N-based N100 SoC has a 6 Watt TDP and boosts up to 3.4 GHz while its Xe-LP-based iGPU (with AV1 decoding support) makes for a decent gaming experience within a ~16 Watt power envelope. Clearly, any OCing of the Raspberry Pi boards is more for the challenge of it, but then so is running the latest Intel CPU at 10 GHz with liquid nitrogen cooling.

A Raspberry Pi 5 Is Better Than Two Pi 4s

What’s as fast as two Raspberry Pi 4s? The brand-new Raspberry Pi 5, that’s what. And for only a $5 upcharge (with an asterisk), it’s going to the new go-to board from the British House of Fruity Single-Board Computers. But aside from the brute speed, it also has a number of cool features that will make using the board easier for a number of projects, and it’s going to be on sale in October. Raspberry Pi sent us one for review, and if you were just about to pick up a Pi 4 for a project that needs the speed, we’d say that you might wait a couple weeks until the Raspberry Pi 5 goes on sale.

Twice as Nice

On essentially every benchmark, the Raspberry Pi 5 comes in two to three times faster than the Pi 4. This is thanks to the new Broadcom BCM2712 system-on-chip (SOC) that runs four ARM A76s at 2.4 GHz instead of the Pi 4’s ARM A72s at 1.8 GHz. This gives the CPUs a roughly 2x – 3x advantage over the Pi 4. (Although the Pi 4 was eminently overclockable in the CM4 package.)

The DRAM runs at double the clock speed. The video core is more efficient and pushes pixels about twice as fast. The new WiFi controller in the SOC allows about twice as much throughput to the same radio. Even the SD card interface is capable of running twice as fast, speeding up boot times to easily under 10 sec – maybe closer to 8 sec, but who’s counting?

Heck, while we’re on factors of two, there are now two MIPI camera/display lines, so you can do stereo imaging straight off the board, or run a camera and external display simultaneously. And it’s capable of driving two 4k HDMI displays at 60 Hz.

There are only two exceptions to the overall factor-of-two improvements. First, the Gigabyte Ethernet remains Gigabyte Ethernet, so that’s a one-ex. (We’re not sure who is running up against that constraint, but if it’s you, you’ll want an external network adapter.) But second, the new Broadcom SOC finally supports the ARM cryptography extensions, which make it 45x faster at AES, for instance. With TLS almost everywhere, this keeps crypto performance from becoming the bottleneck. Nice.

All in all, most everything performance-related has been doubled or halved appropriately, and completely in line with the only formal benchmarks we’ve seen so far, it feels about twice as fast all around in our informal tests. Compared with a Pi 400 that I use frequently in the basement workshop, the Pi 5 is a lot snappier.

Continue reading “A Raspberry Pi 5 Is Better Than Two Pi 4s”

Dead E. Ruxpin Appears Alive And Well

What are you doing to scare trick-or-treaters this Halloween? Surely something, right? Well, Hackaday alum [CameronCoward] certainly has his holiday under control with Dead E. Ruxpin, a murderous, cassette tape-controlled animatronic bear.

Readers of a certain vintage will no doubt see the correlation to Teddy Ruxpin, an animatronic bear from the 1980s whose mouth moved as it read stories from cassette tapes. Cleverly, the engineers used one stereo channel for the story’s audio, and the other channel to control the bear’s mouth.

Dead E. Ruxpin takes this idea and expands it, using the same two channels to send audio and control three servo motors that move both arms and the mouth. How is this possible? By sending tones built from one or more frequencies.

Essentially, [Cameron] assigned a frequency to each movement: mouth open/closed, and left and/or right arm up or down. These are all, of course, synced up with specific points in the audio so Dead E. doesn’t just move randomly, he dances along with the music.

The bear is actually a hand puppet, which leaves room for a 3D-printed skeleton that holds the RP2040 and the servos and of course, moves the puppet’s parts. We can’t decide if we prefer the bulging bloodshot eyes, or think the cutesy original eyes would have made a scarier bear. Anyway, check out the build/demo video after the break to see it in action.

Are you now into Teddy Ruxpin? Here’s a bit more about those scare bears. And don’t forget, Halloween Hackfest runs now until October 31st.

Continue reading “Dead E. Ruxpin Appears Alive And Well”

WhisperFrame Depicts The Art Of Conversation

At this point, you gotta figure that you’re at least being listened to almost everywhere you go, whether it be a home assistant or your very own phone. So why not roll with the punches and turn lemons into something like a still life of lemons that’s a bit wonky? What we mean is, why not take our conversations and use AI to turn them into art? That’s the idea behind this next-generation digital photo frame created by [TheMorehavoc].
Essentially, it uses a Raspberry Pi and a Respeaker four-mic array to listen to conversations in the room. It listens and records 15-20 seconds of audio, and sends that to the OpenWhisper API to generate a transcript.
This repeats until five minutes of audio is collected, then the entire transcript is sent through GPT-4 to extract an image prompt from a single topic in the conversation. Then, that prompt is shipped off to Stable Diffusion to get an image to be displayed on the screen. As you can imagine, the images generated run the gamut from really weird to really awesome.

The natural lulls in conversation presented a bit of a problem in that the transcription was still generating during silences, presumably because of ambient noise. The answer was in voice activity detection software that gives a probability that a voice is present.

Naturally, people were curious about the prompts for the images, so [TheMorehavoc] made a little gallery sign with a MagTag that uses Adafruit.io as the MQTT broker. Build video is up after the break, and you can check out the images here (warning, some are NSFW).

Continue reading “WhisperFrame Depicts The Art Of Conversation”

Button, Button, Who’s Got The (Pico) Button?

There is an episode of Ren and Stimpy with a big red “history eraser’ button that must not be pressed. Of course, who can resist the temptation of pressing the unpressable button? The same goes for development boards. If there is a button on there, you want to read it in your code, right? The Raspberry Pi Pico is a bit strange in that regard. The standard one lacks a reset button, but there is a big tantalizing button to reset in bootloader mode. You only use it when you power up, so why not read it in your code? Why not, indeed?

Turns out, that button isn’t what you think it is. It isn’t connected to a normal CPU pin at all. Instead, it connects to the flash memory chip. So does that mean you can’t read it at all? Not exactly. There’s good news, and then there’s bad news.

The Good News

The official Raspberry Pi examples show how to read the button (you have read all the examples, right?). You can convert the flash’s chip-select into an input temporarily and try to figure out if the pin is low, meaning that the button is pushed. Sounds easy, right?

Continue reading “Button, Button, Who’s Got The (Pico) Button?”