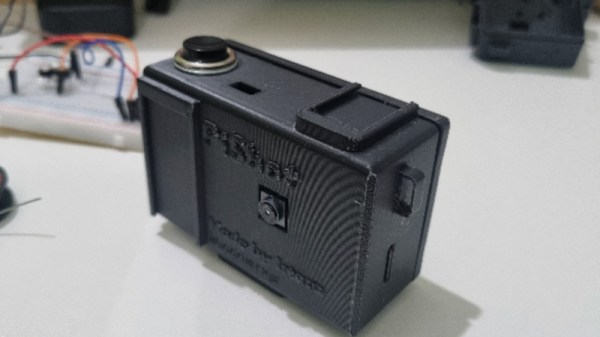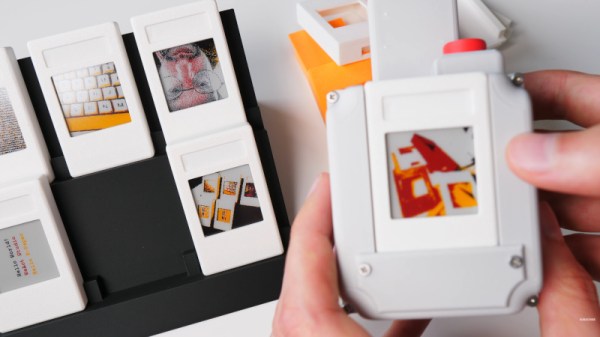
The formula for a Raspberry Pi camera is by now a straightforward one: take a Pi and camera module, add a display, buttons, and battery, and you’re done. This doesn’t mean that there’s no scope for more though, and [Irtaza2009] has one in the PiShot. It’s a few months old now but the repository is still being updated.
The 3D printed case follows a compact camera form factor with the screen on the rear, and a cold shoe on top. Inside is a Pi Zero 2 W and a Camera Module 3, with an 18650 cell and battery management/power supply board. The buttons are tactile switches hooked up to GPIOs, and the screen is an ST7789 SPI display.
For software there’s a Python script, which should do the job. We’ve not tested this one, but our experience is that slowness is the Achilles’ heel of Python based Pi cameras. We hope this one has managed to eke out some performance.
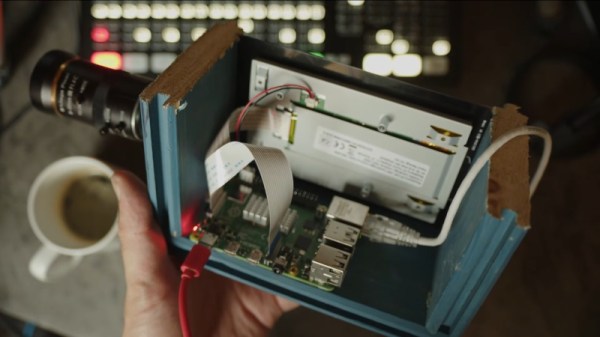
The Raspberry Pi has brought digital camera experimentation within the reach of everybody, with its combination of an accessible computing platform and some almost-decent camera sensors. If there’s a flaw in the Pi as a camera though, it lies in the software, which can be slow and frustrating to use. [Martijn Braam] is here with an interesting project that might yield some useful results in this direction, he’s making a Raspberry Pi studio camera.
His camera hardware is very straightforward, a Pi 5 and touchscreen with the HD camera module in a rough but serviceable wooden box. The interesting part comes in the software, in which he’s written a low-latency GUI over an HDMI output camera application. It’s designed to plug into video mixing hardware, and one of the HDMI outputs carries the GUI while the other carries the unadulterated video. We can see this used to great effect with for example OBS Studio. It’s for now a work in progress as you can see in the video below the break, but we expect that it can only get better.
The video below exposes the obvious flaw in many Pi camera setups, that the available lenses don’t match the quality of the sensor, in that good glass ain’t cheap. But we think it’s one to watch, and could provide competition for CinePi.
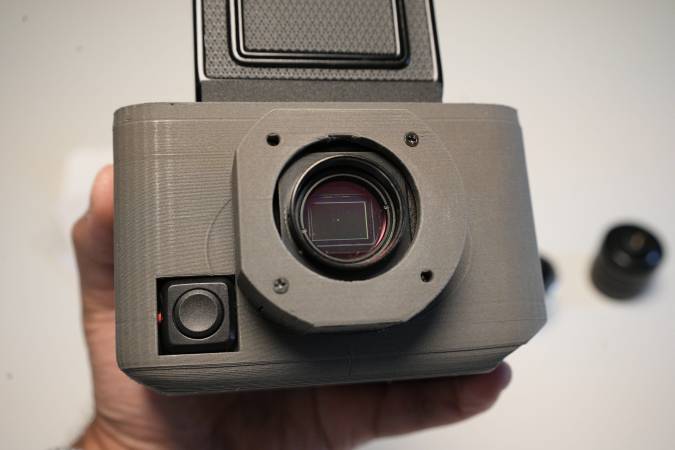
When someone hacks together a digital camera with a Raspberry Pi, the limiting factor for serious photography is usually the sensor. No offense to the fine folks at the foundation, but even the “HQ” camera, while very good, isn’t quite professional grade. That’s why when photographer [Malcolm Wilson] put together this “Mini Hasselblad” style camera, he hacked in a 1″ sensor.
The sensor in question came in the form of a OneInchEye V2, from [Will Whang] on Tindie. The OneInch Eye is a great project in its own right: it takes a Sony IMX283 one-inch CMOS image sensor, and packages it with an IMU and thermal sensor on a board that hooks up to the 4-lane MIPI interface on the Raspberry Pi CM4 and Pi 5.
Sensor in hand, [Malcolm] needed but to figure out power and view-finding. Power is provided by a Geekworm X1200 battery hat. That’s the nice thing about the Pi ecosystem: with so many modules, it’s like LEGO for makers. The viewfinder, too, uses 4″ HDMI screen sold for Pi use, and he’s combined it with a Mamiya C220 TLR viewfinder to give that look-down-and-shoot effect that gives the project the “Mini Hasselblad” moniker.
These are a few images [Malcom] took with the camera. We’re no pros, but at least at this resolution they look good.The steel-PLA case doesn’t hurt in that regard either, with the styling somewhat reminiscent of vintage film cameras. The “steel” isn’t just a colour in this case, and the metal actually makes the PLA conductive, which our photographer friend learned the hard way. Who hasn’t fried components on a surface they didn’t realize was conductive, though? We bet the added weight of the steel in the PLA makes this camera much nicer to hold than it would be in plain plastic, at least.
The OneInchEye module came set up for C-mount lenses, and [Malcolm] stuck with that, using some Fujinon TV lenses he already had on hand. [Malcolm] has released STL files of his build under a Creative Commons NonCommercial license, but he’s holding the code back for subscribers to his Substack.
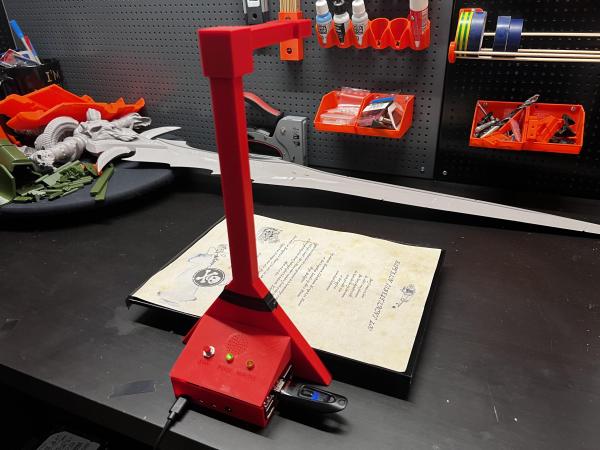
The build is probably what you’re expecting — it’s essentially a Raspberry Pi (in this case a 4B), a V2 Pi camera, and a handful of custom 3D-printed parts. [Caelestis Cosplay] says they had never designed anything for printing before, and we think it looks great. There’s also a buzzer to indicate that the scan is starting (one beep) or has completed (two beeps), a ‘ready’ indicator, and a ‘working’ indicator.
Everything you’d need to build your own is available over on Instructables, including document scanner and controller scripts. Be sure to check it out in action after the break, and see it quickly scan in a document and put it on a thumb drive.
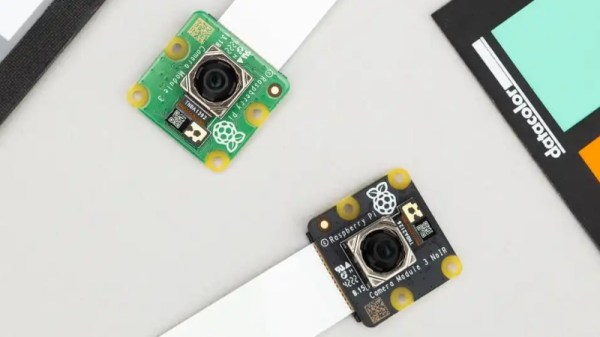
There’s nothing new about a Pi camera module as they’ve been available for years in both official and third party forms, so to be noteworthy the new one has to offer something a bit special. It uses a 12 megapixel sensor, and is available both in autofocus and wide angle versions in both standard and NoIR variants. Wide angle and autofocus modules may be new in the official cameras, but these are both things which have been on the third-party market for years.
So if an autofocus camera module for your Pi isn’t that new, what can we bring to a review that isn’t simply exclaiming over the small things? Perhaps it’s better instead to view the new camera in the context of the state of the Pi camera ecosystem, and what better way to do that than to turn a Pi and some modules into a usable camera! Continue reading “Do You Need The Raspberry Pi Camera Module V3?”→
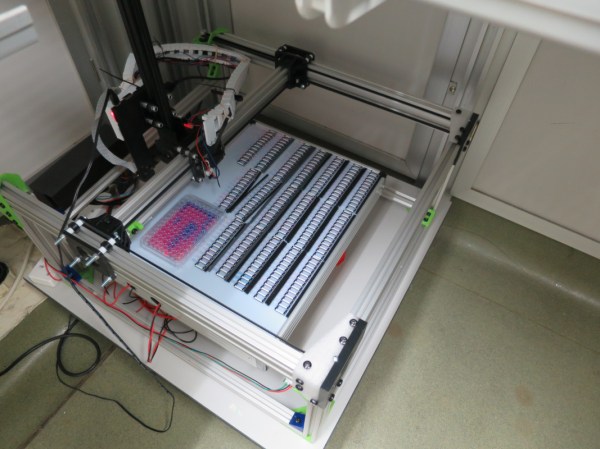
Working in a university or research laboratory on interesting, complicated problems in the sciences has a romanticized, glorified position in our culture. While the end results are certainly worth celebrating, often the process of new scientific discovery is underwhelming, if not outright tedious. That’s especially true in biology and chemistry, where scaling up sample sizes isn’t easy without a lot of human labor. A research group from Reading University was able to modify a 3D printer to take some of that labor out of the equation, though.
This 3D printer was used essentially as a base, with the printing head removed and replaced with a Raspberry Pi camera. The printer X/Y axes move the camera around to all of the different sample stored in the print bed, which allows the computer attached to the printer to do most of the work that a normal human would have had to do. This allows them to scale up massively and cheaply, presumably with less tedious inputs from a large number of graduate students.
While the group hopes that this method will have wide applicability for any research group handling large samples, their specific area of interest involves researching “superbugs” or microbes which have developed antibiotic resistance. Their recently-published paper states that any field which involves bacterial motility, colony growth, microtitre plates or microfluidic devices could benefit from this 3D printer modification.
Here’s something really wonderful. [Dave Akerman] wrote up the results of his attempt to use a high-altitude balloon to try to re-create a famous image of NASA’s Bruce McCandless floating freely in space with the Earth in the background. [Dave] did this in celebration of the 34th anniversary of the first untethered spacewalk, even going so far as to launch on the same day as the original event in 1984. He had excellent results, with plenty of video and images recorded by his payload.
80’s “Astronaut with MMU” model kit.
Adhering to the actual day of the spacewalk wasn’t the only hurdle [Dave] jumped to make this happen. He tracked down an old and rare “Astronaut with MMU” (Mobile Maneuvering Unit) plastic model kit made by Revell USA and proceeded to build it and arrange for it to remain in view of the cameras. Raspberry Pi Zero Ws with cameras, LoRA hardware, action cameras, and a UBlox GPS unit all make an appearance in the balloon’s payload.
Sadly, [Bruce McCandless] passed away in late 2017, but this project is a wonderful reminder of that first untethered spacewalk. Details on the build and the payload, as well as the tracking system, are covered here on [Dave]’s blog. Videos of the launch and the inevitable balloon burst are embedded below, but more is available in the summary write-up.