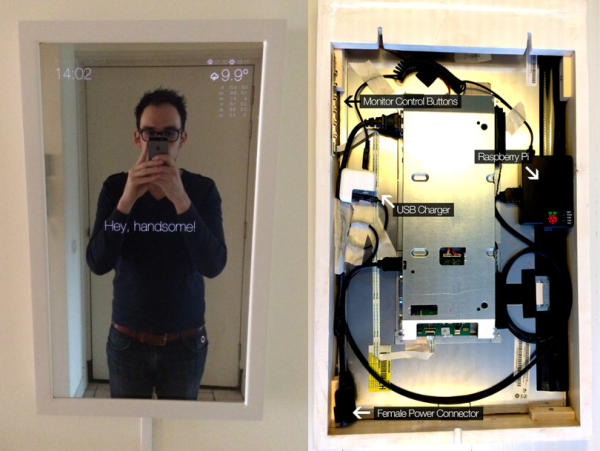
Who wouldn’t want a mirror that compliments them first thing in the morning? [Michael]’s Magic Mirror does this and more. [Michael] got the idea for his mirror during an epic Macy’s shopping trip with his girlfriend. While looking for a boyfriend chair, [Michael] noticed a mirror with a lighted sign behind it. Intrigued by the effect, [Michael] realized he could build it – and build it better!
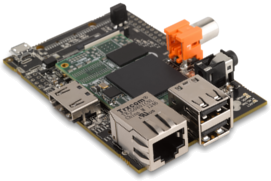
Back at home [Michael] set to work. The Magic Mirror uses a piece of one-way mirror, similar to infinity mirrors. Instead of LED’s and another mirror, [Michael] wanted to embed an entire monitor behind the glass. In order to keep the mirror thin, [Michael] needed a monitor with cables exiting toward the side or bottom rather than directly out the back. He found what he was looking for in an Iiyama monitor. Yanking the case off a brand new LCD can be a bit nerve-wracking, but [Michael] pulled it off in pursuit of a thin final product.
Magic Mirror’s frame is built with standard 2×4 lumber. [Michael] had the foresight to include some cooling holes for the heat generated by the monitor. The heavy 6.5Kg final product required a double mounting point.
With a good-looking case, it was time to get some equally good-looking data to display. [Michael] used a Raspberry Pi to drive his display. He switched the Pi’s display mode to portrait and installed Chromium in kiosk mode. The entire mirror is essentially a web page. [Michael] used some simple HTML, CSS and Javascript to pull time and weather data down from various feeds. The page is rendered in a clean Helvetica Nueve Neue font with matching icons. A handsome build indeed!
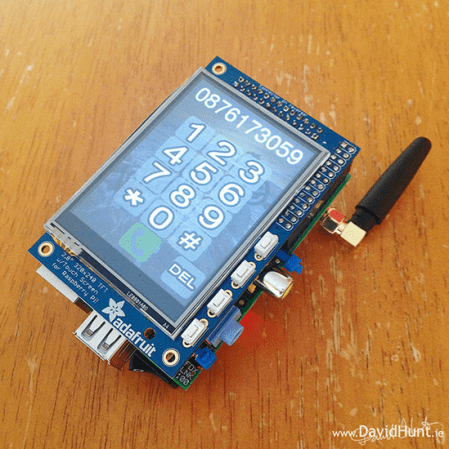 Have you ever dreamed of independence from smartphone bloatware? If you have a Raspberry Pi and an Adafruit TFT, you’re halfway to making your own version of
  Would you believe that some people think the internet is a time waster? Well, not at this particular address of course, but we can think of some other sites that are absolute rabbit holes without so much as a rousing game of croquet at the bottom. If you need help achieving what Tim Ferriss dubbed a Low Information Diet, there are browser extensions that will block your access to sites that keep you from getting things done. [Ivan’s girlfriend] has taken this time management tack seriously and even created a simple web page that states “Don’t Waste Your Time!” that will show if she tries to get to Facebook.