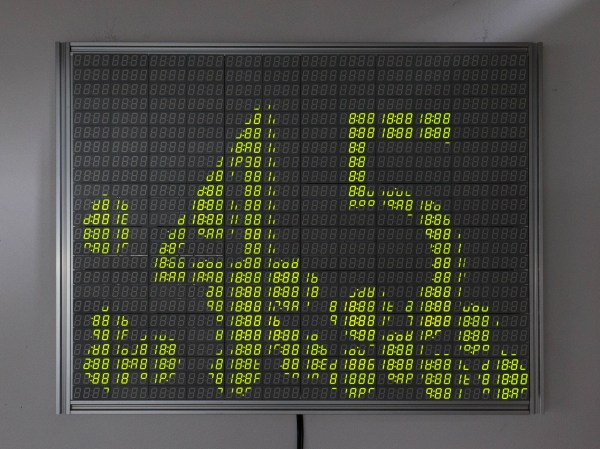
If you look around your desk right now, odds are you’ll see a 7-segment display or two showing you some vital information like the time or today’s weather. But think of how much information you could see with over 1,100 digits, like with [Chris Combs’] 7200-segment display.
For [Chris], this project started the same way that many of our projects start; finding components that were too good of a deal to pass up on. For just “a song or two plus shipping”, he was the proud owner of two boxes of 18:88 7-segment displays, 500 modules in total. Rather than sitting and using up precious shelf space, [Chris] decided to turn them into something fancy he could hang on the wall.
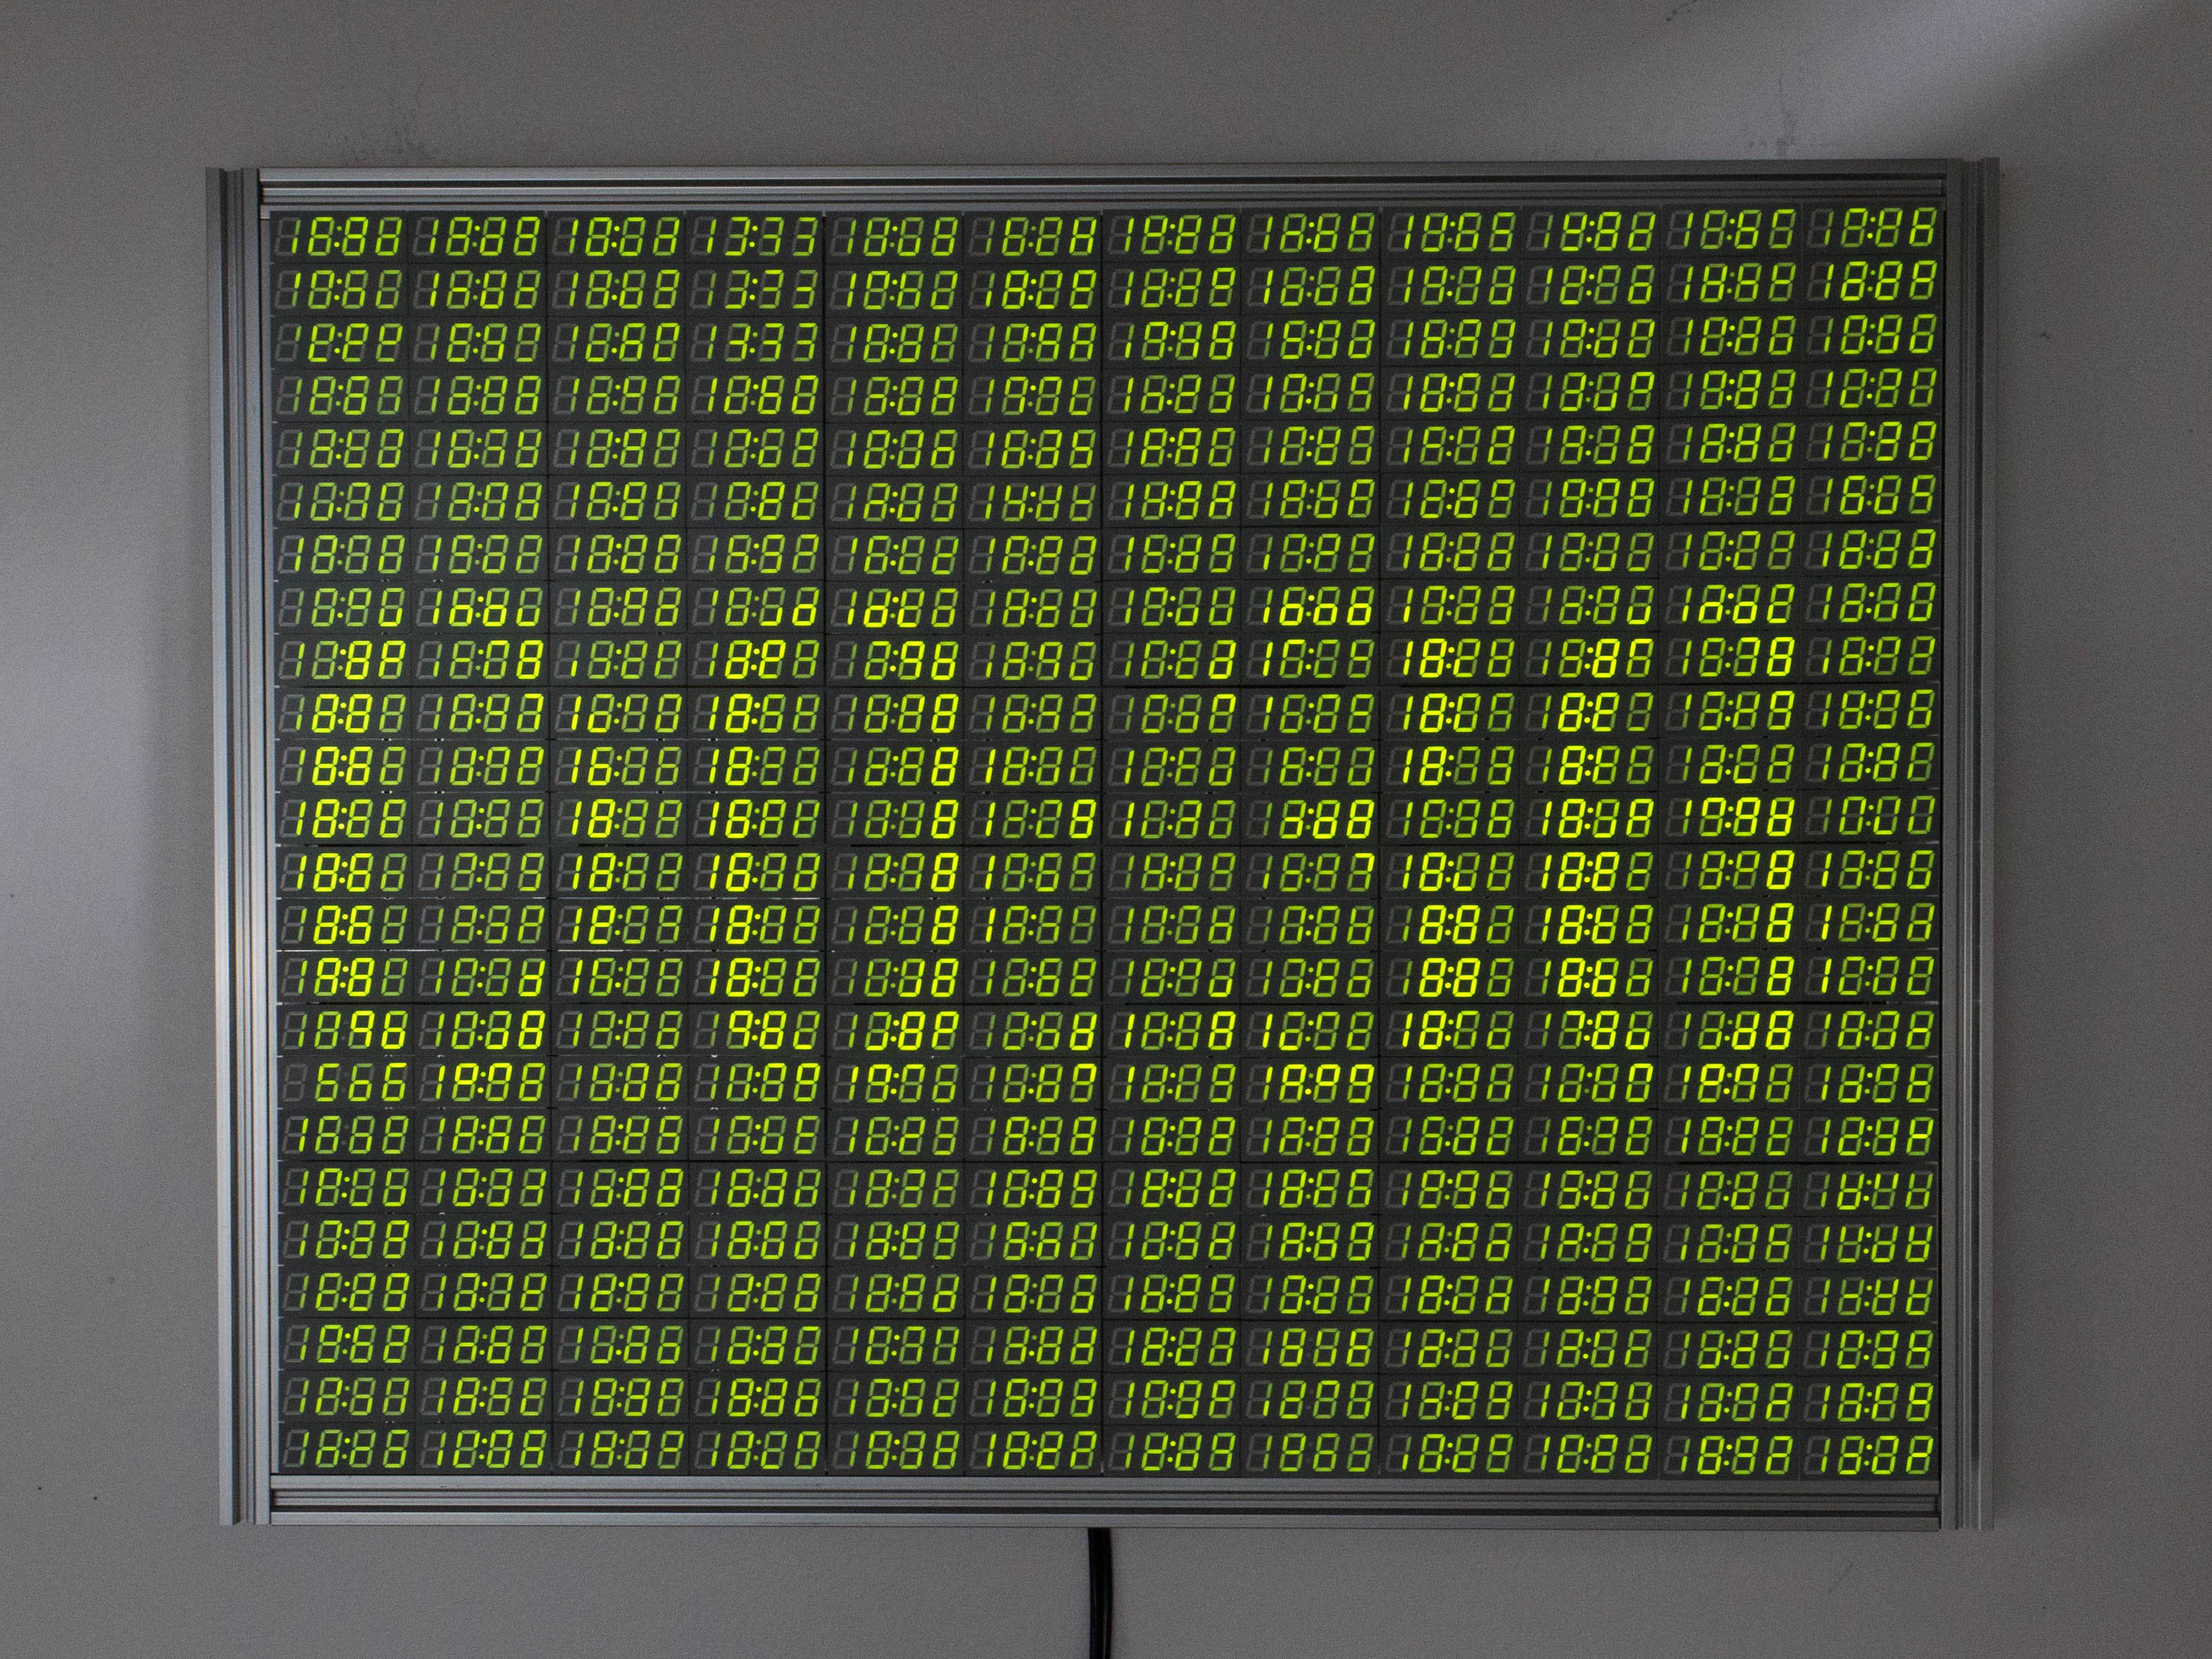
The second challenge was how to actually wire everything up. The finished display comes out to 26 inches across by 20.5 inches tall, much too large for a single PCB. Instead, [Chris] opted to design a series of self-contained panels, each with 6 of the display modules and an IS31FL3733 to drive them. While the multiplexing arrangement did leave space for more segments on each panel, he opted to go for this arrangement as it resulted in a nice, clean, 4:3 aspect ratio for the final display.
The end result was a unique and beautiful piece, which Chris titled “One-to-Many”. He uses it to display imagery and art related to the inevitability of automation, machines replacing humans, and other “nice heartwarming stuff like that”, as he puts it. There’a video after the break, but if you are interested in seeing the display for yourself, it will be on display at the VisArt’s Concourse Gallery in Rockville, MD from September 3 to October 17, 2021. More info on [Chris’s] website.
This isn’t [Chris’s] first adventure in using 7-segment displays in such a unique way, click here to read about the predecessor to this project that we covered last year.
Continue reading “What’s Cooler Than A 7-Segment Display? A 7200-Segment Display!”