The Last Component Storage System You’d Ever Need

Think you’ve seen the best component storage system? This system could only be better if you could walk up and talk to it. [APTechnologies] was tired of using a hodgepodge of drawers and boxen for storing their components. What they needed was an all-purpose solution for storing all kinds of small-to-medium-sized goodies, be they through hole or SMT.

This one happens to have a software interface as well that is searchable with short, crisp expressions that find parts by ID or with parameters. It’s a Python 3 script running on a Raspberry Pi 4B that’s hiding behind the HDMI display. [APTechnologies] printed a special arm for that, and you can find all the files on GitHub. Not only does the LED above the corresponding drawer light up, it lights up in a color that represents the inventory levels. We assume green/yellow/red, but [APTechnologies] doesn’t specify.

Don’t know what to do with some of your components? If they’re really old, they may be no good anymore. It just depends.

New Micro YARH.IO Designed For Skilled Operators

A few months back we brought you word of the YARH.IO, an extremely impressive Raspberry Pi portable that featured rugged good looks and a unique convertible design made possible by a removable keyboard. One of the most appealing aspects of the design was that everything was built from off-the-shelf modules; it only took a couple jumper wires and some scrap perfboard to get everything wired up inside the 3D printed enclosure.

The downside of this construction style was that the finished product was a bit chunkier than was strictly necessary. But that’s not the case with the new YARH.IO Micro. The palm-sized portable looks almost exactly like the original, though it had to ditch the removable keyboard in the shrinking process. Gone as well is the touch pad, though with the touch screen capabilities of the Pimoroni Hyper Pixel four inch IPS display, that’s not much of a problem.

What’s the catch? Well, at a glance we can tell you this one is considerably harder to build. For one thing, you’ll need to remove the Ethernet and USB connectors from the Pi 3B+. The USB ports get relocated, but Ethernet understandably has to be left on the cutting room floor. Nothing to worry about with the GPIO pins, the display takes up all of those, but you’ll probably want to wire the I2C lines to the female header on the side of the case so you can add external hardware and sensors.

You also need to nestle an Arduino Pro Micro in there to communicate status information about the battery to the operating system over I2C. If you wanted to save a little wiring you could probably leave off the DS3231 RTC module, but it depends on how often you’ll be able to sync up with NTP.

While it may be more difficult to assemble than its predecessor, it’s certainly not unapproachable. Once again, no custom PCBs or exotic components are required. You might be doing a lot more soldering (and desoldering) than you would have before, but it’s nothing that the average Hackaday reader isn’t capable of. For your troubles, you’ll get a exceptionally portable Linux machine that’s ripe for hacking and modification.

If the time and effort it will take to put together a YARH.IO is a bit more than you’re willing to invest right now, there’s always commercial alternatives like the DevTerm. But whether you go with the original or this new Micro edition, we think the satisfaction of having built the whole thing yourself will be more than worth it.

Raspberry Pi Tally Lights

Running a camera studio is a complicated affair from pretty much every angle. Not only is the camera gear expensive but the rest of the studio setup takes care and attention down to the lighting as well. When adding multiple cameras to the mix, like for a television studio, the level of complexity increases exponentially. It’s great to have a few things that simplify the experience of running all of this equipment too, without the solution itself causing more problems than it solves, like these network-operated Raspberry Pi-powered tally lights.

A tally light is the light on a camera that lets the person being recorded know which camera is currently in use. Networking them all together often requires complex wiring or at least some sort of networking solution, which is what this particular build uses. However, the lights are controlled directly over HTTP rather than using a separate application which might need a port open on a firewall or router, which not only simplifies their use but doesn’t decrease network security.

The HTTP interface, plus all of the software and schematics for this build, are available on the project’s GitHub page. We imagine the number of people operating a studio and who are in need of a tally light system to be fairly low, but the project is interesting from a networking point-of-view regardless of application. If you do have a studio like this and are looking for other ways to improve it, we do have a simple teleprompter hack that might be right up your alley.

A Novel Micro Desktop Display For Your Raspberry Pi

Since its debut back in 2012 there have been a variety of inventive displays used with the Raspberry Pi. Perhaps you remember the repurposed Motorola phone docks, or you have one of those little displays that plugs into the expansion port. Inevitably the smaller options become disappointing as desktop displays, because while the advert triumphantly shows them sporting a Raspberry Pi OS desktop the reality is almost unusable. Until now.

Along comes [igbit] with a solution in the form of a little SPI display with a different approach to displaying a desktop. Instead of displaying a matchbox-sized desktop over the whole screen it divides into two halves. At the top is a representation of the desktop, while below it is a close-up on the area around the mouse pointer.

Unexpectedly its mode of operation is very accessible to the non-Linux guru, because it works through a Python script that takes screenshots of both areas and passes them as a composite to the display. An area the size of the magnified window is drawn around the mouse pointer, allowing it to be easily located on the tiny desktop. It relies on the main display being pushed to the HDMI output, so if the Pi is otherwise headless then its configuration has to be such that it forces HDMI use. The result isn’t something that would help you with the more demanding desktop tasks, but it provides a neat solution to being able to use a Pi desktop on a tiny screen.

Of course, in a pinch you can always use your mobile phone.

Amiga Now Includes HDMI By Way Of A Raspberry Pi Daughterboard

If you had an Amiga during the 16-bit home computer era it’s possible that alongside the games and a bit of audio sampling you had selected it because of its impressive video capabilities. In its heyday the Amiga produced broadcast-quality graphics that could even be seen on more than a few TV shows from the late 1980s and early 1990s. It’s fair to say though that the world of TV has moved on since the era of Guru Meditation, and an SD video signal just won’t cut it anymore. With HDMI as today’s connectivity standard, [c0pperdragon] is here to help by way of a handy HDMI upgrade that taps into the digital signals direct from the Amiga’s Denise chip.

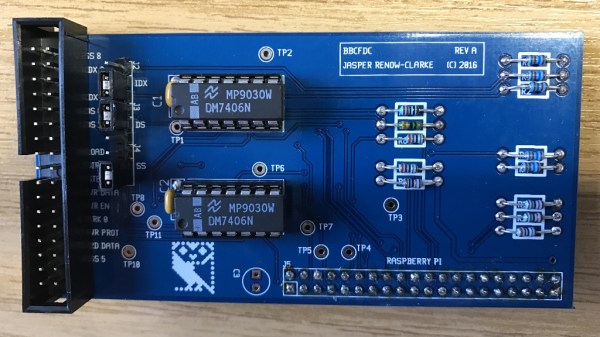
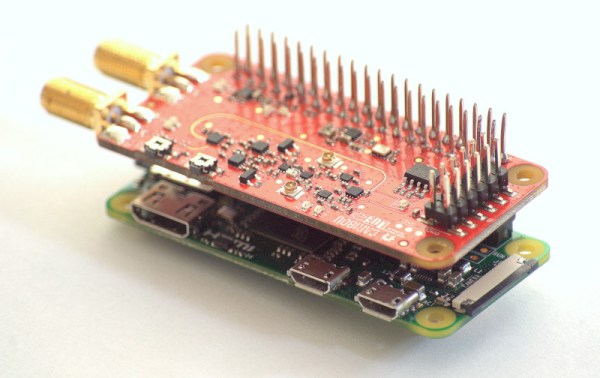
At first thought one might imagine that an FPGA would be involved, however instead the signals are brought out via a daughterboard to the expansion header of a Raspberry Pi Zero. Just remove the DENISE display encoder chip and pop in the board with uses a long-pinned machined DIP socket to make the connections. The Pi runs software from the RGBtoHDMI project originally created with the BBC Micro in mind, to render pixel-perfect representations of the Amiga graphics on the Pi’s HDMI output. The caveat is that it runs on the original chipset Amigas and only some models with the enhanced chipset, so it seems Amiga 600 owners are left in the cold. A very low latency is claimed, which should compare favourably with some other solutions to the same problem.

This isn’t the first time we’ve seen an HDMI Amiga conversion, but it’s one that’s usable on more than simply the big-box machines.

Continue reading “Amiga Now Includes HDMI By Way Of A Raspberry Pi Daughterboard”

3D Printed Server Case Holds 14 Raspberry Pis

If you ever need to cluster up to 14 Raspberry Pis and an equal number of 2.5 inch hard drives, you might want to look at the Raspberry Pi Server Mark III case from [Ivan Kuleshov]. The original Mark I design came from Thingiverse, but the Mark III is a complete redesign.

The redesign allows for more boards along with a reduction in the number of parts. That takes less plastic and less time to print. The design is also modular, so there should be new components in the future.

Continue reading “3D Printed Server Case Holds 14 Raspberry Pis”

Implementing SENT Sensors On The Raspberry Pi

The SENT protocol, standing for Single Edge Nibble Transmission, is used for sensors that need to send high-resolution data while keeping system costs low. It’s most typically used in the automotive world, where it can be found in such parts as throttle-by-wire pedals and temperature sensors. [Mark Smith] set out to see if he could get the Pi Zero to read such sensors without the use of an intermediate microcontroller.

[Mark]’s initial attempts relied on Python and the RPI.GPIO library. Unfortunately, the overheads introduced made decoding SENT traffic impossible. Undeterred, [Mark] pressed on, leveraging the pigpio library and its callback function which allowed sampling at up to one microsecond. This was fast enough to read the messages from a LX3302A inductive position sensor that uses the protocol.

It’s a project that could prove useful for those trying to work with certain sensors who want to avoid adding complexity to a Raspberry Pi project. Files are available on Github for the curious. We’ve seen other direct sensor builds with the Pi, before too – like this power monitoring system. Video after the break.

Continue reading “Implementing SENT Sensors On The Raspberry Pi”