For the average home gamer, good old fashioned Ethernet at 100 Mbit/s is only just starting to become a bottleneck as things like 4K video streaming begin to demand more bandwidth. As always, though, there are those who wish to push the limits of what is possible. [Jeff Geerling] is one such operator, who set out to maximise the network throughput on the Raspberry Pi Compute Module 4.
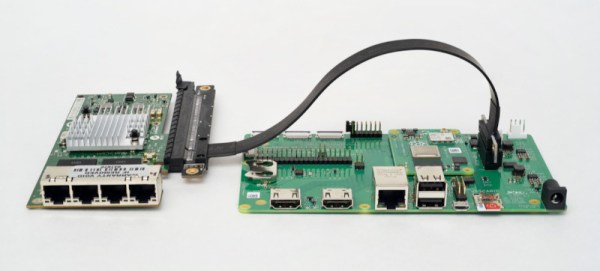
The build began by taking advantage of the PCI-Express 2.0 single lane interface on the new Raspberry Pi Compute Module. Hooked up to an Intel four-port Gigabit Ethernet card, and in combination with the onboard Gigabit-E port, [Jeff] was able to get 3.0 Gbit/s out of the setup without too much fuss. However, he wanted more, and set about finding where he was being held back. It turned out that ksoftirqd, a daemon that handles network packets, can only run on one core on the Raspberry Pi 4, and it was getting maxed out at this data rate. Overclocking the CPU helped, getting the max rate up to 3.4 Gbit/s.
Further analysis showed that the onboard interface was only contributing 200 Mbit/s, with the Intel card maxing out at 3.2 Gbit/s. In the case of the latter, this was due to the limits of the PCI-E interface. In the case of the former, however, [Jeff] knew that more was available. The trick turned out to be recompiling the Linux kernel to allow the internal interface to be able to set to use a higher Maximum Transmission Unit. This allows each network transmission to carry more data without extra CPU load. With the internal interface and the external card all set to an MTU of 9000, the Pi was able to spit out a scorching 4.15 Gbit/second. Details of the hack are available on Github for the curious.
It’s a hack that doesn’t offer a lot to the average user, though [Jeff] states he has some interesting applications in mind. He’s also contemplating what can be achieved with a 10 Gbit card, which we can’t wait to see. If you want to learn more about the Compute Module’s features, including a couple of tips for laying out yor own board, check out our review. Video after the break.
Continue reading “Getting Over 4Gbps Out Of A Compute Module 4”