Arduino Cable Tracer Helps Diagnose Broken USB Cables

We’ve all found ourselves swimming amongst too many similar-looking USB cables over the years. Some have all the conductors and functionality, some are weird power-only oddballs, and some charge our phones quickly while others don’t. It’s a huge headache and one that [TechKiwiGadgets] hopes to solve with the Arduino Cable Tracer.

The tracer works with USB-A, Mini-USB, Micro-USB, and USB-C cables to determine whether connections are broken or not and also to identify wiring configurations. It’s built around the Arduino Mega 2560, which is ideal for providing a huge amount of GPIO pins that are perfect for such a purpose. Probing results are displayed upon the 2.8″ TFT LCD display that makes it easy to figure out which cables do what.

It’s a tidy build, and one that we could imagine would be very useful for getting a quick go/no-go status on any cables dug out of a junk box somewhere. Just remember to WIDLARIZE any bad cables you find so they never trouble you again. Video after the break.

Continue reading “Arduino Cable Tracer Helps Diagnose Broken USB Cables”

Fixing Noisy Measurements On An Owon XDM2041 Bench Multimeter

After purchasing an Owon XDM2041 bench multimeter for an automated test setup, [Petteri Aimonen] was disappointed to find that at especially the higher mega Ohm ranges, the measured values were jumping around a lot and generally very inaccurate. Since this is an approximately $170 bench multimeter and Owon support wasn’t cooperating, [Petteri] set out to fix the issue, starting with a solid teardown.

As noted by [Petteri], there’s not a whole lot inside one of these multimeters. The main board with the guts of the whole system contains a GigaDevices GD32F103CBT6 MCU coupled with the star of the show: the HYCON Technology Corporation’s HY3131 multimeter chip. After a peek at the HY3131 datasheet, the culprit was quite apparent: while sampling the presence of mains voltage noise is usually suppressed through the selection of an appropriate crystal.

Unfortunately, instead of the recommended 4.9152 MHz crystal per the reference schematic for the HY3131, Owon’s engineers had apparently opted for a 4 MHz crystal instead, and so it’s essentially aliasing the line noise.

[Petteri] figured that the resulting sampling timing might work well enough with 60 Hz line frequency, but clearly with 50 Hz there was a lot of noise sneaking into the measurements. After swapping the crystal with a 3.072 MHz one, there was a marked improvement, as the plot shows.

3D Printed CNC Knee Mill

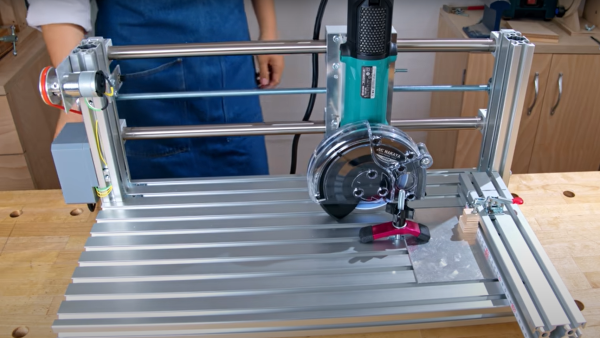
CNC mills will never match real heavy metal mills on hard materials, but that won’t stop people from pushing the limits of these DIY machines. One of the usual suspects, [Ivan Miranda] is at it again, this time building a knee mill from aluminum extrusions and 3D printed fittings. (Video after the break.)

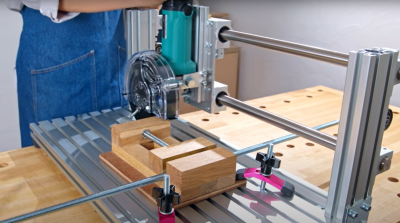
Most DIY CNC milling machines we see use a gantry arrangement, where the bed is fixed while everything else moves around it. On most commercial metal milling machines, the table is the moving part, and are known as knee mills. In the case of [Ivan]’s mill, the table can move 187 mm on the X-axis and 163 mm on the Y-axis. The 1.5 kW spindle can move 87 mm in the Z-axis. All axes slide on linear rails and are driven by large stepper motors using ball screws. The table can also be adjusted in the Z-direction to accept larger workpieces, and the spindle can be tilted to mill at an angle.

To machine metal as [Ivan] intended, rigidity is the name of the game, and 3D printed parts and aluminum extrusion will never be as rigid as heavy blocks of steel. He says claims that the wobble seen on the video is due to the uneven table on which the mill was standing. Of course, a wobbly base won’t be doing him any favors. [Ivan] also had some trouble with earthing on the spindle. He nearly set his workshop on fire when he didn’t notice tiny sparks between the cutter and aluminum workpiece while he was cooling it with isopropyl alcohol. This was solved with the addition of the grounding wire.

While the machine does have limitations, it does look like it can machine functional metal parts. It could even machine metal upgrades for its 3D printed components. One possible way to improve rigidity would be to cast the frame in concrete. [Ivan] has built several other workshop tools, including a massive 3D printer and a camera crane. Continue reading “3D Printed CNC Knee Mill”

3D-Printed, Hot-Swap Keyboard PCB Generator Is Super Cool

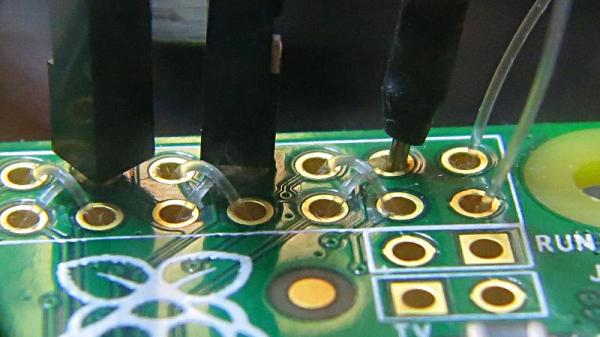
About a month ago, [50an6xy06r6n] shared their hot swap 3D-printed circuit board for keyboard design with the mechanical keyboard subreddit. It’s more of a prototyping tool than a permanent fixture, though nothing is stopping you from using it permanently. Well, now it’s even better, and open source to boot.

[50an6xy06r6n] came up with this to test split ergo layouts faster and not have to solder anything — the switch pins make contact with the row wires and folded diode legs. In fact, prepping all the diodes is probably the thing that takes the longest.

The design can be generated from layout data, or you can convert directly from a KLE JSON file. We love how delightfully clean this keyboard breadboard generator looks, and we wish we had thought of it!

[50an6xy06r6n]’s PCB generator currently supports Cherry MX/clones and Kailh Choc switch footprints. If you want ALPS, somebody’s gonna have to send [50an6xy06r6n] some ALPS to make that happen.

As long as all the contact points are good, you should be able to use this as the final PCB indefinitely. We’ve certainly seen our share of 3D-printed wire guides. Really, you could print the whole thing, including the switches.

Making Teeny Clamps With Hand Tools

Sometimes you need a small clamp, and sometimes it’s nice to use tools you’ve made yourself. [Neil] from [Pask Makes] delivers on both counts, with incredibly cute little clamps that he whipped up in his own home shop. You can even make them with hand tools!

The first step is to cut out a section of flat steel bar, and then drill a hole in the middle. The flats that form the key clamping surfaces can then be cut using a hacksaw. From there, it’s a matter of cleaning up the resulting blank with a file to take off sharp edges and neaten up the flats.

Drilling and tapping the main hole through the bottom of the clamp is the next job, and getting the hole straight and true is key to making a good usable clamp. The video shares tips on how to do this with even a simple cordless drill, by using a vice and a wood guide to keep things on track. The swiveling nut is then made out of a piece of round bar, and installed on the end of a bolt to create a nice clamping surface. A cute little brass handle is used to tighten it up.

It’s a useful tool, and the video goes on to show how the clamp can be made more quickly using higher-end facilities. While small clamps can be had cheaply, the video notes that making tools is fun and we think that’s as good a reason as any to make your own.

We’ve seen [Neil]’s work before, particularly in the case of this stunning “bladeless fan” build. Video after the break.

Continue reading “Making Teeny Clamps With Hand Tools”

Building A Big Ol’ Powerful Wheelbarrow

Sometimes you’ve gotta haul big heavy loads around a wide area. Regular wheelbarrows are fine, but it can quickly grow tiring when one has to make multiple trips. [Workshop from Scratch] instead elected to build a powered wheelbarrow, with plenty of grunt to shift loads about.

The build is absolutely from the ground up, welded up from sections of steel RHS, and given rear steering for plenty of maneuverability. The actual job of steering is handled by a rack repurposed from automotive use, set up with a single-sided attachment to the rear wheel assembly. It’s quite a neat and tidy way of doing the job, and seems to work well. Drive is sent to the front wheels through a hydrostatic lawnmower transmission. A 17-horsepower engine provides plenty of grunt for the job at hand, even coming with electric start already fitted for the ultimate in ease-of-use.

It’s impressive to see just how much of the rig was put together from raw materials; even the fuel tank was fabricated in steel. We’ve seen similar builds from [Workshop from Scratch] before, like this tidy bandsaw. Video after the break.

Continue reading “Building A Big Ol’ Powerful Wheelbarrow”

Fractal Vise Holds Odd-Shaped Objects Tight

A regular vice is great if you want to clamp rectangular objects, but it can fall down a little with more complex shapes. Inspired by an ancient vise [Chris Borge] whipped up his own 3D-printed fractal clamping tool.

The inspiration for this one comes from the [Hand Tool Rescue] video that shows of the clever mechanism. The vice uses a series of interlocking parts that can freely articulate to grip the object of interest via several protruding fingers. In reproducing the design, [Chris] had some issues initially with the joints, but settling on a dovetail similar to that of the original metal vice which got things working nicely.

[Chris] notes that while the design works, it could still use some refinement. Silicone or rubber tips on the fingers could give the vice better grip, and there remain some flexural issues that could be improved. Overall, however, it’s a useful table vice for small jobs on weird shaped things. We’ve seen 3D-printed vices before, particularly in the PCB vice space, but the grip scheme user here is totally unique.

Continue reading “Fractal Vise Holds Odd-Shaped Objects Tight”