A Nifty Tool For Separating Magnets

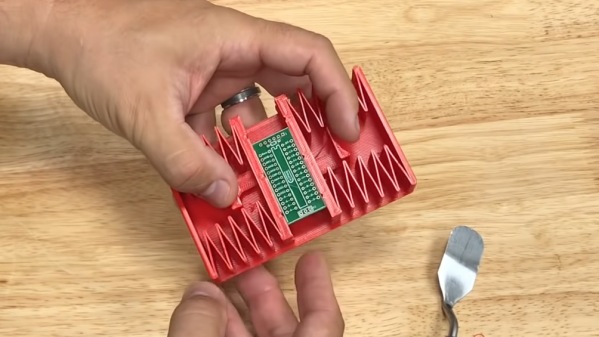
Neodymium magnets are fun to play with, largely thanks to their incredibly strong magnetic field. This also gives them plenty of applications where other magnets won’t cut the mustard. This very strength is also a drawback, making them difficult to work with and posing a danger to squishy human bodies. To help ease the task, [RandomCitizen4] developed a handy magnet separator tool.

The tool is similar in design to a pair of scissors, with two blades that are slid together when the handles are squeezed. The design is subtly different, however, with plastic blades that slide in between the gaps of a pair of magnets stuck together, pushing them apart. With just three parts to be 3D printed, a handful of fasteners and a rubber band, the tool is easy to build, too.

As someone who has spent significant time sliding magnets apart on the edge of a desk, wearing away the skin on my hands in the process, this tool would certainly come in handy. It might also be useful if you find yourself experimenting with magswitches or similar. Video after the break.

Continue reading “A Nifty Tool For Separating Magnets”

This Servo Actuated Multimeter Does The Twist

This tip comes our way courtesy of [Elad Orbach], who’s been experimenting with a device that uses a servo to turn the function dial on a multimeter. It’s something you can put together in a few minutes with leftovers from the parts bin, and as you can see in the video after the break, the basic concept seems to be sound enough.

As to finding a practical reason for spinning the switch on your meter with a servo, that’s left largely as an exercise for the reader. [Elad] hints at the possibility of using such a setup to help automate repetitive testing, which we could see being useful especially in combination with a foot pedal that allows you to switch modes without having to put the probes down. The same basic idea could also be helpful as an assistive device for those who have difficulty grasping or limited dexterity.

Whether top of the line or bottom of the barrel, the multimeter is easily the hardware hacker’s most frequently used tool (beyond the screwdriver, perhaps). We’ve seen plenty of projects that try to graft additional features onto this common gadgets, though automation isn’t usually among them.

Continue reading “This Servo Actuated Multimeter Does The Twist”

It Ain’t Over ‘Til The Paperwork Is Done: Test Driving TiddlyWiki

Working on projects is fun. Documenting them is often not so much. However, if you want anyone to duplicate your work — or even just want to remember what you were doing a few years ago when something needs upgrading or repairing.

There’s a ton of ways to keep track of the details of your projects. We love seeing how things come together and of course we’re happy to suggest documenting on Hackaday.io. But sometimes, you just want to keep your own notes to yourself. There’s always a notebook, of course, but that seems kind of old fashioned. A lot of projects are on Wikis but you hate to stand up a web server and a Wiki instance just to keep notes. But what if you could have a local Wiki with minimal setup?

I recently came across TiddlyWiki and decided to take it for a spin. Join me after to break to see what it’s all about.

Continue reading “It Ain’t Over ‘Til The Paperwork Is Done: Test Driving TiddlyWiki”

Concrete Solder Squid Is A Solid Solution

Although it’s possible to buy a soldering setup out of the box, the one that works for you will likely develop over time. Honestly, it may never stop evolving. Sure, you can start with el-cheapo helping hands or a nice hobby vise, but it probably won’t end there. Why? Because no one of these tools will be right for all applications, unless you plan to solder the same thing over and over again. Sometimes it’s just easier to alligator clip a board in place than to slowly manipulate the jaws of a vise, but those helping hands have such a limited range of motion.

Have you been meaning to build a soldering squid out of coolant hose because that stuff just looks so dang cool and bendy? Well, then let Hackaday alum [JeremySCook] show you how it can be done. A few years ago he built a similar squid with a wooden base, but it just isn’t heavy enough, so he redesigned it with a concrete base. He took the opportunity to make some nice tweaks, like zip-tying a small PC fan and 9 V to make an endlessly repositionable ventilation system, and adding a big clip in the back for extra stability while soldering. And of course, threading the solder spool on to one of the hoses is genius.

If you follow [Jeremy] at all, you know he’s been playing around with concrete for a while now, and it’s neat to see him cement his devotion to the stuff by using it in the pursuit of better tools. He’s got the files for the printed mold up on GitHub, and the build video after the break should be all set up by now.

Not custom enough for you? Fire up that printer and make your own ball and socket arms.
Continue reading “Concrete Solder Squid Is A Solid Solution”

Build Your Own Active Load

When it comes to testing power supplies, it’s useful to have a dummy load to put the gear through its paces. While it’s possible to just use some old heating elements or other big resistors, an active load can provide more control over the process. [Charles Ouweland] found himself in need of just such a piece of gear, and decided to build his own.

Commercial units often pack in a raft of features, operating in different modes from constant resistance, constant power, and constant current. For [Charles]’s needs, just constant current would be fine, and thus the design progressed around this constraint.

The IRFP250 MOSFET specified in the build can dissipate up to 190W, but as it heats up, this is reduced. In this design, cooled by a heatsink and PC fan, [Charles] estimates 120W continous output is a safe limit. It’s combined with an LM358 op-amp and TL431A reference voltage source to act as a current sink, controllable between 0 and 10 amps.

We’re sure that the new hardware makes testing power supplies a cinch for [Charles], and it’s always good to have a strong understanding of the workings of your own test gear. We’ve seen open-source designs in this space, too!

Recreating Fast Oscilloscopes Is A Slow Process

If you want to do something you’ve never done before, there are two broadly-defined ways of approaching it: either you learn everything you can about it and try to do it right the first time, or you get in there and get your hands dirty, and work out the details along the way. There’s a lot to be said for living life by the seat of your pants. Just ask anyone who found inspiration in the 11th hour of a deadline, simply because they had no other choice.

Ted Yapo didn’t have a lot of high-speed design knowledge when he set out to build an open-source multi-GHz sampling oscilloscope, but he didn’t let that stop him. Fast forward a year or so, and Ted’s ready to build his third prototype armed with all the hands-on practical knowledge he’s gained from building the first two.

At the 2019 Hackaday Superconference, Ted gave a talk about his journey into the high-stakes world of high-speed design. It’s an inspiring talk, and Ted gives a good look into everything he’s learned in trying to build a sampling ‘scope. We think you’ll appreciate not only Ted’s work, but also the ease with which he explains it all.

Continue reading “Recreating Fast Oscilloscopes Is A Slow Process”

Building A Sound Activated Shop Fan With Arduino

Whether you’re using a soldering iron or a table saw, ventilation in the shop is important. Which is why [Atomic Dairy] built a monster air cleaner called the Fanboy that looks like it should be mounted under the wing of an F-15. Realizing a simple switch on the wall wouldn’t do this potent air mover justice, they decided to build a sound activated controller for it.

It’s certainly an elegant idea. The sound created once they kick on their woodworking tools would be difficult to miss by even the most rudimentary of sound-detection hardware. At the most basic level, all they needed was a way for an Arduino to throw a relay once the noise level in the room reached a specific threshold.

Of course it ended up getting a bit more complicated than that, as tends to happen with these kinds of projects. For one, the sound doesn’t directly control the solid state relay used in the fan controller. When the microphone equipped Arduino detects enough noise, it will start a timer that keeps the fan running for two hours. If the tool keeps running, then more time gets added to the clock. This ensures that the air in the room is well circulated even after the cutting and sanding is done.

[Atomic Dairy] also added a few additional features so they could have more direct control over the fan. There’s a button to manually add more time to the clock, and another button to shut it down. There’s even support for a little wireless remote control, so the fan can be operated without having to walk over to the control panel.

We’ve seen some impressive air circulation and dust collection systems over the years, but finding a way to elegantly switch them on and off has always been a problem given the wide array of tools that could be in use at any given time. Sound activation isn’t a perfect solution, but it’s certainly one we’d consider for our own shop.

Continue reading “Building A Sound Activated Shop Fan With Arduino”