Laser Cutting A 3D Printer

The concept of self-replicating 3D printers is a really powerful one. But in practice, there are issues with the availability and quality of the 3D-printed parts. [Noyan] is taking a different approach by boostrapping a 3D printer with laser-cut parts. There are zero 3D-printed parts in this project. [Noyan] is using acrylic for the frame and the connecting mechanisms that go into the machine.

The printer design chosen for the project is the Prusa i3. We have certainly seen custom builds of this popular design before using laser-cut plywood for the frame. Still, these builds use 3D-printed parts for some of the more complicated parts like the extruder carriage and motor brackets. To the right is the X-carriage mechanism. It is complicated but requires no more than 6 mm and 3 mm acrylic stock and the type of hardware traditionally associated with printer builds.

With the proof of concept done, a few upgrades were designed and printed to take the place of the X-axis parts and the belt tensioner. But hey, who doesn’t get their hands on a 3D printer and immediately look for printable solutions for better performance?

We first saw a laser-cut RepRap almost nine years ago! That kit was going to run you an estimated $380. [Noyan] prices this one out at under $200 (if you know someone with a laser cutter), and of course you can get a consumer 3D printer at that price point now. Time has been good to this tool.

Keysight’s New 1000-X Scopes Get Double Hertz

It’s not every day that we have the pleasure of being excited about a new oscilloscope in the market; not only is it affordable but also produced by one of the industry’s big players. To top it all off,  all the marketing is carefully crafted towards students and hackers.

Keysight recently released a new line of oscilloscopes called the 1000X series that starts at $448. It’s an entry level, two-channel scope having (officially) 50 MHz, 70 MHz and 100 MHz versions to choose from. It hosts their standard technology such as Megazoom, but also some interesting, albeit optional extra quirks such as an in-built signal generator and a simple network analyser with gain and phase plot capability.

The release of this scope and the marketing strategy employed by Keysight feels like they’re late to this entry-level party but still want to get in on the fun. In the words of Keysight we should all immediately “Scrap the toys, get a real oscilloscope” . The persuasion has gone a step further; Keysight has kindly facilitated many giveaways and generated hype from our favorite EE YouTuber’sIf anything, this certainly heats up the entry level scope market, so we at Hackaday welcome it with open arms.

All this fuss about affordable yet capable entry level scopes started with Rigol. Here was a company that actually bothered to genuinely market a scope to the masses at a reasonable price. At the time, the norm for such scopes was to be marketed solely to schools and universities by large teams of suits. Winning the hearts (and money) of any hackers along the way was merely collateral damage.  The scope that considerably changed this was the Rigol DS1052e, the predecessor of the DS1054z which is now considered the benchmark for all entry level scopes. If Keysight is to entice us to scrap the toys, the 1000X series must spar with the community’s current sweetheart.

It is still early days for this scope, but [Dave Jones] already received one and successfully unlocked the shipped bandwidth lock. He has even unearthed an undocumented 200 MHz bandwidth mode by hacking the main processor board! Unsurprisingly, the analog front end is consistent across all the models with the sampling rate and bandwidth being set, rather old-fashionedly, by a few resistors on the main processor board.

Continue reading “Keysight’s New 1000-X Scopes Get Double Hertz”

DIY Barrel Rifling With 3D Printed Help

[Jeff Rodriguez] has been busy testing a feasible DIY method for rifling a barrel and has found some success using salt water, a power supply, wire, and 3D printed parts to create the grooves of rifling without the need for any moving parts or cutting tools. Salt water flows between the barrel’s inside surface and a 3D-printed piece that holds wires in a precise pattern. A current flows between the barrel and the wires (which do not actually touch the inside of the barrel) and material is eroded away as a result. 10-15 minutes later there are some promising looking grooves in the test piece thanks to his DIY process.

Rifled barrels have been common since at least the 19th century (although it was certainly an intensive process) and it still remains a job best left to industrial settings; anyone who needs a barrel today normally just purchases a rifled barrel blank from a manufacturer. No one makes their own unless they want to for some reason, but that’s exactly where [Jeff] is coming from. The process looks messy, but [Jeff] has had a lot of space to experiment with a variety of different methods to get different results.

Continue reading “DIY Barrel Rifling With 3D Printed Help”

Magnetic Stir Plate Is A Hack

If you’ve ever spent any time around a lab, you’ve doubtless seen one of those awesome combination magnetic stirrer and heater plates that scientists use to get liquids mixed and up to temperature. If you’ve ever etched your own PCBs using ammonium persulfate, you’ve experienced the need for both heating and agitation firsthand. Using a stirrer plate for PCB etching is putting two and two together and coming up with four. Which is to say, it’s a good idea that’s not amazingly novel. [acidbourbon] built his own, though, and there’s almost no part of this DIY heater/stirrer that isn’t a hack of some kind or another.

Start off with the temperature controller. Instead of buying a thermocouple or using an LM75 or similar temperature-measurement IC, [acidbourbon] uses a bog-standard 1n4148 diode. The current passed through a diode, at a given voltage, is temperature dependent, which means that adding a resistor and a microcontroller’s ADC yields a quick hacked temperature sensor. [acidbourbon] glued his straight onto the casserole that he uses as an etching tray.

Does the type of person who saves $0.25 by using a diode instead of a temperature sensor go out and buy a stirrer motor? No way. Motor and gears come from a CD-ROM drive. The “fish” — the magnetic bar that spins in the etchant — is made of neodymium magnets lengthened by shrink-wrapping heat-shrinking them together with some capacitors. Who knew that shrinkwrap heat-shrink, fused with pliers, was waterproof? Is that a wall-wart in that box, with the prongs wired to mains electricity?

Anyway, this just goes to show that etching equipment need not be expensive or fancy. And the project also provides a showcase for a bevy of tiny little hacks. And speaking of [acidbourbon]’s projects, this semi-automatic drill press mod has been on our to-do list for two years now. Shame on us! Continue reading “Magnetic Stir Plate Is A Hack”

Open Source Firmware For A Cheap Programmable Power Supply

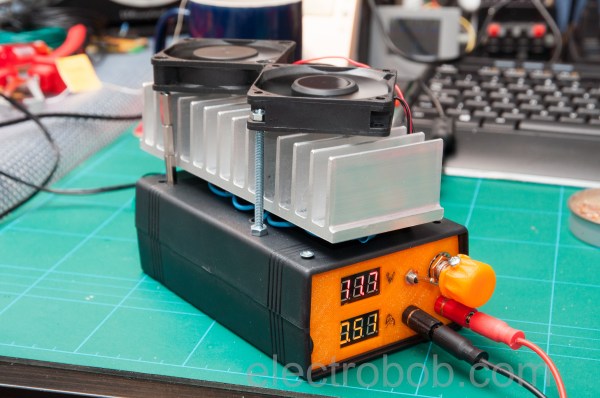
A few months ago, someone clued us in on a neat little programmable power supply from the usual Chinese retailers. The DPS5005 is a programmable power supply that takes power from a big AC to DC wall wart and turns it into a tiny bench-top power supply. You can pick one of these things up for about thirty bucks, so if you already have a sufficiently large AC to DC converter you can build a nice 250 Watt power supply on the cheap.

[Johan] picked up one of these tiny programmable power supplies. His overall impression was positive, but like so many cheap products on AliExpress, there wasn’t a whole lot of polish to the interface. Additionally, the DPS5005 lacked the ability to be controlled over a serial port or WiFi.

This programmable power supply is built around an STM32, with the programming pads exposed and labeled on the PCB. The changes [Johan] wanted to make were all in software, leading him to develop OpenDPS, a firmware replacement for the DPS5005. Continue reading “Open Source Firmware For A Cheap Programmable Power Supply”

Punching It Down: Insulation Displacement Connectors

In my misspent youth I found myself doing clinical rotations at a local hospital. My fellow students and I were the lowest of the low on the hospital pecking order, being the ones doing the bulk of the work in the department and paying for the privilege to do so. As such, our locker facilities were somewhat subpar: a corner of a closet behind a door labeled “COMMS”.

In the room was a broken chair and a couple of hooks on the wall for our coats, along with an intriguing (to me) electrical panel. It had a series of rectangular blocks with pins projecting from it. Each block had a thick cable with many pairs of thin, colorful wires fanned out and neatly connected to the left side, and a rats nest of blue and white wires along the right side. We were told not to touch the board. I touched it nonetheless.

I would later learn that these were Type 66 punchdown blocks for the department’s phone system, and I’d end up using quite a few of them over my hacking life. Punchdown connectors were a staple of both private and public telco physical plants for decades, and belong to a class of electrical connections called insulation displacement connections, or IDC. We’ve recently looked at how crimp connections work, and what exactly is going on inside a solder joint. I thought it might be nice to round things out with a little bit about the workings of IDC.

Continue reading “Punching It Down: Insulation Displacement Connectors”

Bulking Up A Lightweight Lathe With A Concrete Cart

When it comes to machine tools, a good rule of thumb is that heavier is better. A big South Bend lathe or Bridgeport mill might tip the scales at ludicrous weight, but all that mass goes to damping vibration and improving performance. So you’d figure a lathe made of soda cans could use all the help it could get; this cast concrete machine cart ought to fit the bill nicely

Perhaps you’ve caught our recent coverage of [Makercise]’s long and detailed vlog of his Gingery lathe build. If not, you might want to watch the 5-minute condensed video of the build, which shows the entire process from melting down scrap aluminum for castings to first chips. We love the build and the videos, but the lightweight lathe on that wooden bench never really worked for us, or for [Makercise], who notes that he was never able to crank the lathe up to full speed because of the vibrations. The cart attempts to fix that problem the old fashioned way – more mass.

There are a few “measure twice, cut once” moments in the video below, as well as a high pucker-factor slab lift that could have turned into a real disaster. We might have opted for a countertop-grade concrete mix that could be dyed and polished, but that would be just for looks. When all is said and done, the cart does exactly what it was built to do, and there’s even room on it for the shaper that’s next on the build list. We’re looking forward to that.

Continue reading “Bulking Up A Lightweight Lathe With A Concrete Cart”