NintendOscope

[Craig] has taken his gameboy hackery to the next step, using an oscilloscope as an external display. Back in November of 2010 [Craig] showed us how to extract the video data from a classic gameboy’s screen, armed with that information, and a pretty powerful XMega128A1 controller it seems straightforward to process that data and output it onto a oscilloscope that is in XY(z) mode, especially since he has done all of the hard work for us.

Scopes that feature XY mode typically have a Z input on the back, X controls where the beam is positioned from left to right, Y controls the beam from top to bottom, and Z controls the intensity of the beam. By sweeping the X and Y to act as lines, and Z to control the shade of the beam, its fairly easy to reuse your typically vector display as a raster display similar to televisions or computer monitors (as long as you have your math and timing right), making scopes very useful as output displays for devices like the gameboy, which do not have “standards” friendly display systems.

Join us after the break for a short video, and also check out the scope terminal, or the VGA-to Sope converter for more examples of how to use your oscilloscope as a raster display.

Continue reading “NintendOscope”

Rechargeable Battery Capacity Tester

Rechargeable-Battery-Capacity-Tester

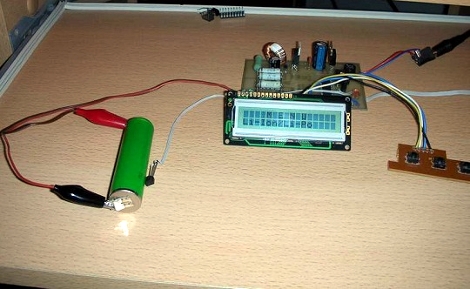
If you are like most people, you likely have a mixed pile of rechargeable batteries sitting around with no idea as to what kind of charge they can hold. You could watch a voltmeter for a few hours while you drain each and every battery, noting when it drops below its stated voltage – but then again, you have a life.  Instead of wasting away in front of his multimeter, [BrianH] decided he would build an automated battery capacity tester to do the job for him.

He created a simple circuit that drains any AA battery, NiMh or NiCd, and records its useful capacity in milliamp hours.  Since the ATMega168 microcontroller used has 6 analog/digital converters on board, he figured that he might as well design his tester to measure the capacity of three batteries simultaneously.  [BrianH] wired the meter up to an old Nokia LCD, then moved his project to a perfboarded ATMega, freeing up his Arduino for other tasks. Once he had things reassembled, he packed it all into a handsome wooden box.

His writeup is chock full of details and source code, so be sure to check it out.  We have video of the charger in action after the jump.

Continue reading “Rechargeable Battery Capacity Tester”

Multitool Alarm System

Here’s a way to make sure you don’t leave your Leatherman multitool somewhere. It’s an alarm system that will start a timer when the tool is removed from the holster. After five minutes the module beeps to remind you to put the tool back where it belongs. Annoying? Possibly, but if you’re not done with your work just press the reed leaf switch on the module to reset the timer. A PIC 12F683 handles the timing and generates the waveform for the piezo buzzer. Perhaps this could have been accomplished with a dual 555 chip like the LM556 (one timer for the countdown and another for the piezo waveform) but the PIC has power-down modes available that should make the button batteries last a long time.

Ossmann Talks About Ubertooth At Schmoocon

[Michael Ossmann’s] talk from Schmoocon about his open source Bluetooth test tool called Ubertooth is now available to watch online. The video really fills in the gaps from the first time we looked at the project, as he covers why he took on the challenge, and what has happened since. He talks about how his work with the IM-ME helped in choosing hardware along the way, and the choices he made while developing the USB dongle. His hardware considerations included parts that didn’t require a nondisclosure agreement (keeping it open source) and that were available in single quantities so that individuals could build and populate their own boards quite easily.

We’ve embedded the talk after the break. The project is coming along great, and his Kickstart funds have almost doubled the original goal.

Continue reading “Ossmann Talks About Ubertooth At Schmoocon”

Logisim: Open Source Digital Logic Simulator

[Spi Waterwing] wrote in to make sure that we were aware of Logisim, a Java-based open source digital logic simulator. We’ve used Atanua quite a bit in the past but hadn’t heard of this program. It seems to have a pretty big educational following and right off the bat it’s got a feature we’ve always wanted, the ability to build your own ‘black box’ logic devices. That is to say you can build your own circuit out of logic gates and then package it into a part to be plopped into your next design. What it doesn’t have is the series logic chips that we’re used to with Atanua, but you can build your own with the black box feature if you really need that kind of functionality.

So grab a copy and try building that binary calculator project from last month.

Mixed I/O Testing Module

Needing to test the display interface for a multitude of different sensors [Fileark] built himself this analog and digital input/output simulator. Along the bottom is a double row of trimpots that adjust analog voltages. Each voltage is measured by the Arduino inside and its value is displayed on the graphic LCD screen to confirm that the hardware you’re testing is making correct measurements. There’s also digital I/O in two different forms. To the upper left are momentary push buttons but the DIP switch bank below that allows the same connections to be toggled on and off. It’s not an automated test bed, but if you’ve got a lot of I/O, or a lot of hardware to test this will save you some real time.

Don’t miss the demonstration video after the break.

Continue reading “Mixed I/O Testing Module”

Rotary Wall Plug From Scrap

Rotary tools such as a Dremel are useful to have around for all sorts of tasks in a workshop, including cutting, polishing, and grinding. [Konstantin] sent us in his home made wall mount rotary tool based off of parts from a blender and an old bench top jigsaw. Unlike a Dremel where the motor is in the hand held part of the tool, this setup hides the blender motor (which provides the power) behind a wall panel, and is controlled via the blender’s speed settings buttons. We could see this configuration allowing for more delicate work due to the reduction of weight in hand, as well as the added bonus of a near impossibility of losing this tool. Overall an excellent re-purposing of leftover parts, be sure to check out [Konstantin]’s blog for more build info and photos.