Bluetooth Low Energy (BLE) 5 has been around since 2016 with the most recent version 5.2 published just this year. There’s not much hardware out there that’s using the new hotness. That didn’t stop [Damien Cauquil] from picking apart BLE 5’s new frequency hopping techniques and updating his BtleJack tool to allow sniffing, jamming and hijacking hardware using the new protocol.
As you can imagine, the BLE standard a complicated beast and just one part of it is the topic here: the PRNG-based frequency hopping scheme that is vastly different from BLE 4.x and earlier. The new standard, called Channel Selection Algorithm (CSA) #2 — uses 65535 possible channels, compared to just 37 channels used by its predecessor. Paired devices agree to follow a randomized list of all possible channels in sequence so that they remain in synchronization between hops. This was put in place to help avoid collisions, making it possible for many more BLE devices to operate in close proximity. This is important to note since it quickly becomes obvious that it’s not a robust security measure by any means.
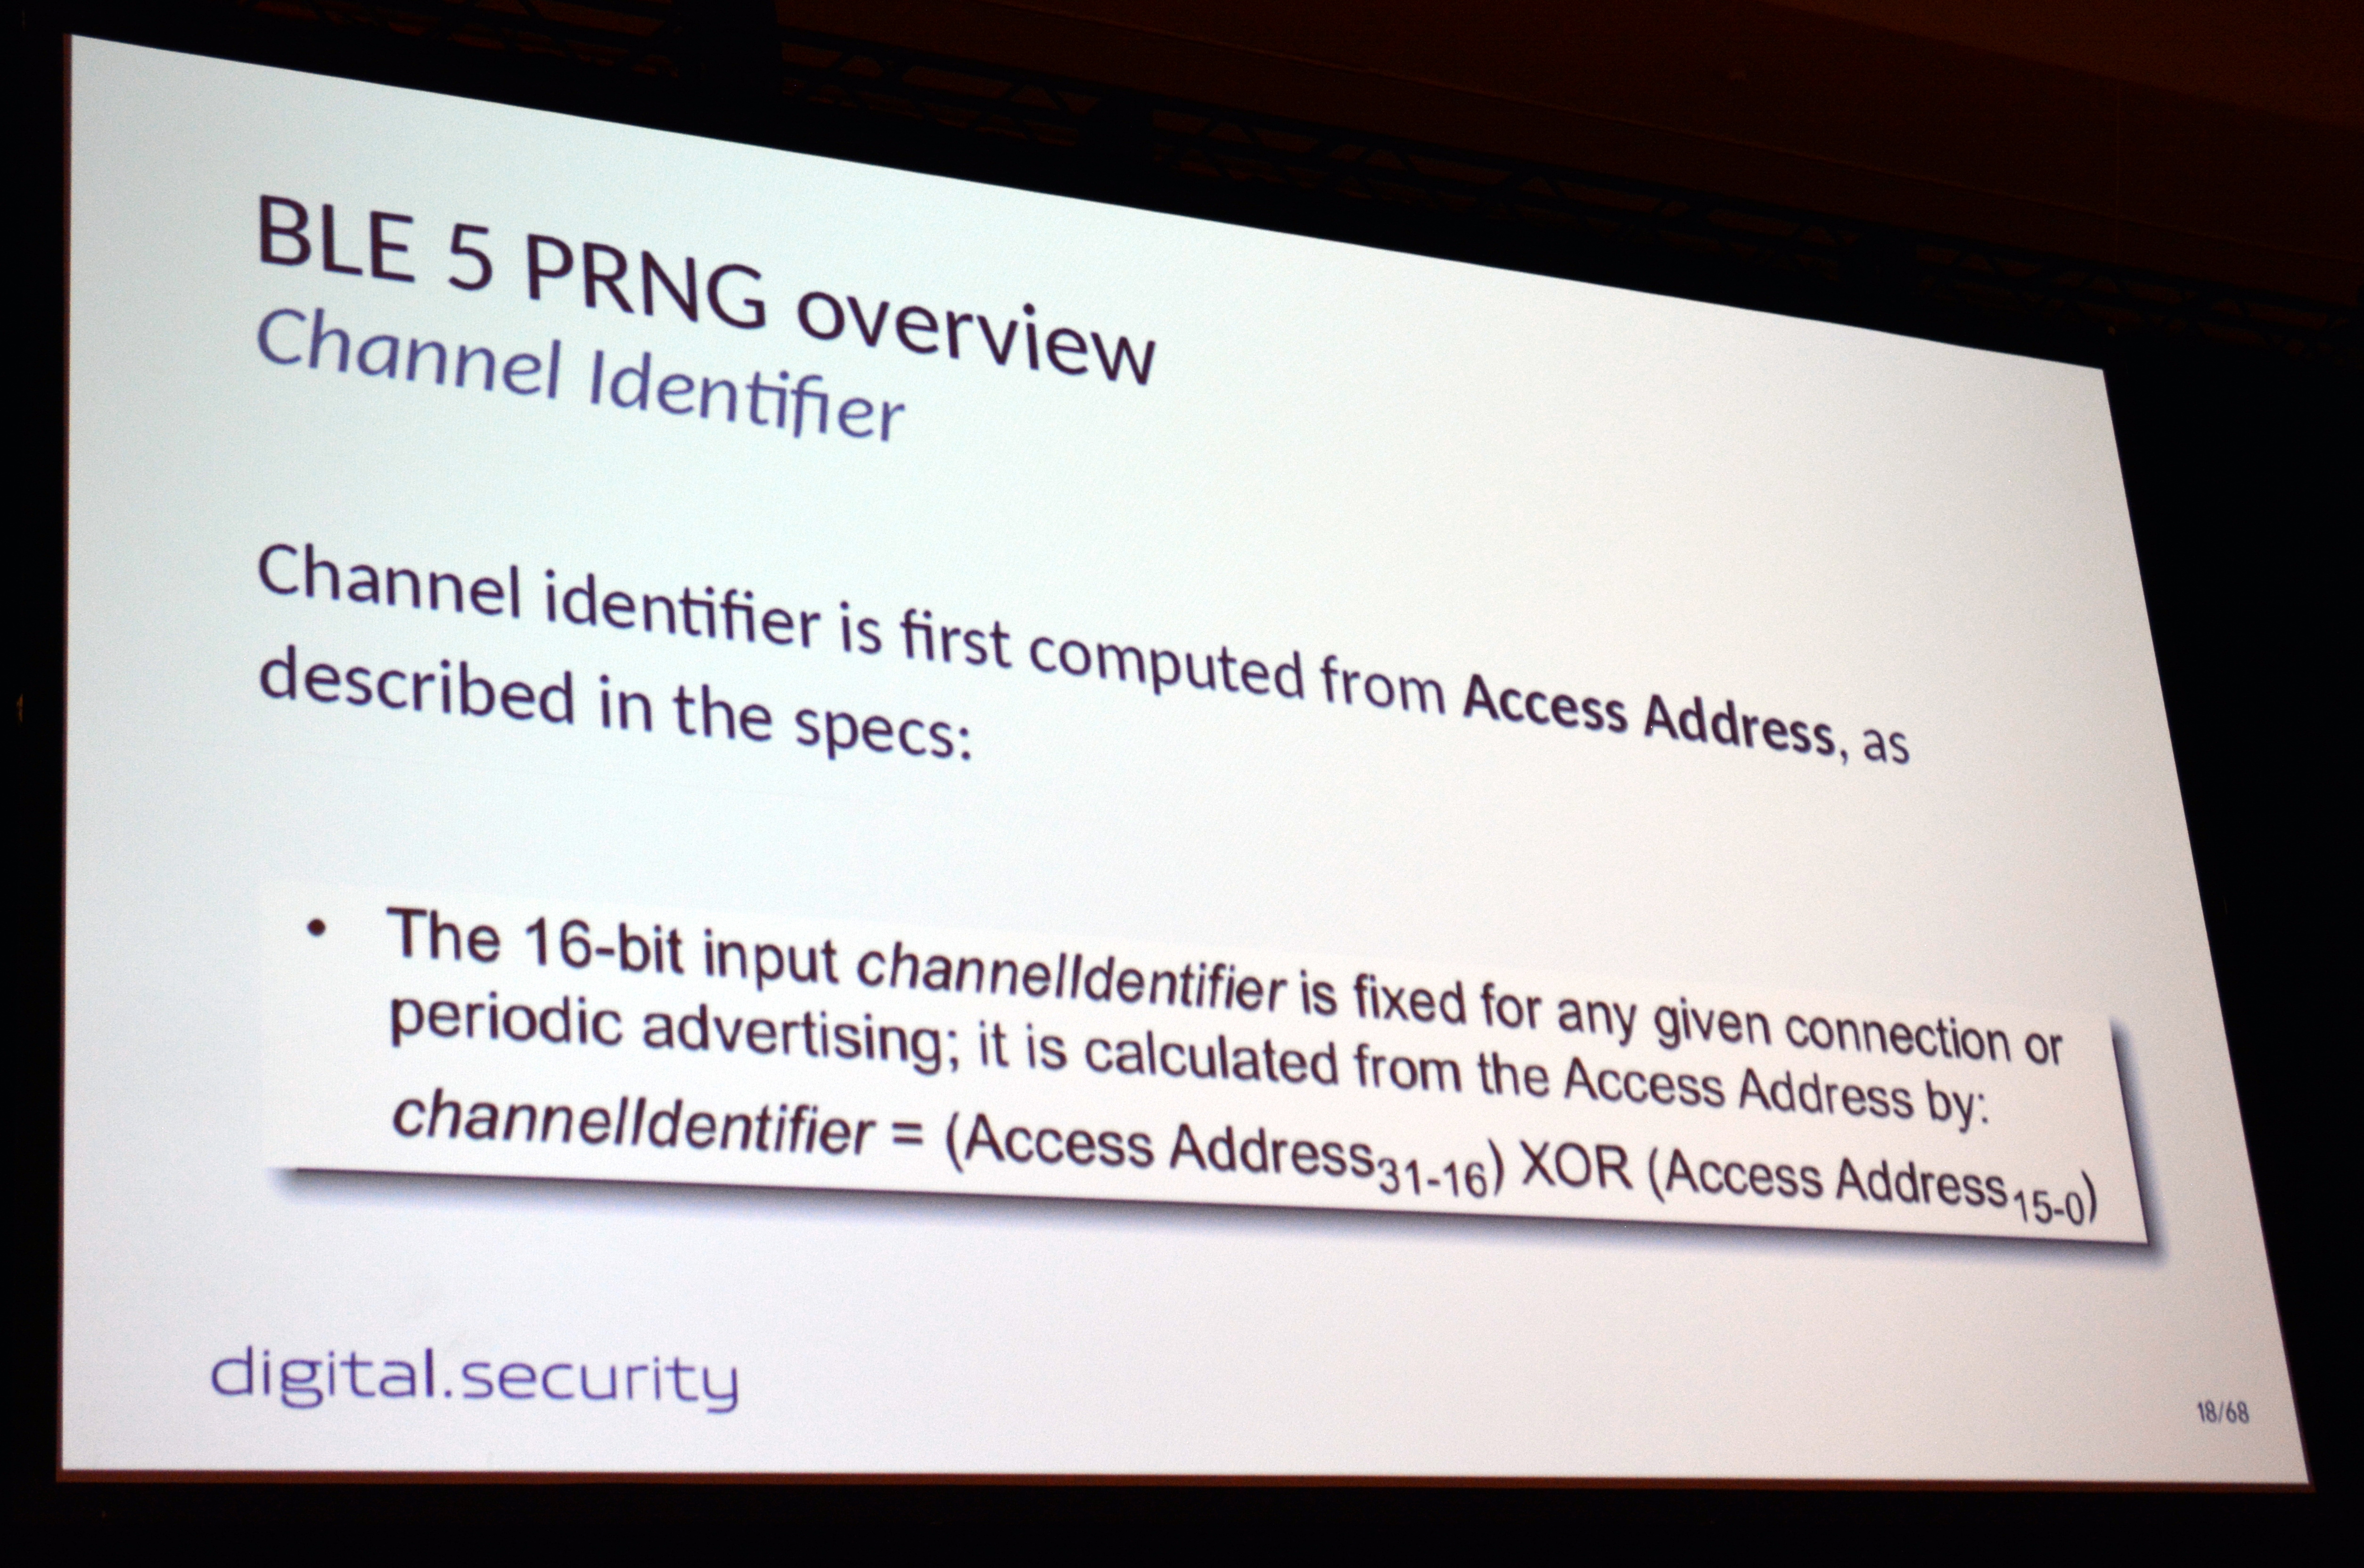
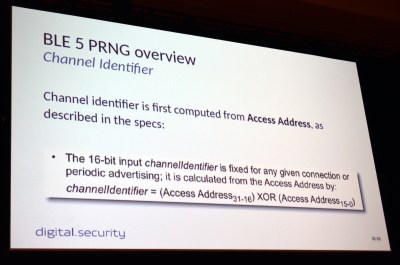 To begin channel hopping the two devices must first agree on an order in which to hop, ensuring they’ll meet one another after each leap. To do so they both run the same 32-bit seed number through a PRNG algorithm, generating a list that will then be followed exactly in order. But it turns out this is not very difficult to figure out. All that’s needed is the access address whose top 16-bits are publicly available if you’re already sniffing packets, and the bottom 16-bits is the counter that increments the hop address list.
If you want to jam or hijack BLE 5 communication you need to establish which “randomized” channel list is being used, and the value of the counter that serves as an index to this list. To do so, [Damien] sniffs packets on two different channels. These channels will be used over and over again as it loops through the channel list, so calculating how much time occurs between each channel indicates how far apart these channels are on the list.
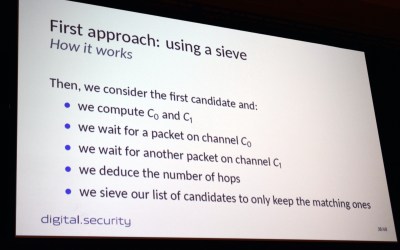 In practice, [Damien] first implemented a sieve (the same concept as the Sieve of Eratosthenes for finding primes) that starts with a list of all possibilities and removes those that don’t contain a matching timing between the two channels. Keep doing this, and eventually, you’ll whittle your list down to one possible channel order.
This certainly worked, but there were timing issues that sometimes meant you could learn the seed but couldn’t then sync with it after the fact. His second approach uses pattern matching. By measuring hops on 11 consecutive channels, he’s able to synchronize with target devices in a minute or less. From there, jamming or hijacking methods come into play. The randomization of this scheme is really marginal. A more robust technique would have used an internal state in both devices to generate the next hopping channel. This would have been much more difficult for an attacker to figure out. From the device perspective, CSA #2 takes very little computation power which is key for power-sipping IoT devices most often using BLE.
As mentioned before, [Damien] had trouble finding any hardware in the wild using the BLE 5 standard. His proof of concept is built on a pair of nRF52840 development boards. Because it needs more testing, the code hasn’t been merged into the main version of BtleJack, but you can still get it right now by heading over to BtleJack repo on GitHub.