Making Music From Cardboard

Fans of MaKey MaKey may find this project similar, but there’s a lot more to the Mini Automat than making music from fruit.

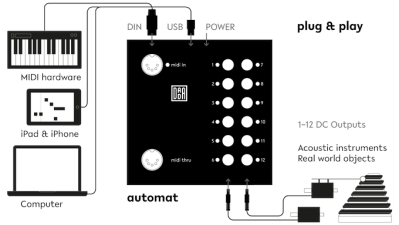
The idea for the Mini Automat (which is an off-shoot of the original Automat project by [Dada Machines]) is to make music accessible to anyone. The device functions as a plug and play MIDI-controller that connects to a computer, MIDI workstation (keyboards and sequencers), or DAW for input and triggers actuators on the output to create music.

The modifications make the originally Automat more hackable by making the board compatible with Arduino and Circuit Python, as well as adding in digital and analog pins for connecting to sensors, buttons, or light systems.

The team has released all schematics, firmware, and software, with only the board layouts unreleased to the public. From solenoids that push, pull, jiggle, smash, and bash at drums to surfaces that vibrate screws and beads, there’s a huge variety of household objects that can be used to make complex layered musical compositions, even for a one-person musician.


The Berlin-based team works on open source music tech hardware with the hopes of bringing environmentally and financially sustainable ideas to market.

Continue reading “Making Music From Cardboard”

Dry Your Clothes In One Minute Or Less

If you’re like most people, then washing clothes is probably a huge pain for you. Figuring out the odd number of minutes necessary to run a wash and dry cycle, trying desperately not to end up with clothes that are still wet, and worst of all having to wait so long for your clothes to be clean can be a real hassle.

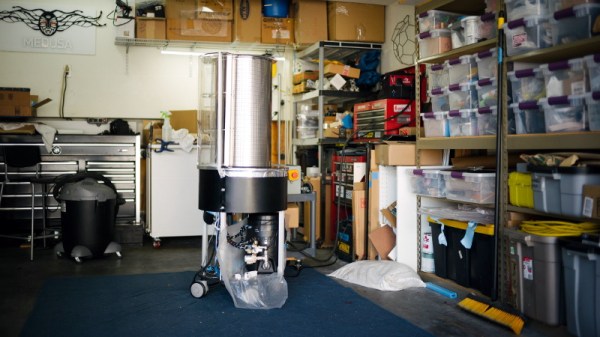
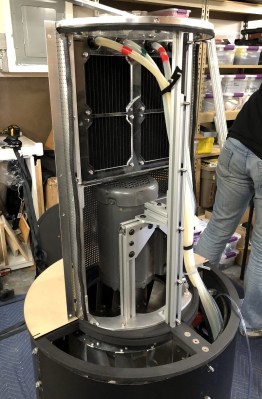
One team of inventors decided to build Eleven, a dryer that dries and sanitizes clothes in a minute or less. As explained in their demo video, clothes are placed around the center tube and dried by the airflow initiated by Eleven. Fragrance and ozone is injected to prevent bacteria from causing bad smells.

The team experimented with ultrasonics and microwave-vacuum system, and ultimately decided to use a method that controls the flow of air within the fabric. A steam generator sprays the clothes with a disinfectant while a filter quarantines the chemicals to a receptacle within the device.

They also installed sensors to monitor the performance of the machine remotely, allowing users to track their clothes and the health of the machine even when they aren’t home. Something we’ve previously seen done in the DIY space.

It might not be the futuristic heat-free clothes dryer we were promised, but Eleven certainly looks like a step in the right direction.

Soldering Your Own Soldering Iron

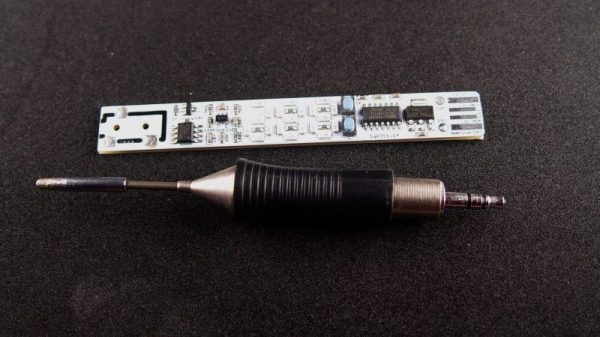
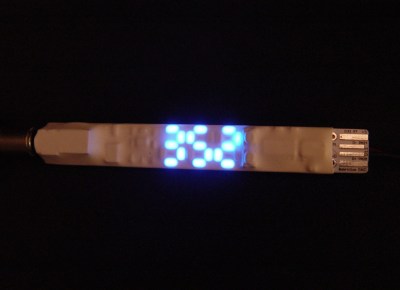
A device that even DIY enthusiasts don’t usually think to DIY is the humble soldering iron. Yet, that’s exactly what one Hackaday.io user did by building a USB-powered soldering pen with better performance than a $5 Chinese soldering pen.

The project draws inspiration from another Weller RT tip-based soldering pen by [vlk], although this project has a simpler display than an OLED. Slovakia-based maker [bobricius] was inspired by the DiXi ATSAMD11C14-based development board. The project uses the same 32-bit ATMEL ARM microcontroller with a USB bootloader, which makes updating the firmware a lot easier.

Two buttons control the heat (+/-) and the jack for the Weller RT soldering tip controls the power out with PWM. For the display, 20 Charlieplexed 3014 LEDs are used to show the temperature from 0-399. The last missing LED is left out since 5 GPIO pins can only drive 20 LEDs.

Assuming that the main heating controls stay the same as [vlk]’s project, the pen uses a current sensor and heating controller for PID control of a heating module, which connects to the SMT connector for the Weller RT soldering iron tip. The temperature sensor uses a an op-amp for amplification of the signal from a type K thermocouple.

While there aren’t currently GERBER files for the PCB yet, the project is based on the open-source OLED display soldering pen project by [vlk], whose schematic for the device is published.

Continue reading “Soldering Your Own Soldering Iron”

Building A Wind Power Generator In Your Backyard

For many environmental enthusiasts, horizontal-axis wind turbines (HAWTs) — the kind that look like windmills slowly spinning in the distance — are a pretty familiar sight. Unfortunately, there are quite a few caveats that make them harder to adopt despite the fact that harvesting renewable energy sources is more sustainable than relying on natural gas and fuels that can be depleted. Since they face in one axis, they need to be able to track the wind, or else trade off the ability to maximize energy output. In turbulent and gusty conditions, as well, HAWTs face accelerated fatigue when harvesting.
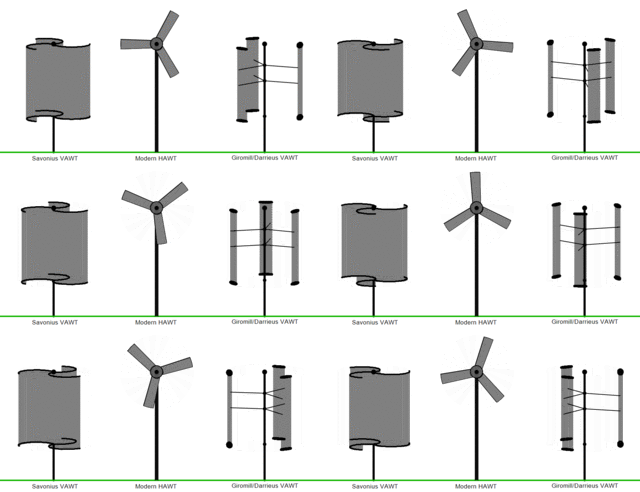
The development of the vertical-axis wind turbine (VAWT) solves several of these issues. In addition, the turbines are typically closer to the ground and the gearbox replacement is simpler and more efficient. Maintenance is more accessible due to the size of the turbines, so no heavy machinery is typically necessary to access crucial components on-site. In addition, the gearbox by nature of its operation takes on less fatigue and is able to function in turbulent winds, which reduces the rate of failure.

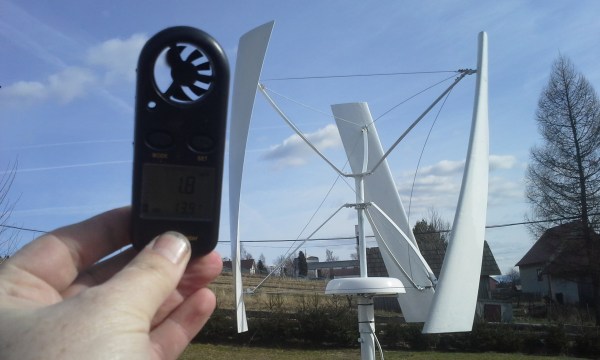
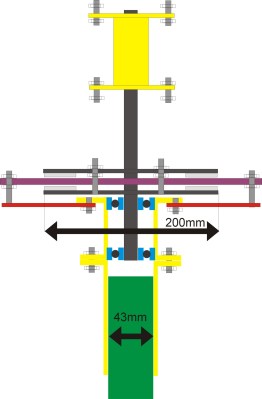
For a simple version of a VAWT that you can build yourself, [BlueFlower] has published several mechanical drawings that detail the layout of the design. The wind power generator uses 24 magnets, copper wire fashioned into coils, and a metal plate for the main generator. The coils are arranged in a circular formation on a static plate, while the magnets are equally spaced on a moving circular plate. As the magnets pass over coils, the flux induces a current, which increases as the plates spin faster.

The blades of the generator are made from blue foam with a metal bar running through it for structure. Three of the blades are attached with triangular bars to a central rod, which also holds the spinning magnetic plate.
In [BlueFlower]’s initial trials using the VAWT for charging a battery they were able to generate a max power of 15W on boost mode and 30-70W when charging in PWM mode. Not bad for a home-made wind power generator!

There aren’t only pros to the design, however. While VAWTs may be cheaper, more mobile, and more resistant to wear and tear, there are some design features that prevent the generators from functioning as well as HAWTs at harvesting energy. The blades don’t produce torque at the same time, with some blades simply being pushed along. This produces more drag on the blades when they rotate, limiting the efficiency of the entire system. In addition, higher wind speeds are typically found at higher altitudes, so the VAWTs will perform better if installed on a towering structure. Vibration forces close to the ground can also wear out the bearings, resulting in more maintenance and costs.


Continue reading “Building A Wind Power Generator In Your Backyard”

Modular Camera Remote Is Highly Capable

Many cameras these days have optional remotes that allow the shutter release to be triggered wirelessly. Despite this, [Foaly] desired more range, and more options for dealing with several cameras at once. As you’d expect, hacking ensued.

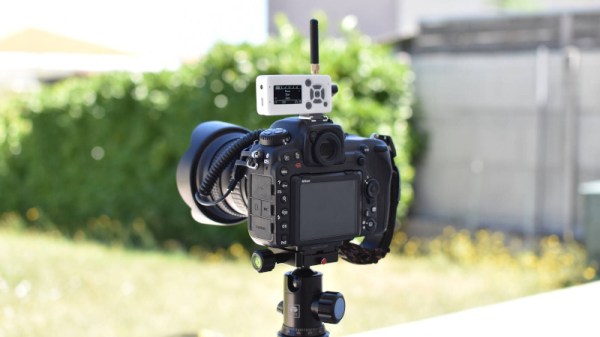
[Foaly] uses Silver modules to photograph rocket launches safely.
The system goes by the name of Silver, and is modular in nature. Each Silver module packs a transmitter and receiver, and can send and receive trigger orders to any other module in range. This allows a module to be used to trigger a camera, or be used as a remote to control other modules. There’s even a PC interface program that controls modules over USB.

Modules are also capable of sharing configuration changes with other modules in the field, making it easy to control a large battery of cameras without having to manually run around changing settings on each one. Oh, and it can run as a basic intervalometer too.

LoRa is used for wireless communications between modules, giving them excellent range. [Foaly] successfully used the remotes at ranges over 500 meters without any dropouts, capturing some great model rocket takeoffs in the process.

Silver is a highly robust project that should do everything the average photographer could ever possibly need, and probably a good deal more. Firmware and board files are available for those eager to make their own.

We’ve seen several very impressive camera augmentations entered into the 2019 Hackaday Prize, from ultra high-speed LED flash modules to highly flexible automatic trigger systems.

No Need To Watch Your Tea, This Robot Does It For You

For anyone who’s ever had to make their own tea, steeping it for the right amount of time can be a pain. That’s precisely the problem that the automatic tea brewing robot solves with its painless approach to brewing tea, built by Slovenian electrical engineering student [Kristjan Berce].

You can use the robot by setting a timer on the knob, at which point the robot raises it arm for the tea bag then dips in the water every 30 seconds until the time has passed. At the end of the timer, the bag is raised clear of the cup to end the brewing. It’s a remarkably simple design that almost evokes chindogu (the Japanese art of useless inventions) if not for the fact that the robot actually serves a useful purpose.

The components for 3D printing the robot are available online, consisting of a case, a container for the Arduino-powered electronics, the lever for holding the tea, and the gear that raises the lever up and down. The device also uses an integrated Li-Ion battery with an accessible charging port and integrated BMS. A 35BYJ46 stepper motor and ULN2003 driver are used to move the 3D printed mechanism. The device uses a potentiometer for setting the steeping time between 1 and 9 minutes, and there’s even a buzzer for indicating once the tea is done brewing.

The Gerber and Arduino code files are open-source for any hackers looking to make their own tea brewers; just take care they operate with “deadly punctuality”.

Continue reading “No Need To Watch Your Tea, This Robot Does It For You”

X-Printer Fits In A Backpack

3D printers are great for rapid prototyping, but they’re not usually what you’d call… portable. For [Malte Schrader], that simply wouldn’t do – thus, the X-printer was born!

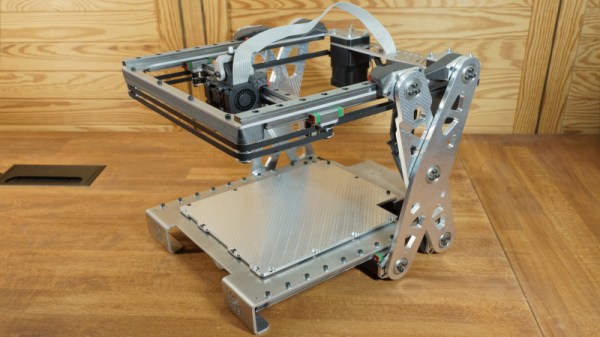
The X-printer is a fused-deposition printer built around a CoreXY design. Its party piece is its folding concertina-style Z-axis, which allows the printer to have a build volume of 160x220x150mm, while measuring just 300x330x105mm when folded. That’s small enough to fit in a backpack!

Getting the folding mechanism to work took some extra effort, with the non-linear Z-axis requiring special attention in the firmware. The printer runs Marlin 1, chosen for its faster compile time over Marlin 2. Other design choices are made with an eye to ruggedness. The aluminium frame isn’t as light as it could be, but adds much needed rigidity and strength. We’d love to see a custom case that you could slide the printer into so it would be protected while stowed.

It’s a build that shows there’s still plenty to be gained from homebrewing your own printer, even in the face of unprecedented options on the market today. We’ve seen other unique takes on the portable printer concept before, too. Video after the break.

Continue reading “X-Printer Fits In A Backpack”