Expanding On The Creation Of Collapsible Containers

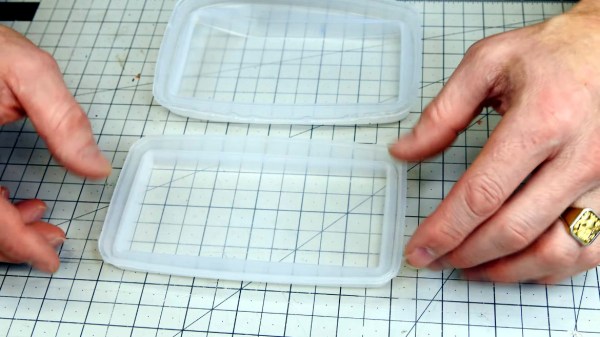
You might remember that industrial designer [Eric Strebel] tried to make a collapsible silicone container with 3D printed molds a few weeks ago, and was finally successful after dozens of attempts. Someone commented that commercial containers are molded in the collapsed position instead of the expanded position, so naturally, [Eric] had to try it once he saw the photographic proof of these molds.
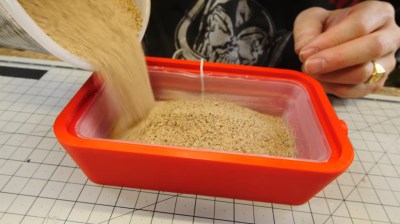
Adding sand to a partially-cured silicone piece so it will take the shape of the expanded mold.This time around, [Eric] made things easier on himself by adding some handles to the mold and using both wax and spray mold release before pouring in the degassed silicone. The first one was a failure —  he had let it cure the whole time in the collapsed mold, and it just didn’t want to stay expanded. On the second attempt, [Eric] decided to pull the piece while it was curing, about 5 1/2 hours into the process.

After carefully de-molding the piece, he pressed it into the grooves of one of the older molds from the days of molding containers in the expanded state. Then he filled it with sand and let it cure the rest of the way. That worked out quite well, but even so, [Eric] made a third attempt that he pulled after 3.5 hours or so when the silicone was still sticky.  He did the sand trick again, but this time, he ran a piece of string up the wall and over the edge so that the air that gets trapped under the sand can escape. The final result looks great, albeit a little bit floppy, but [Eric] fits the final product into a frame that makes them much sturdier. Check out the process in the video after the break.

Did you miss the first installment? It’s worth a look into the science of creating collapsible walls.

Continue reading “Expanding On The Creation Of Collapsible Containers”

How To Make A Collapsible Container Without Breaking Down

How hard could it be to make a collapsible silicone container? Turns out, it’s really, really hard — collapsible containers have rigid guidelines. Just ask [Eric Strebel], who failed dozens of times before finally getting it right (video, embedded below).

[Eric] started with an SLA-printed two-part mold and a silicone formulation with a Shore durometer of A 40 — this is the measure of hardness for silicone, polymers, and elastomers in the sense that the piece will resist indentation. The first twenty-four attempts all came out looking great, but not a single one of them would collapse and stay collapsed.

Eventually, [Eric] went back to the drawing board and played with the angles of the flex points, the thickness of the living hinges, and the wall thicknesses, which have to be strong enough to stay collapsed.

For attempt #25, [Eric] took the part out of the mold about three hours in and tried curing it in the collapsed state. Persistence paid off, and the part finally collapses and stays that way. Get yourself some popcorn and check out the fail-fest after the break. You know what we always say — fail fast, fail often.

[Eric] has made many molds both from silicone and for silicone. Some of them are really big!

Continue reading “How To Make A Collapsible Container Without Breaking Down”

Serial Silicone Molding

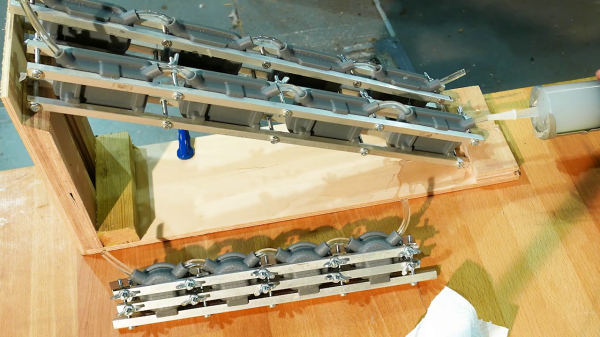
The techniques for making single-digit quantities of custom molded parts don’t scale well when you need to make dozens, as [Kevin Holmes] discovered. He needed to make 80-some sets of a silicone motor mount, and the one-up mold process was not going to work. He explores several solutions, which he rejects as being too complicated. Finally [Kevin] comes up with the idea of daisy-chaining banks of molds clamped together with rails of stock metal bars. It’s a pretty nifty process to watch and you can check the video out below, which is not unlike a very slow 7495 four-bit shift register.

Even though the silicone he uses is clear, pay attention and you can still see the carry-out as it propagates from mold to mold. He manually performs the nibble carry operation from one bank to the next — we wonder if he could cascade these banks, and inject all 80 in one really big squeeze?

Why would someone need 80 sets of silicone rubber motor mounts, you may ask? Well, you may remember the 4-mation 3D zoetrope that we wrote about back in 2018. [Kevin] is one of the founders of this mesmerizing project, and it would seem that their Kickstarter project has been successful. As he demonstrates in the video below, without some type of noise dampening mounts, a rumble from the motor is amplified through the stage of the zoetrope. If you have any favorite mold-making tips for small batch manufacturing, let us know in the comments below. Thanks to [George Graves] for sending this tip our way.

Continue reading “Serial Silicone Molding”

Optimized Molds With 3D Printing

[Florian] has a few arcade games and MAME machines, and recently he’s been trying to embed objects in those hard plastic spheres on the end of joysticks. A common suggestion is to 3D print some molds, but even though that’s a great idea in theory the reality is much different: you’re going to get layer lines on the casting, and a mirror finish is impossible.

No, a silicone mold is the way to do this, but here 3D printing can be used to create the mold for the silicone. Instead of a few pieces of hot glued cardboard or a styrofoam cup, [Florian] is 3D printing a a container to hold the liquid silicone around the master part.

After printing a two-piece part to hold both halves of a silicon mold, [Florian] put the master part in, filled it up with silicone, and took everything apart. There were minimal seam lines, but the end result looks great.

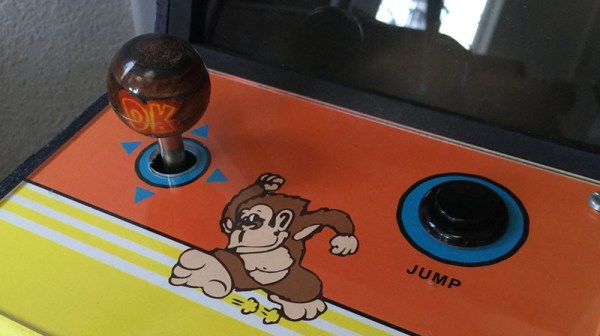
In addition to making a 3D printed mold container, [Florian] is also experimenting with putting 3D printed parts inside these joystick balls. The first experiment was a small 3D printed barrel emblazoned with the Donkey Kong logo. This turned out great, but there’s a fair bit of refraction that blows out all the proportions. Further experiments will include a Pac-Man, a skull, and a rose, to be completed whenever [Florian] gets a vacuum chamber.