Printing An Aston Martin DB4

CAR

With 3D printers finding their way into the workshops of makers the world over, it was bound to happen sooner or later. [Ivan Sentch] is making an Aston Martin DB4 with a 3D printer.

Before we board the hype train, let’s go over what this is project is not: [Ivan] isn’t making any metal parts with his 3D printer, and the chassis and engine will be taken from a donor car. Also, the printed plastic parts won’t actually make their way into the final build; the 3D printed body panels will be used to pull the final panels in fiberglass. That being said, it’s still an impressive undertaking that’s going to cost [Ivan] $2250 NZD in plastic alone.

[Ivan]’s body panels are made by taking a DB4 model in Solidworks, slicing it up into 105mm squares, giving each square extruded sides, and finally securing them to the wooden form after the parts are printed. There’s still an awful lot of work to be done once the 3D printed parts are all glued together, but it’s still an amazingly impressive – and cheap – way to create a replica of a very famous automobile.

3D Printing With Liquid Metals

Gallium

While 3D printers of today are basically limited to plastics and resins, the holy grail of desktop fabrication is printing with metal. While we won’t be printing out steel objects on a desktop printer just yet, [Collin Ladd], [Ju-Hee So], [John Muth], and [Michael D. Dickey] from North Carolina State University are slowly working up to that by printing objects with tiny spheres of liquid metal.

The medium the team is using for their metallic 3D prints is an alloy of 75% gallium and 25% indium. This alloy is liquid at room temperatures, but when exposed to an oxygen atmosphere, a very thin layer of oxide forms on a small metal bead squeezed out of a syringe. Tiny metal sphere by tiny metal sphere, the team can build up metallic objects out of this alloy, stacking the beads into just about any shape imaginable.

In addition to small metal spheres, [Collin] and his team were also able to create free-standing wires that are able to join electrical components. Yes, combined with a pick and place machine, a printer equipped with this technology could make true printed circuit boards.

Even though the team is only working on very small scales with gallium, they do believe this technology could be scaled up to print aluminum. A challenging endeavour, but something that would turn the plastic-squeezing 3D printers of today into something much more like the Star Trek replicators of tomorrow.

Video demo below, or check out [Collin]’s editing room floor and a vimeo channel. Here’s the paper if you’ve got a Wiley subscription.

Continue reading “3D Printing With Liquid Metals”

Hackaday Links: Sunday, June 30th, 2013

hackaday-links-chain

The race is on to squeeze cycles out of an 8MHz AVR chip in order to better drive the WS2811 LED protocol.

[Asher] doesn’t want to buy charcoal aquarium filters if he can just build them himself. He filled a couple of plastic drink bottles with charcoal, cut slots in the sides, and hooked them up to his pump system. A gallery of his work is available after the break.

Is the best way to make microscopic sized batteries to 3d print them? Harvard researchers think so. [Thanks Jonathan and Itay]

The Ouya gaming console is now available for the general public. [Hunter Davis] reports that the Retrode works with Ouya out-of-the-box. If you don’t remember hearing about it, Retrode reads your original cartridge ROMs for use with emulators.

Making a cluster computer out of 300 Raspberry Pi boards sounds like a nightmare. Organization is the key to this project.

Hackaday alum [Jeremy Cook] is working on an animatronic cigar box. Here he’s demonstrating it’s ability to listen for voice commands.

A Kelvin clips is a type of crocodile clip that has the two jaws insulated from each other. [Kaushlesh] came up with a way to turn them into tweezer probes.

Continue reading “Hackaday Links: Sunday, June 30th, 2013”

3D Printing Sensor Mounts For The Oculus Rift

While browsing an oculus rift thread on reddit, I saw someone mention how nice it would be to have some actual mounts for external sensors on their Rift. The idea is that adding additional sensors or cameras will allow us to expand the capabilities of the rift. With something like the Razor Hydra, you can add quick positional tracking (the rift only tracks rotation, not position). With some webcams, you could theoretically do some stereoscopic augmented reality.  Unfortunately, attaching all these things to the rift is a bit of a pain at the moment.

I had all the things right here in front of me to make this happen, so I did! I’ve quickly tossed together two accessories for the Rift.

1. a small bracket that feeds onto the velcro on the back. People will likely use this for “heavy” position sensors. They may be fairly light, but any additional weight on the front of the rift is unwanted.

2. A snap-on face plate that has a modular design. This wold be for mounting cameras on the front of the rift.

All of these files can be downloaded here.

One Piece, 3D Printed Crossbow

bow

Centuries ago, craftsmen and smiths of all sort spent hundreds of hours crafting a crossbow. From the fine craftsmanship that went into making the bow to the impeccable smithing a windlass requires, a lot of effort went into building a machine of war. Since [Chris] has a 3D printer, he figured he could do just as well as these long-dead craftsmen and fabricate a crossbow in under a day.

What’s really interesting about [Chris]’ crossbow is that it is only a single piece of plastic. The bow is integrated into the stock, and the trigger works by some creative CAD design that takes advantage of the bendability of plastic. The only thing required to shoot a bolt from this crossbow is a piece of string. That, and a few chopsticks.

He won’t be taking part in any sieges, but [Chris]’ weapon is more than capable of shooting a bolt across a room or launching a balsa wood airplane. You can see an example of this after the break.

Continue reading “One Piece, 3D Printed Crossbow”

Preserving Locomotives With 3D Laser Scanning And 3D Printing

[Chris Thorpe] is a model railroading aficionado, and from his earliest memories he was infatuated with the narrow gauge locomotives that plied their odd steel tracks in northern Wales. Of course [Chris] went on to create model railroads, but kit manufacturers such as Airfix and Hornby didn’t take much interest in the small strange trains of the Ffestiniog railway.

The days where manufacturing plastic models meant paying tens of thousands of dollars in tooling for injection molds are slowly coming to an end thanks to 3D printing, so [Chris] thought it would be a great idea to create his own models of these small locomotives with 3D laser scanners and high quality 3D printers.

[Chris] started a kickstarter to fund a 3D laser scanning expedition to the workshop where the four oldest locomotives of the Ffestiniog railway were being reconditioned for their 150th anniversary. The 3D printed models he’s able to produce with his data have amazing quality; with a bit of paint and a few bits of brass, these models would fit right in to any model railway.

Even better than providing scale narrow gauge engines to model railway enthusiasts around the world is the fact that [Chris] has demonstrated the feasibility of using modern technology to recreate both famous and underappreciated technological relics in plastic for future generations. There’s a lot that can be done with a laser scanner in a railway or air museum or [Jay Leno]’s garage, so we’d love to see more 3D printed models of engineering achievements make their way onto Kickstarter.

Signing Your 3D Prints

print

For all the 3D models out on the Internet, including the STL files on Thingiverse that are copied by other makers every day, there hasn’t been a good way to put your John Hancock on a three-dimensional piece of plastic you’ve designed. [Chris] has been thinking about the fact that an STL file released on the Internet is completely out of the creator’s hands for a while now, and he finally came up with a good solution to signing 3D prints.

[Chris] had been looking into ‘stamping’ a maker’s mark on the first few layers of a print, but this wasn’t always practical. Sometimes the bottom of a print needs to be a smooth surface, so [Chris] moved his initials up a few layers into the main body of the print.

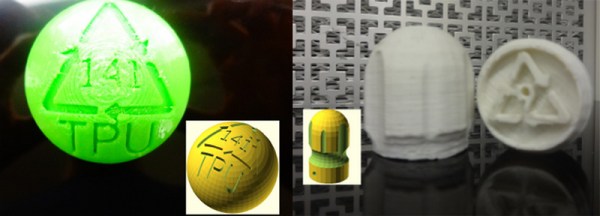
By subtracting a 1.0 mm-thick version of his initials from the interior of a print, [Chris] is able to put his maker’s mark on the inside of a 3D object, visible only for a short time during the production process.

The signature isn’t impossible to remove, but it does give a little bit of credit to the original designer, all without some strange DRM scheme or metadata attached to an STL file.

You can check out [Chris]’ printer laying down a few layers of his logo after the break.

Continue reading “Signing Your 3D Prints”