Simple Tips For Better 3D-Printed Enclosures

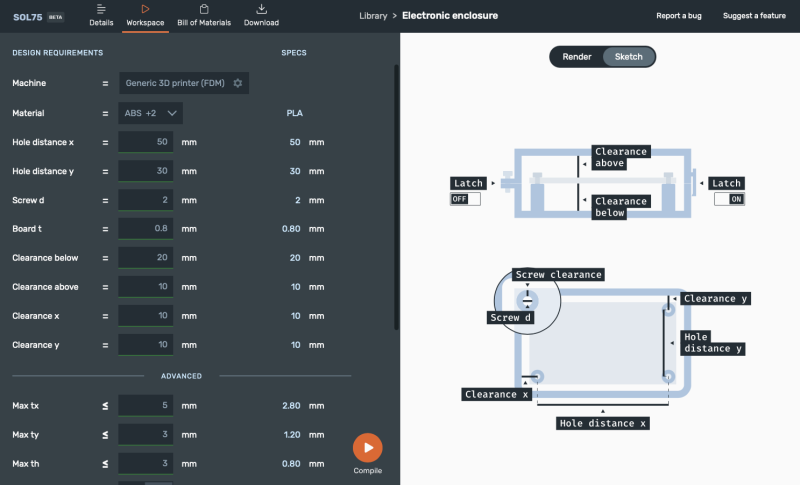
3D printing can be great for making enclosures, and following some simple guidelines can help the whole process go much smoother. 3D Hubs has an article on designing printed enclosures that has clear steps and tips to get enclosures coming out right the first time. 3D Hubs offers 3D printing and other services, and the article starts with a short roundup of fabrication methods but the rest is a solid set of tips applicable to anyone.

The first recommendation is to model the contents of the enclosure as a way to help ensure everything fits as it should, and try to discover problems as early as possible during the design phase, before anything gets actually printed. We’ve seen how a PCB that doesn’t take the enclosure into account risks needing a redesign, because there are some issues an enclosure just can’t fix.

The rest of their advice boils down to concrete design guidelines about wall thickness (they recommend 2 mm or more), clearances (allow a minimum of 0.5 mm between internal components and enclosure), and how to size holes for fasteners, clips, or ports. These numbers aren’t absolute minimums, but good baseline values to avoid surprises.

One final useful tip is that using a uniform wall thickness throughout the enclosure is general good practice. While this isn’t strictly necessary for successful 3D printing, it will make life easier if the enclosure ever moves to injection molding. Want to know more? Our own Bob Baddeley has an excellent primer on injection molding, and his been-there-done-that perspective is invaluable.

A Featherweight Direct Drive Extruder In A Class Of Its Own

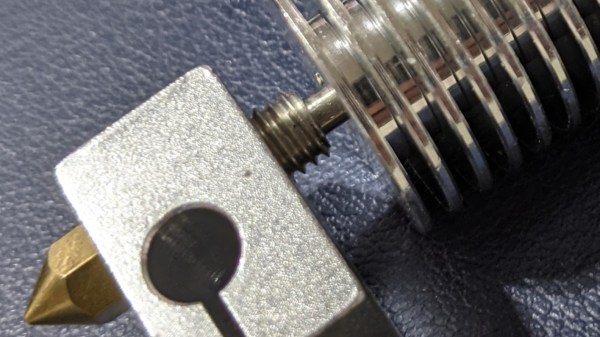
Even a decade later, homebrew 3D printing still doesn’t stop when it comes to mechanical improvements. These last few months have been especially kind to lightweight direct-drive extruders, and [lorinczroby’s] Orbiter Extruder might just set a paradigm for a new kind of direct drive extruder that’s especially lightweight.

Weighing in at a mere 140 grams, this setup features a 7.5:1 gear reduction that’s capable of pushing filament at speeds up to 200 mm/sec. What’s more, the gear reduction style and Nema 14 motor end up giving it an overall package size that’s smaller than any Nema 17 based extruder. And the resulting prints on the project’s Thingiverse page are clean enough to speak for themselves. Finally, the project is released as open source under a Creative Commons Non-Commercial Share-Alike license for all that (license-respecting!) mischief you’d like to add to it.

This little extruder has only been around since March, but it seems to be getting a good amount of love from a few 3D printer communities. The Voron community has recently reimagined it as the Galileo. Meanwhile, folks with E3D Toolchangers have been also experimenting with an independent Orbiter-based tool head. And the Annex-Engineering crew has just finished a few new extruder designs like the Sherpa and Sherpa-Mini, successors to the Ascender, all of which derive from a Nema 14 motor like the one in the Orbiter. Admittedly, with some similarity between the Annex and Orbiter designs, it’s hard to say who inspired who. Nevertheless, the result may be that we’re getting an early peek into what modern extruders are starting to shape into: smaller steppers and more compact gear reduction for an overall lighter package.

Possibly just as interesting as the design itself is [lorinczroby’s] means of sharing it. The license terms are such you can faithfully replicate the design for yourself, provided that you don’t profit off of it, as well as remix it, provided that you share your remix with the same license. But [lorinczroby] also negotiated an agreement with the AliExpress vendor Blurolls Store where Blurolls sells manufactured versions of the design with some proceeds going back to [lorinczroby].

This is a clever way of sharing a nifty piece of open source hardware. With this sharing model, users don’t need to fuss with fabricating mechanically complex parts themselves; they can just buy them. And buying them acts as a tip to the designer for their hard design work. On top of that, the design is still open, subject to remixing as long as remixers respect the license terms. In a world where mechanical designers in industry might worry about having their IP cloned, this sharing model is a nice alternative way for others to both consume and build off of the original designer’s work while sending a tip back their way.

Continue reading “A Featherweight Direct Drive Extruder In A Class Of Its Own”

Bringing High Temperature 3D Printing To The Masses

Despite the impressive variety of thermoplastics that can be printed on consumer-level desktop 3D printers, the most commonly used filament is polylactic acid (PLA). That’s because it’s not only the cheapest material available, but also the easiest to work with. PLA can be extruded at temperatures as low as 180 °C, and it’s possible to get good results even without a heated bed. The downside is that objects printed in PLA tend to be somewhat brittle and have a low heat tolerance. It’s a fine plastic for prototyping and light duty projects, but it won’t take long for many users to outgrow its capabilities.

The next step up is usually polyethylene terephthalate glycol (PETG). This material isn’t much more difficult to work with than PLA, but is more durable, can handle higher temperatures, and in general is better suited for mechanical parts. If you need greater durability or higher heat tolerance than PETG offers, you could move on to something like acrylonitrile butadiene styrene (ABS), polycarbonate (PC), or nylon. But this is where things start to get tricky. Not only are the extrusion temperatures of these materials greater than 250 °C, but an enclosed print chamber is generally recommended for best results. That puts them on the upper end of what the hobbyist community is generally capable of working with.

Industrial 3D printers like the Apium P220 start at $30,000.

But high-end industrial 3D printers can use even stronger plastics such as polyetherimide (PEI) or members of the polyaryletherketone family (PAEK, PEEK, PEKK). Parts made from these materials are especially desirable for aerospace applications, as they can replace metal components while being substantially lighter.

These plastics must be extruded at temperatures approaching 400 °C, and a sealed build chamber kept at >100 °C for the duration of the print is an absolute necessity. The purchase price for a commercial printer with these capabilities is in the tens of thousands even on the low end, with some models priced well into the six figure range.

Of course there was a time, not quite so long ago, where the same could have been said of 3D printers in general. Machines that were once the sole domain of exceptionally well funded R&D labs now sit on the workbenches of hackers and makers all over the world. While it’s hard to say if we’ll see the same race to the bottom for high temperature 3D printers, the first steps towards democratizing the technology are already being made.

Continue reading “Bringing High Temperature 3D Printing To The Masses”

Improved Flexible Build Plate For SLA Is Ready To Rock

The Elegoo Mars is an affordable SLA (resin-based) 3D printer, and there are probably few that have seen more mods and experimentation than [Jan Mrázek]’s machine. The final design of his DIY flexible build plate is a refinement of his original proof of concept, which proved a flexible build platform can be every bit as useful on an SLA printer as it is for FDM; instead of chiseling parts off a rigid build platform, simply pop the flexible steel sheet off the magnetic base and flex it slightly for a much easier part removal process. His original design worked, but had a few rough edges that have since been ironed out.

[Jan]’s magnetic build platform.
We love how [Jan] walks through all of the design elements and explains what worked and what didn’t. For example, originally he used a galvanized steel sheet which was easy enough to work with, but ended up not being a viable choice because once it’s bent, it stays bent. Spring steel is a much better material for a flexible build platform, but is harder for a hobbyist to cut.

Fortunately, it’s a simple job for any metal fabrication shop and [Jan] got a variety of thicknesses cut very cheaply. It turns out that the sweet spot is 0.3 mm (although 0.2 mm is a better choice for particularly fragile parts.) [Jan] also suggests cutting the sheet a few millimeters larger than the build platform; it’s much easier to peel the sheet off the magnetic base when one can get a fingertip under an edge, after all.

The magnetic base that the steel sheet sticks to is very simple: [Jan] converted a stock build platform by mounting an array of 20 x 20 x 1 mm magnets with 3M adhesive mounting tape. He was worried that resin might seep in between the magnets and cause a problem, perhaps even interfering with the adhesive; but so far it seems to be working very well. Resin is viscous enough that it never penetrates far into the gaps, and no effect on the adhesive has been observed so far.

Watch how easily parts are removed in the short video embedded below, in which [Jan] demonstrates his latest platform design.

Continue reading “Improved Flexible Build Plate For SLA Is Ready To Rock”

Polymer Networks Make Better 3D Prints

Biological machines such as human and animal bodies are quite incredible. Your body seamlessly incorporates materials as different as muscle, bone, and tendons into an integrated whole. Now Texas A&M researchers think they can imitate nature using polymer networks that have a tunable stiffness. As a bonus, similar to biological devices, the material spontaneously self-heals.

The trick relies on the Diels-Alder reaction which is a cycloaddition reaction of a conjugated diene to an alkene. Diels-Alder-based polymers or DAPs will bond together even when they have different physical characteristics and they undergo a reversible reaction to heat which offers shape-memory and healing capability.

Continue reading “Polymer Networks Make Better 3D Prints”

Robotic Worm Uses NinjaFlex Filament

If you think about building a moving machine, you probably will consider wheels or tracks or maybe even a prop to take you airborne. When [nwlauer] found an earthworm in the garden, it inspired a 3D-printed robot that employs peristaltic motion. You can see a video of it moving, below.

The robot uses pneumatics and soft plastic, and is apparently waterproof. Your printer’s feed path has to be pretty rigid to support flexible filament without jamming. There’s also some PVA filament and silicone tubing involved.

Continue reading “Robotic Worm Uses NinjaFlex Filament”

Plaster Annealing 3D Prints For Strength

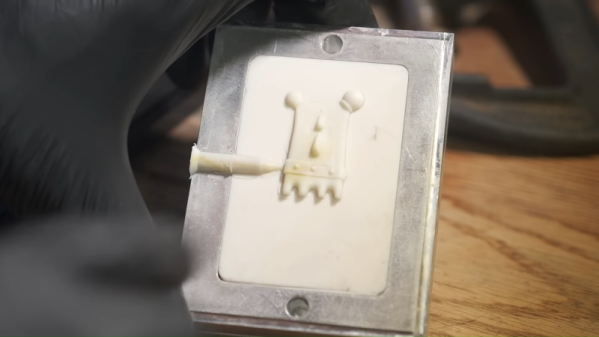
[Stefan] is always trying to make stronger 3D prints. Annealing can strengthen prints, but often at the expense of the part’s exact dimensions. His latest approach is to embed the prints in plaster and then anneal in an attempt to fuse the plastic together without changing its shape or size. Did it work? See for yourself in the video below.

He’s done a lot of work we’ve taken note of before where he measures the strength of parts after different post-processing steps. His test plastic parts used both PLA and PETG.

Continue reading “Plaster Annealing 3D Prints For Strength”