Blastoise Humidifier Shows Us You Don’t Need A 3D Printer If You’re This Good With A 3D Pen

[3D SANAGO] is a bit of a master when it comes to using a 3D-printing pen. Their latest work involved fixing a broken humidifier and giving it a Pokemon-themed makeover. It’s an education in just what can be achieved with a tool many of us write off as a simple novelty.

The basic idea of the build was to create a Blastoise figurine that serves as a humidifier. Work starts with marking out a basic outline on a round stone. The 3D pen is then used to create a tortoise shell with the appropriate concave shape, directly on the rock. [3D SANAGO] also demonstrates how a simple plastic framework can be heated with a blowtorch and shaped around the rock as needed to generate gentle curves. Meanwhile, a simple marker pen serves as a form for creating the gun barrels on Blastoise’s back. The legs are built with a similar technique, but with expert manipulation with a blowtorch to turn them into stubby muscular forms.

The full figurine is built up in stages, with individual wireframe components assembled into a complete body. The gaps in the frame are then filled in by hand, which takes a long time; [3D SANAGO] calls it “the most boring for sure.” Plenty of post-processing is then done with various sanding tools and a bladed tip on a soldering iron. The latter is used as the melting action allows the creation of a smooth final surface. In contrast, subtractive methods like sanding would leave holes and divots that need to be filled in before painting. There’s plenty of sealing to be done before paint, too, to ensure the interior of Blastoise can hold water without leaking. Then, the internal componets are installed and the body finished to its final cartoon form. In case you’re wondering, [3D SANAGO] says that sanding took 2-3 days to get such a great result.

If you really dig it, it’s on display at [3D SANAGO’s] cafe in Daejeon. Overall, it’s amazing to see such craftsmanship with a 3D pen. A resin printer could obviously print a wonderful Blastoise of similar quality, but there’s something about watching the level of human skill in this that’s just compelling. Video after the break.

Continue reading “Blastoise Humidifier Shows Us You Don’t Need A 3D Printer If You’re This Good With A 3D Pen”

Hacking A 3D Pen For Better Performance

When 3D pens first became available, many assumed them to be gimmicky or part of a general fad that would eventually die out. Like most revolutionary technologies, though, they’ve found a firm foothold, especially in the art community where the ability to 3D print in freehand is incredibly valuable. There are still some shortcomings with the technology, though, but [tterev3] recently tore into a 3doodler pen to make some necessary upgrades.

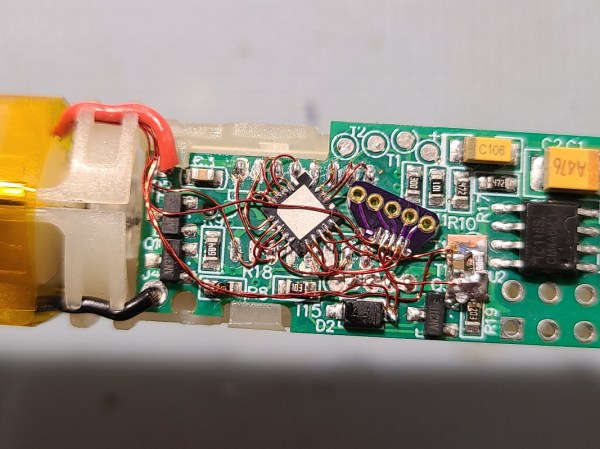
First, this pen has some design choices that are curious, to say the least. The cooling fan runs regardless of temperature, and it has pushbuttons for start and stop rather than a momentary button that controls the extrusion. To fix these issues, as well as change the filament size, improve the cooling, and provide greater control over the extrusion speed, [tterev3] completely rewrote the firmware, changed the microcontroller on the PCB, and made several hardware upgrades to accommodate these changes. He also went ahead and installed a USB-C port for charging, which should be standard practice on all low-voltage consumer electronics by now anyway.

The detail work on this project is impressive, given the small size of the pen itself and the amount of precision hardware needed to make the changes. Especially regarding the replacement of the microcontroller on the board itself, which is an impressive feat even without the incredibly small dimensions. The firmware upgrade is available on his GitHub page as well if you have your own 3doodler that needs modifications, and if you’re still struggling to find uses for these handy devices, we’ve seen them used with interesting effect to build drones.

3D Pens Can Make Ugly Drone Parts That Almost Work

Small hobby aircraft and light plastic parts go hand in hand, and a 3D printing pen makes lightweight plastic things without the overhead of CAD work and running a 3D printer. So could a 3D pen create useful plastic bits for small quadcopters? [Michael Niggel] decided to find out by building his drone parts with a 3D pen loaded with ABS plastic. He mostly discovered that the created objects could politely be said to look like they were sketched by a toddler, but that’s not all he learned.

He found that in general creating an object was harder than the marketing materials implied. As soon as the filament exits the pen’s nozzle, the thin little molten line of plastic cools rapidly and does two things: it has a tendency to curl, and loses its desire to stick to things. [Michael] found the whole affair worked much less like ‘drawing in thin air’ and rather more like piping frosting, or caulking.

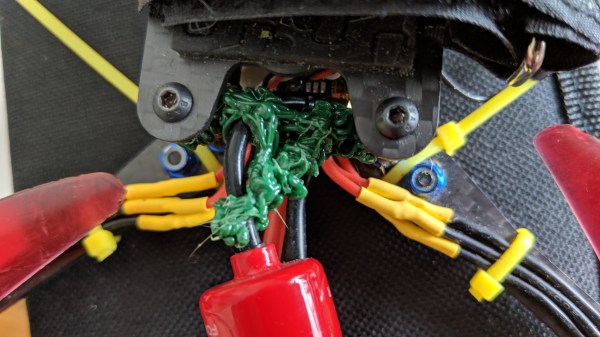
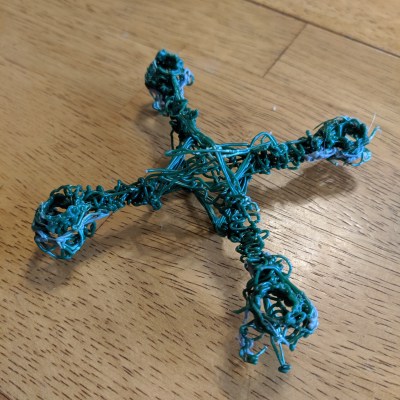
An almost functional micro quad frame. The arms aren’t rigid enough to hold the motors vertical when under power.

Nevertheless, [Michael] sought to discover whether a 3D pen could be used to make quick and dirty parts of any use. He created two antenna brackets and one micro quad frame. All three are chaotic messes, but one antenna bracket was perfectly serviceable. The 3D pen was indeed able to create a strangely-shaped part that would have been a nightmare to CAD up. The other antenna part worked, but didn’t do anything a zip tie wouldn’t have done better. The rapid cooling of the plastic from the 3D pen has an advantage: extrusions don’t “droop” like a glob of hot glue does before it hardens.

By now, [Michael] agreed that the best way to create a plastic part of any complexity whatsoever seemed to be to draw sections flat, build them up in layers, then use the pen to weld the pieces together and add bulk. The micro quad frame he made in this way doesn’t look any nicer than the other attempts, but it did hold the parts correctly. Sadly, it would not fly. Once the motors powered up, the arms would twist and the flight controller was unable to compensate for motors that wouldn’t stay straight. This could probably be overcome, but while the end result was dirty it certainly wasn’t quick. The 3D pen’s niche seems restricted to simple, unstressed parts that aren’t permitted to gaze up themselves in a mirror.

If you have a 3D pen, we’d like to remind you of this mini spool design whose parts are welded together with the pen itself. For bigger jobs, a high-temperature hot glue gun can be used to dispense PLA instead.

Mini Spool System For 3D Printing Pen Tidies Things Up

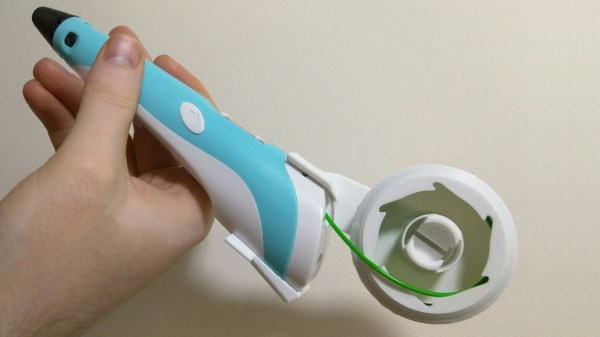
3D printing pens may be toys to some, but they can be genuinely useful tools to repair 3D prints, rescue a support structure, or weld together different pieces. However, [BManx2000] found that the way the filament simply sticks out of the back of a 3D printing pen like a bizarre tailfeather was troublesome.

The solution? A Mini Spool System for 3D Printing Pens, with which you can use your 3D printing pen to weld together the parts after printing them. The unit holds 1.75mm filament coiled under its own tension in a tidy package that doesn’t interfere with feeding. Since different 3D pens are shaped differently, the interface to the pen is a separate piece that can be modified or changed as needed without affecting the rest of the design.

We’ve seen some interesting innovations with filament holders before, like this entirely 3D printed filament holder, but a mini spool for a 3D pen is definitely a new one.

3D Printing Pen And CNC Machine Yields Cheap 3D Printer

3D printers are ubiquitous now, but they’re still prohibitively expensive for some people. Some printers cost thousands, but even more inexpensive options aren’t exactly cheap. [Daniel] decided that this was unacceptable, and set out to make a basic 3D printer for under $100 by including only the bare essentials needed for creating anything out of melted plastic.

3D printers are essentially four parts: a bed, filament, and a hot end and extruder. In a previous project, [Daniel] used parts from old CD drives to create a three-axis CNC machine which he uses for the bed. To take care of the hot end and extruder, he is using a 3D printing pen which he mounts to the CNC machine and voila: a 3D printer!

It’s not quite as simple as just strapping a 3D printing pen to a CNC machine, though. The pen and the CNC machine have to communicate with each other so that the pen knows when to place filament and the CNC machine knows when to move. For that, [Daniel] went with a trusty Arduino in order to switch the pen on and off. Once it’s working, it’s time to start printing!

[Daniel] does note that this is a design that’s relatively limited in terms of print size and resolution, but for the price it can’t be beat. If you’re interested in getting started with 3D printing, a setup like this would be perfect. 3D pens are a pretty new idea too, and it’s interesting to see them used in different ways like this.

Where Are They Now: Terrible Kickstarters

Kickstarter started out as a platform for group buys, low-volume manufacturing, and a place to fund projects that would otherwise go unfinished. It would be naive of anyone to think this would last forever, and since these humble beginnings, we’re well into Peak Kickstarter. Now, Kickstarter, Indiegogo, and every other crowdfunding platform is just another mouthpiece for product launches, and just another strategy for anyone who needs or wants money, but has never heard of a business loan.

Of course there will be some shady businesses trying to cash in on the Kickstarter craze, and over the last few years we’ve done our best to point out the bad ones. Finding every terrible Kickstarter is several full-time jobs, but we’ve done our best to weed out these shining examples of the worst. Following up on these failed projects is something we have been neglecting, but no longer.

Below are some of the most outrageous Kickstarters and crowdfunding campaigns we’ve run across, and the current status of these failed entrepreneurial endeavors.

Continue reading “Where Are They Now: Terrible Kickstarters”