High Speed Photography Controller Built To Catch Water Droplets

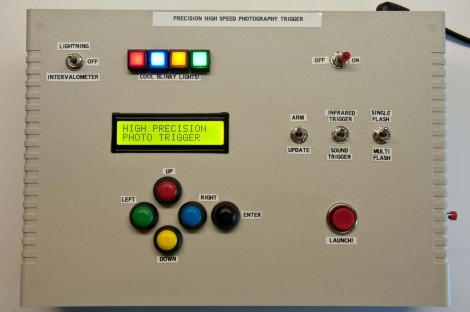
One high-speed photography controller to rule them all. If you’re looking to photograph droplets of water splashing on a still reservoir this is the ticket. But if you’re not, it still offers an incredible amount of flexibility for other high-speed needs. Inside you’ll find an Arduino Mega, which has plenty of room to bend to your will.

[Michael Ross] is the man behind this box. He wanted a system that did it all; timings, droplet control, camera shutter, etc. What you can’t see in the image above is the interface panel on the back of this enclosure (this shot shows the top of the box). The video after the break will give you a look at the overall setup. It has ports to control two different light sources, detectors to snap the images using an infrared sensor or via sound (we’re thinking bullet photography), and four ports to control solenoid valves.

He produced a mammoth PDF tutorial which will guide even the biggest noob through the entire build process. Find it at his site linked above.

Continue reading “High Speed Photography Controller Built To Catch Water Droplets”

Building A Homebrew Diesel ECU

arduino-diesel-ecu

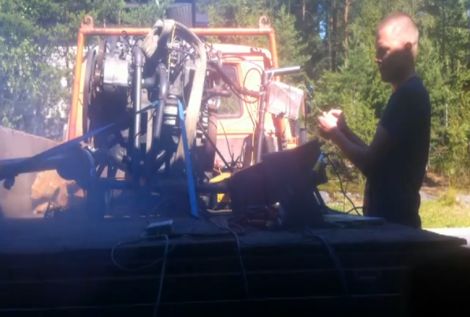
Over the years automobile engines have become increasingly complex, and with this added complexity comes an increased reliance on intricate computer systems to run them. These control systems are typically the fruit of many hours of research and development, carefully protected by the auto makers who create them. Instead of relying on a closed system to power his car, a Finnish hacker that goes by the name [synkooppi] has decided to do away with his diesel engine’s ECU altogether and build one of his own with little more than an Arduino.

As you can see from his web site, [synkooppi] has created his DIY ECU using an Arduino Mega, which is capable of controlling diesel engines that employ a Bosch VP37 or other inline diesel pump. So far he has all of the basic workings in place, which allow him to run and control an Audi diesel motor.

While many details about his homebrew ECU are hard to come by, he does have a series of development videos posted on YouTube which should help satiate inquisitive minds. For those of you with a spare diesel motor laying around, [synkooppi] has made the first release of his code available to try out.

Stick around to see a video of the ECU in action.

[Thanks, perhof]

Continue reading “Building A Homebrew Diesel ECU”

Driving A Nokia QVGA Screen With Arduino (or Any UC)

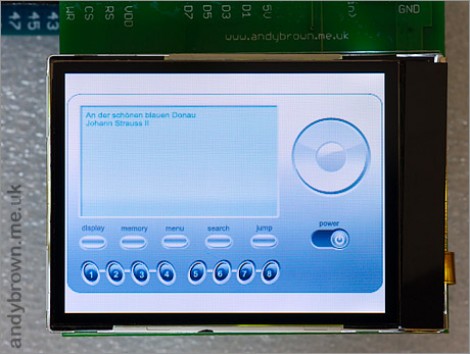
This is a Nokia 6300 screen. It’s a 320×240 display that has about 2″ of diagonal viewing area and boasts 24-bit QVGA TFT technology. It’s going to look fantastic in your next project and it won’t be hard to get up and running thanks to the hardware and software guide which [Andy Brown] put together. He chose this display because of its features, but also because it’s really easy to source and can be had for $5-7 delivered. The guide is aimed at working with the Arduino MEGA, but we’re sure you can port it for just about any microcontroller you’d like.

Much like the FPGA PSP display we just looked at, [Andy] chose to design his own PCB to host the LCD. This makes it a snap to attach the LCD — literally, since he managed to source the correct snap-in connector. The board also hosts a constant-current LED driver which takes care of the backlight, and allowed him to build in a level converter (since the screen communicates at 3.3V but Arduino uses 5V logic).

The software tutorial is lengthy but impressive. We’re surprised at the performance he gets out of the AVR chip. See the screen cycle through a set of demos after the break.

Continue reading “Driving A Nokia QVGA Screen With Arduino (or Any UC)”

Restoring A Jukebox With An Arduino

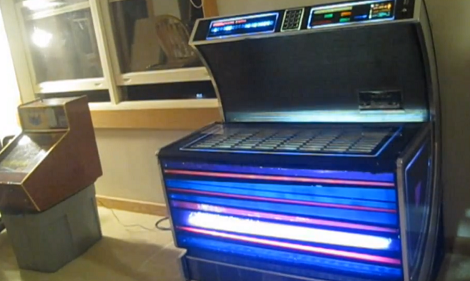
[Jim] just finished restoring an old Seeburg USC1 jukebox for his father using an Arduino, replacing an electromechanical rats nest of wires. The stack of 45 records were replaced with an Arduino Mega 2560 with an Sparkfun MP3 player shield, and he jukebox lights are now controlled with 74595 shift registers. Because his jukebox isn’t taking in money, the dollar bill validator has been modified into a ‘skip song’ button, and when there are no songs in the jukebox queue, there are 500 additional songs on the SD card that will randomly play.

We’ve seen one of [Jim]’s builds before. Earlier this year he repaired a thirty year old Pachinko machine using the same Arduino + MP3 shield setup. It looks like [Jim] is pretty skilled at revitalizing bulky old electronics. The jukebox restoration is great and has a lot more class than the internet-connected touch screen monstrosities that we still pump money into.

Check out the video after the break for a walk through of this restoration.

Continue reading “Restoring A Jukebox With An Arduino”

Monitoring The World’s DNS Status Using A Display Straight Out Of WarGames

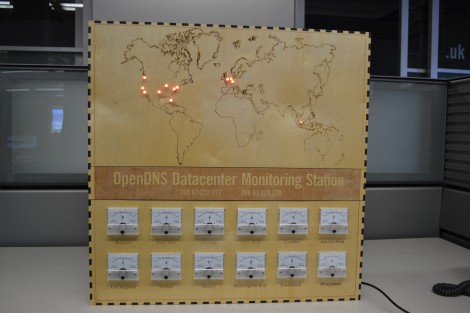
Nothing says Cold War like a map of the work with LEDs embedded in it. Throw in some analog dials for good measure and you’ve got a piece that would be comfortable mounted next the WOPR in everyone’s favorite ’80s-computers-run-amok movie. We think [Dima] really hit the mark when building this status panel for OpenDNS datacenter monitoring.

[Dima] works for OpenDNS and wanted to make something special for its upcoming 5 year anniversary. He’d already been toying with making boxes from laser-cut wooden pieces. This was just a matter of choosing a size that would fit the dials and leave a suitable area for a laser-etched map. Each of the twelve panel meters gets a PWM signal from the Arduino Mega that he used to bring the device to life. It shows a comparative server load for each data center based on the previous day’s numbers. There is an LED in the map for each of these centers. Right now they’re all red, but he used RGB LEDs and plans to upgrade the capability soon. He should have no problem doing this as he sourced some TLC5940 drivers to extend his I/O capabilities.

Don’t forget the check out the clip embedded after the break. Continue reading “Monitoring The World’s DNS Status Using A Display Straight Out Of WarGames”

Arduino Hits The Battlefield — For Real

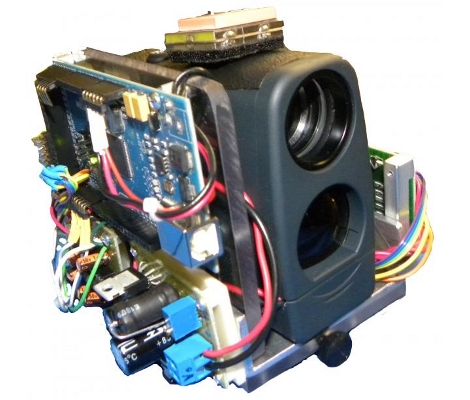
We’re not sure if this is the first time, but here’s some pretty solid proof that Arduino has found its way into the weapons of war. The creators, [Derek Wales], [John Eischer], and [George Hopkins] are all Electronics Engineering majors at West Point. They came up with this idea after seeing video footage of a firefight in Afghanistan where combat soldiers were calling in artillery strikes using a compasses and GPS devices. It’s an all-in-one unit that can provide the same information quickly and accurately. The prototype above, which they call the DemonEye, contains a laser range finder, digital compass, and a GPS module. The article also states that it contains a mini-computer but we recognize that as an Arduino Mega (thanks to Miguel over at Areopago 21 for noticing this first and sending in the tip about it).

The prototype apparently comes in at $1000. Okay, it seems a bit high but not out of the ballpark. What we can’t understand is how the second generation of devices was billed out at $100,000 for five more units. What’s the going rate for laying out military-grade PCBs?

Why Build A CNC Mill When You Can Have A Chess Robot Instead?

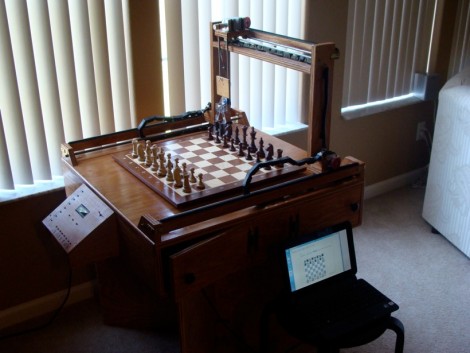
[Patrick McCabe] enjoys the challenge of playing chess against the computer but he wasn’t satisfied with the flat experience of on-screen gaming. No problem, he just built his own gantry-style chess robot that he can play against. Don’t be confused, he still doesn’t have to touch the pieces, but instead uses the dedicated control board seen on the left of the image above. The robotic arm that is mounted on a gantry takes care of moves for both players.

It’s a pretty normal CNC build, using four stepper motors to slide the moving bits along precision rod. An Arduino Mega drives the system, with a PC doing the heavy lifting using a program called My Robot Lab.

We certainly like it that [Patrick] spent a little bit of time making the cabinet and visible parts look nice. Chess is a civilized game and unfinished parts would be out-of-place. We didn’t see it in his writeup, but the one feature we’re really hoping he has implemented is the ability to have the robot automatically reset the board at the beginning of a game.

As you might have guess, you’ll find embedded video after the break.

Continue reading “Why Build A CNC Mill When You Can Have A Chess Robot Instead?”