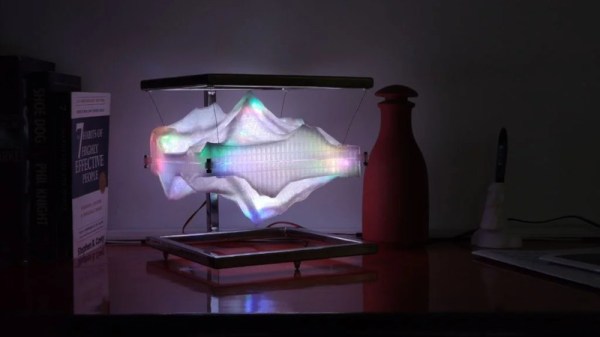
Kinetic Lamp Sheds Light On Scientific Principles

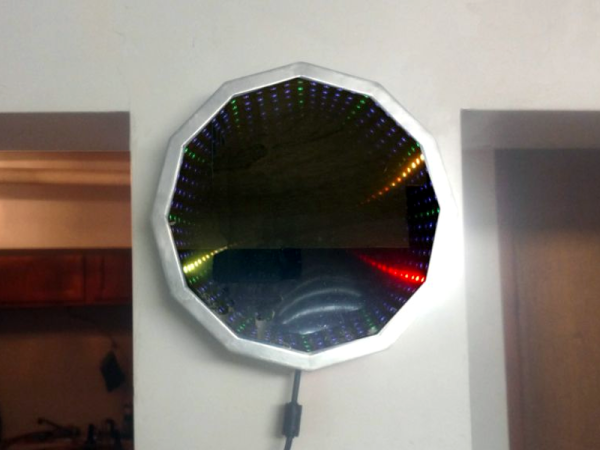
This thing right here might be the coolest desk toy since Newton’s Cradle. It’s [Stephen Co]’s latest installment in a line of mesmerizing, zodiac-themed art lamps that started with the water-dancing Aquarius.  All at once, it demonstrates standing waves, persistence of vision, and the stroboscopic effect. And the best part? You can stick your finger in it.

This intriguing lamp is designed to illustrate Pisces, that mythological pair of fish bound by string that represent Aphrodite and her son Eros’ escape from the clutches of Typhon. Here’s what is happening: two 5V DC motors, one running in reverse, are rotating a string at high speeds. The strobing LEDs turn the string into an array of optical illusions depending on the strobing rate, which is controlled with a potentiometer. A second pot sweeps through eleven preset patterns that vary the colors and visual effect. And of course, poking the string will cause interesting interruptions.

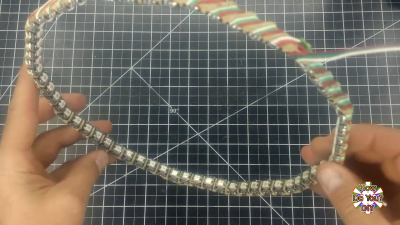
The stroboscopic effect hinges on the choice of LED. Those old standby 2812s don’t have a high enough max refresh rate, so [Stephen] sprung for APA102Cs, aka DotStars. Everything is controlled with an Arduino Nano clone. [Stephen] has an active Kickstarter campaign going for Pisces, and one of the rewards is the code and STL files. On the IO page for Pisces, [Stephen] walks us through the cost vs. consumer pricing breakdown.

We love all kinds of lamps around here, from the super-useful to the super-animated.

An MSX With A Nintendo Controller

Console owners inhabit their own individual tribes depending upon their manufacturer of choice, and so often never the twain shall meet. But sometimes there are those what-if moments, could Mario have saved the princess more quickly through PlayStation buttons, or how would Sonic the Hedgehog have been with a Nintendo controller? [Danjovic] is finding the answer to one of those questions, with an interface between Nintendo 64 controllers and MSX hardware including the earlier Sega consoles.

In hardware terms, it’s a pretty simple device in the manner of many such projects, an Arduino Nano, a resistor, and a couple of sockets. The clever part lies not in its choice of microcontroller, but in the way it uses the Nano-s timing to ensure the minimum delay between button press and game action. The detail is in the write-up, but in short it makes use of the MSX’s need to attend to video lines to buy extra time for any conversion steps.

The MSX computers have had their share of controller upgrade courtesy of Nintendo hardware in the past, we’ve seen a Wii nunchuck controller talk to them before, as well as a SNES one.

Header image: [mboverload] (Public-domain).

Persistence Of Vision On An Old Fan

Persistence of vision is a fun feature of the human visual system, which allows us to blink a bunch of spinning LEDs at the right time to spell out messages that appear to hang in the air. [TN_Inventor] took a stab at his own POV build, using an old desk fan as a base.

The initial build relied on a rotor made of MDF and some very old-school LEDs. The rotor was heavy and unbalanced, causing issues for the motor, and the dim LEDs weren’t visible in normal daytime conditions. Like any good maker, [TN_Inventor] persevered and iterated the design.

The next revision instead relied on protoboard itself for the rotor, greatly reducing the weight and making it easier to balance. The problem of getting power to a rotating mechanism was sidestepped entirely, with a small lipo battery being mounted on the rotor itself. High-brightness white LEDs were employed, making the effect much more visible. This was helped further thanks to the use of transistors to run the LEDs directly from battery voltage, rather than obeying the current limits of the Arduino Nano’s output pins.

The build presents well, with the final POV board being built into the chassis of an old desk fan. Rather than use the original motor, instead a smaller 12 volt geared device was used, powered separately from the main board. The familiar form factor of the desk fan is a great way to finish the project off, and gives it an interesting industrial aesthetic.

POV builds can go a long way – we’ve even seen volumetric displays built in this way. Video after the break. Continue reading “Persistence Of Vision On An Old Fan”

Simple Simon Says Looks Sharp

Simon was a popular toy, launching at the very end of the 1970s, and cribbed from earlier work by Atari with their game Touch Me. The gameplay is simple, and while we suspect it won’t last quite as long as the several thousand years we’ve so far had chess, it’s still around today. [DIY Machines] decided to bust out the 3D printer and whip up their own version.

Simon has long served as a great test project to get to grips with various maker skills, and this build is no exception. An Arduino Nano runs the show, and gets an OLED display to display the current level. Large glowing arcade buttons serve as the control, with their lights flashed as per the original game. Sound is courtesy of a simple buzzer.

It’s a build that doesn’t do anything wild, but presents very well. This is down to the smoothly finished and nicely designed case, as well as the choice of quality human interface components. Everyone loves mashing arcade buttons, and that’s what they’re built for – so they’re always a safe choice.

We’ve seen a lot of straight-down-the-lines Simon projects, but this DDR-ified version is a fun twist on the standard form. Video after the break.

Continue reading “Simple Simon Says Looks Sharp”

A Doom-esque Port To The ATmega328

Doom holds a special place as one of the biggest games of the 1990s, as well as being one of the foundational blocks of the FPS genre. Long before 3D accelerators hit the market, iD Software’s hit was being played on computers worldwide, and later spread to all manner of other platforms. [David Ruiz] decided to build a cutdown version for everyone’s favourite, the ATmega328.

Due to the limited resources available, it’s not a direct port of Doom. [David] instead took some sprites and map data from the original game, and built a raycasting engine similar to that of Wolfenstein 3D. Despite the limited memory and CPU cycles, the basic game can run at between 8-11 FPS. There are fancy dithering tricks to help improve the sense of depth, a simplified enemy AI, and even a custom text library for generating the UI.

It’s a great example of what can be done with a seemingly underpowered part. We’ve seen similar work before, with Star Fox replicated on the Arduboy. A hacker’s ingenuity truly knows no bounds.


Simulating The Enigma’s Oddball Cousin

Even if you wouldn’t describe yourself as a history buff, you’re likely familiar with the Enigma machine from World War II. This early electromechanical encryption device was used extensively by Nazi Germany to confound Allied attempts to eavesdrop on their communications, and the incredible effort put in by cryptologists such as Alan Turing to crack the coded messages it created before the end of the War has been the inspiration for several books and movies. But did you know that there were actually several offshoots of the “standard” Enigma?

For their entry into the 2019 Hackaday Prize, [Arduino Enigma] is looking to shine a little light on one of these unusual variants, the Enigma Z30. This “Baby Enigma” was intended for situations where only numerical data needed to be encoded. Looking a bit like a mechanical calculator, it dropped the German QWERTZ keyboard, and instead had ten buttons and ten lights numbered 0 through 9. If all you needed to do was send off numerical codes, the Z30 was a (relatively) small and lightweight alternative for the full Enigma machine.

Creating an open source hardware simulator of the Z30 posses a rather unique challenge. While you can’t exactly order the standard Enigma from Digi-Key, there are at least enough surviving examples that they’ve been thoroughly documented. But nobody even knew the Z30 existed until 2004, and even then, it wasn’t until 2015 that a surviving unit was actually discovered in Stockholm.

Of course, [Arduino Enigma] does have some experience with such matters. By modifying the work that was already done for full-scale Enigma simulation on the Arduino, it only took a few hours to design a custom PCB to hold an Arduino Nano, ten buttons with matching LEDs, and of course the hardware necessary for the iconic rotors along the top.

The Z30 simulator looks like it will make a fantastic desk toy and a great way to help visualize how the full-scale Enigma machine worked. With parts for the first prototypes already on order, it shouldn’t be too long before we get our first good look at this very unique historical recreation.

One Arduino Handheld To Rule Them All

There’s nothing quite as annoying as duplicated effort. Having to jump through the same hoops over and over again is a perfect way to burn yourself out, and might even keep you from tackling the project that’s been floating around in the back of your mind. [Alain Mauer] found that he’d build enough Arduino gadgets that were similar enough he could save himself some time by creating a standardized piece of hardware that he can load his code du jour on.

He’s come to call this device the Arduino Nano QP (which stands for Quick Project), and now it’s part of the 2019 Hackaday Prize. [Alain] doesn’t promise that it’s the perfect fit for everything, but estimates around 85% of the simple Arduino projects that he’s come up with could be realized on QP. This is thanks to the screw terminals on the bottom of the device which let you easily hook up any hardware that’s not already on the board.

The QP board itself has the ubiquitous 16×2 character LCD display (complete with contrast control trimmer), seven tactile buttons arranged in a vaguely Game Boy style layout, and of course a spot to solder on your Arduino Nano. All of which is protected by a very slick laser cut acrylic case, complete with retained buttons and etched labels.

We’ve seen no shortage of handheld Arduino devices, but we have to admit, something about the utilitarian nature of this one has us intrigued. We wouldn’t mind having one of these laying around the lab next time we want to do a quick test.

Continue reading “One Arduino Handheld To Rule Them All”