Giving The Amstrad CPC A Voice And A Drum Kit

Back in the ’80s, home computers weren’t capable of much in terms of audio or multimedia as a whole. Arguably, it wasn’t until the advent of 16-bit computers such as the Amiga that musicians could make soundtrack-quality music without having to plug actual studio gear up to their machines. [Michael Wessel] is trying to bring some of that and many more features to the Amstrad CPC with his ambitious LambdaSpeak 3 project, an expansion card built completely up from scratch and jam-packed with features.

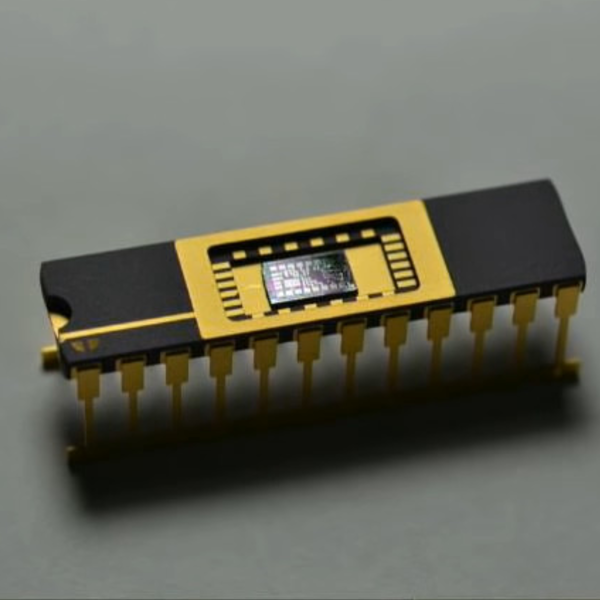
First, and likely giving it its name, is the speech synthesizer. [Michael] has made an emulation mode where his card can act just like the original SSA-1 expansion, being able to be controlled by the same software as back then. By default, the card offers this mode with an Epson S1V30120 daughterboard (which is based on DECTalk synthesis), however for further authenticity you also have the option of fitting it with an SP0256-AL2 chip, the same one used in the original Amstrad hardware in 1985.

As for the more musical part of the project, the board supports 4-channel PCM playback, much like the Amiga’s sound offering. This can be used for a drum machine sequencer program, and it has an Amdrum mode, emulating another expansion from the original Amstrad days. Sample playback can also be used alongside the speech synthesis as shown here, with random allophone beats that wouldn’t sound out of place in a Kraftwerk recording. Finally, by using the UART interface included on the LambdaSpeak, you can also turn the CPC itself into a synth by giving it MIDI in/out and interfacing a controller in real time with the computer’s AY-3-8912 sound chip.

If you like modern expansions giving old computers new life, did you know that you can get just about any retro computer online, perhaps a TRS-80, an Amiga and even a Psion Organizer? And if you’re interested in just using old systems’ sound chips with modern USB MIDI controllers, it’s easy to make a microcontroller do all the heavy lifting.

Continue reading “Giving The Amstrad CPC A Voice And A Drum Kit”

KVM Foot Switch In A Few Steps

[Radishmouse], despite the handle, is not a mouse guy. Give him a keyboard and he will get around just fine in any OS or program. As it is, he’s got a handful of ThinkPads, each running a different OS. He wanted to be able to switch his nice mechanical keyboard between two laptops without the hassle of unplugging and replugging the thing. His solution: a DIY KVM foot switch.

He’s been learning about electronics and 3D design, and this problem was the perfect opportunity to dig in and get his hands dirty. After learning enough about the USB protocol and switches to figure out what had to happen, he made a prototype from a pâte tub. Though undeniably classy, this vessel would never survive the rigors of foot-stomping in feline territory. Fortunately, [radishmouse] has also been learning about 3D design. After some trial and error, he came up with a sturdy, curvy 3D-printed two-piece enclosure. We particularly like the blocks built into the bottom piece that shore up the USB ports.

There are lots of reasons to build input controls for those under-utilized appendages at the ends of your legs. You could control your ‘scope with a probe in each hand, or use a foot switch to relocate an inconvenient power button.

Via [r/functionalprint]

EL Wire Makes For A Great Faux-Neon Sign

Neon signs are attractive, but require specialised tools and skills for their manufacture. If you don’t have time to learn glass blowing and source the right gasses, you’re pretty much out of luck. However, EL wire can give a similar aesthetic, and with an off-the-shelf power supply it is easy to hook up and get working. [sjm4306] combined this with 3D printing for a quick and easy build.

The project starts by selecting a Nintendo 64 neon sign as a basis for the design. An image of the sign was traced in Inkscape, and an outline imported into CAD software. From there, a frame was designed with posts for the EL wire to wrap around, and holes for it to pass through to the back of the sign. The frame was then 3D printed, and laced with EL wires in the requisite colors.

The final result is impressive, with the EL wire serving as a great small-scale simulacrum of neon tubes. It’s a construction method that should scale as large as your 3D printed assemblies can go, too. If you need to get to grips with how it works, there’s a tutorial available for working with EL wire. Video after the break.

Continue reading “EL Wire Makes For A Great Faux-Neon Sign”

That E-Cig Battery Probably Fits Into Sunglasses

This particular e-cigarette is a little bigger than a typical cigarette, with a matching battery.

E-cigarettes use electrical power to rapidly heat and vaporize a base liquid such as propylene glycol, and that power comes from a battery. These devices are functionally straightforward but it can be a messy process on the inside. Thankfully though the batteries can be salvaged once components like heating elements either gum up or burn out.

[facelesstech] decided to use the battery from an e-cig as the power source for a smart sunglasses project, which uses two RGB LED rings to put on a light show. Opening up the device it was discovered that the battery was a straightforward lithium-polymer cell, in AAAA size. If you’ve ever torn open a 9 v battery and discovered the six diminutive cylinders inside, an AAAA cell is about the same size as one of those. However, the battery from the e-cig is both rechargeable and has a nominal voltage of 3.7 volts, which can happily drive a microcontroller project. The small battery fit nicely into one arm of the glasses, and when covered with heat-shrink, was hardly noticeable. The battery charger doesn’t fit inside the glasses, but one can’t have everything.

The ability of an e-cigarette to pump out clouds of vapor has led to some interesting hacks. One such is a DIY portable fog machine, which opens all kinds of doors for costuming applications.

PaperLedger: An E-Ink Cryptocurrency Ticker

For a long time it seemed like e-ink displays were outside the reach of us lowly hackers, as beyond the handful of repurposed Kindles that graced these pages, we saw precious few projects utilizing this relatively exotic display. But that’s changed over the last couple of years, and we’re thrilled to start seeing hackers bend this incredible technology to their will.

A perfect example is PaperLedger, an entry into the 2019 Hackaday Prize by [AIFanatic]. This wireless device is designed to display the current price of various cryptocurrencies on its 2.9-inch e-ink screen and provide audible price alerts with its built-in speaker. It even has a web portal where users can configure the hardware or view more in-depth price information.

The PaperLedger is based on the TTGO T5 V2.2 ESP32, but it looks like [AIFanatic] is in the process of spinning up a new board for the MIT licensed project to address some nagging issues for this particular application. Unfortunately, it doesn’t look like there are any pictures of the new board yet, but a description of the changes on the Hackaday.IO page shows that most of the work seems to be going into improving support for running on batteries.

Even if you’re not interested in cryptocurrency, the PaperLedger looks like a fantastic little e-ink monitor for pretty much anything else you’d like to keep a close eye on. The GPLv3 licensed firmware is available on the project’s GitHub page, so expanding or completely changing the device’s functionality shouldn’t be too tricky for anyone with a desire to do so and a working knowledge of C++.

We’ve seen several projects using the various TTGO boards that mate an ESP32 with a display at this point, and it looks like a great platform to check out if you want to push some data to a little WiFi screen with the minimum amount of hassle.

The Death Of A Weather Satellite As Seen By SDR

What is this world coming to when a weather satellite that was designed for a two-year mission starts to fail 21 years after launch? I mean, really — where’s the pride these days?

All kidding aside, it seems like NOAA-15, a satellite launched in 1998 to monitor surface temperatures and other meteorologic and climatologic parameters, has recently started showing its age. This is the way of things, and generally the decommissioning of a satellite is of little note to the general public, except possibly when it deorbits in a spectacular but brief display across the sky.

But NOAA-15 and her sister satellites have a keen following among a community of enthusiasts who spend their time teasing signals from them as they whiz overhead, using homemade antennas and cheap SDR receivers. It was these hobbyists who were among the first to notice NOAA-15’s woes, and over the past weeks they’ve been busy alternately lamenting and celebrating as the satellite’s signals come and go. Their on-again, off-again romance with the satellite is worth a look, as is the what exactly is going wrong with this bird in the first place.

Continue reading “The Death Of A Weather Satellite As Seen By SDR”

Homemade Integrated Circuits Hack Chat

Join us on Wednesday, August 14th at noon Pacific for the Homemade Integrated Circuits Hack Chat with Sam Zeloof!

While most of us are content to buy the chips we need to build our projects, there’s a small group of hackers more interested in making the chips themselves. What it takes the big guys a billion-dollar fab to accomplish, these hobbyists are doing with second-hand equipment, chemicals found in roach killers and rust removers, and a lot of determination to do what no DIYer has done before.

Sam Zeloof is one of this dedicated band, and we’ve been following his progress for years. While he was still in high school, he turned the family garage into a physics lab and turned out his first simple diodes. Later came a MOSFET, and eventually the Z1, a dual-differential amp chip that is the first IC produced by a hobbyist using photolithography.

Sam just completed his first year at Carnegie-Mellon, and he’s agreed to take some precious summer vacation time to host the Hack Chat. Join us as we learn all about the Z1, find out what improvements he’s made to his process, and see what’s next for him both at college and in his own lab.

join-hack-chatOur Hack Chats are live community events in the Hackaday.io Hack Chat group messaging. This week we’ll be sitting down on Wednesday, August 14 at 12:00 PM Pacific time. If time zones have got you down, we have a handy time zone converter.

Click that speech bubble to the right, and you’ll be taken directly to the Hack Chat group on Hackaday.io. You don’t have to wait until Wednesday; join whenever you want and you can see what the community is talking about.