One of the first frustrating situations a beginning microcontroller programmer will come across is the issue of debouncing switches. Microcontrollers are faster than switches, and the switch has yet to be built that can change state in zero time like they can on paper. This hurdle is easily overcome, but soon we are all faced with another issue: filtering noise from an analog signal. Luckily [Paul Martinsen] has put together a primer of three different ways to use an Arduino to filter signals.
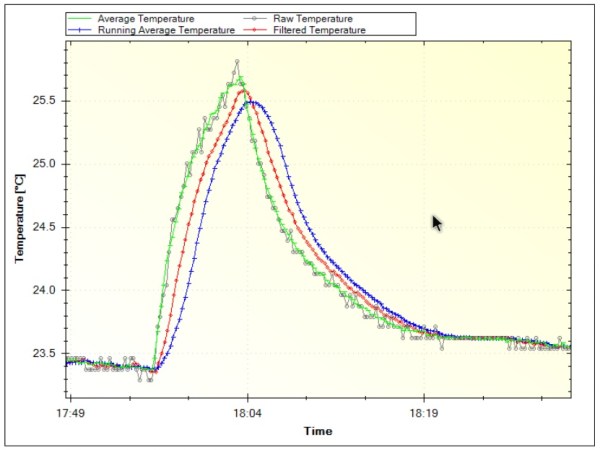
The first (and fastest, simplest, etc.) way to filter an analog signal is to sample a bunch of times and then average all of the samples together. This will eliminate most outliers and chatter without losing much of the information. From there, the tutorial moves on to programming a running average to help increase the sample time (but consume much more memory). Finally, [Paul] takes a look at exponential filters, which are recursive, use less memory, and can be tweaked to respond to changes in different ways.
[Paul] discusses all of the perks and downsides of each method and provides examples for each as well. It’s worth checking out, whether you’re a seasoned veteran who might glean some nuance or you’re a beginner who hasn’t even encountered this problem yet. And if you’re still working on debouncing a digital input, we have you covered there, too.