Only about two percent of the blind or visually impaired work with guide animals and assistive canes have their own limitations. There are wearable devices out there that take sensor data and turn the world into something a visually impaired person can understand, but these are expensive. The Visioneer is a wearable device that was intended as a sensor package for the benefit of visually impaired persons. The key feature: it’s really inexpensive.
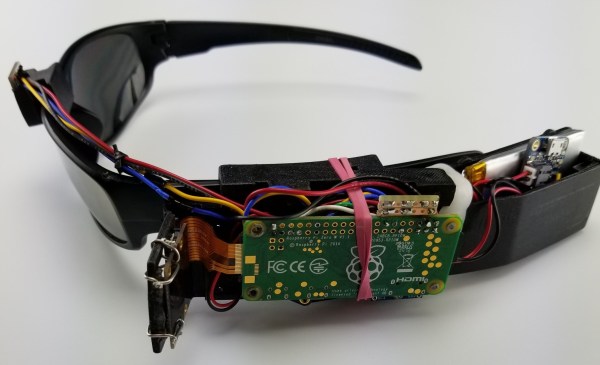
The Visioneer consists of a pair of sunglasses, two cameras, sensors, a Pi Zero, and bone conduction transducers for audio and vibration feedback. The Pi listens to a 3-axis accelerometer and gyroscope, a laser proximity sensor for obstacle detection within 6.5ft, and a pair of NOIR cameras. This data is processed by neural nets and OpenCV, giving the wearer motion detection and object recognition. A 2200mA battery powers it all.
When the accelerometer determines that the person is walking, the software switches into obstacle avoidance mode. However, if the wearer is standing still, the Visioneer assumes you’re looking to interact with nearby objects, leveraging object recognition software and haptic/audio cues to relay the information. It’s a great device, and unlike most commercial versions of ‘glasses-based object detection’ devices, the BOM cost on this project is only about $100. Even if you double or triple that (as you should), that’s still almost an order of magnitude of cost reduction.


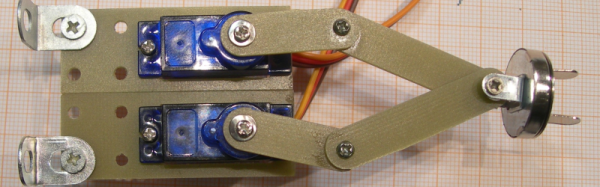
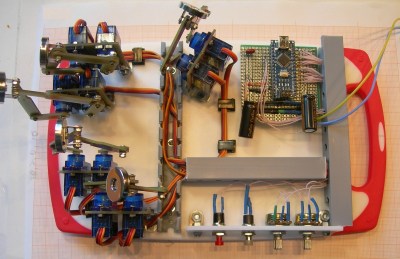 He’s using ten hobby micro servos connected to an Arduino Nano, all mounted on a kitchen chopping board, with a few other bits thrown in to round out the build. There’s one pair of servos for each finger. A five bar linkage converts the servo rotations to two-dimensional motion. The end of the linkage has a swiveling metallic disk. Patient fingers are attached to these discs via magnetic metal pads that are attached to the end of the fingers using adhesive plaster tape. Two push buttons cycle through a large number of exercise modes and two potentiometer’s help adjust the speed and smoothness (the number of points calculated for the desired motion). Two 7-segment LED display modules connected to the Arduino provides a visual interface showing program modes, speed, number of cycles and other relevant information. Replicating the project ought to be very straightforward since the device uses off-the-shelf parts which are easy to put together using the detailed build instructions, photos and code posted on [Sergei]’s project page. Check out the videos below to see the rehab helper in action.