Weatherproof Pi Looks Up So You Don’t Have To

Skywatching is a fascinating hobby, but does have the rather large drawback of needing to be outside staring at the sky for extended periods of time. Then there’s the weather to contend with, even if you’ve got yourself a nice blanket and it isn’t miserably cold, there might be nothing to see if cloud cover or light pollution is blocking your view.

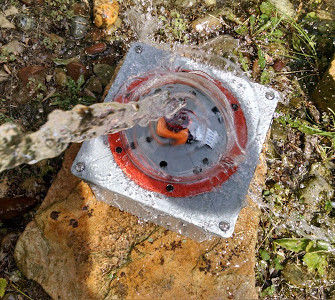
Highly scientific testing procedure.

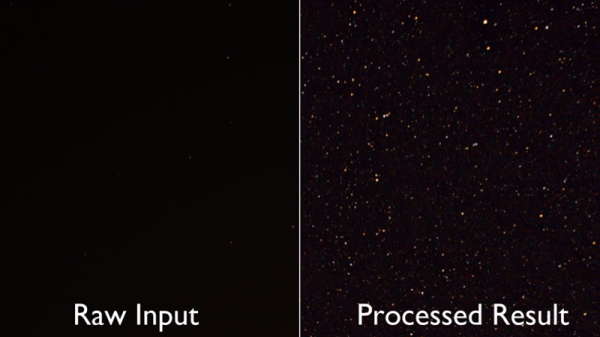
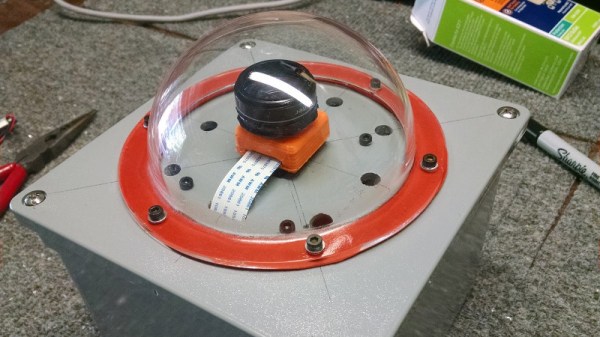
To address these issues, [Jason Bowling] decided to put a Raspberry Pi in a weatherproof enclosure and use it as a low-cost sky monitoring device. His setup uses the No-IR camera coupled with a cheap wide-angle lens designed for use with smartphone camera. The whole setup is protected from the elements by a clear acrylic dome intended for a security camera, and a generous helping of gasket material. Some experiments convinced [Jason] to add a light pollution filter to the mix, which helped improve image contrast in his less than ideal viewing area.

The software side is fairly straightforward: 10 second exposures are taken all night long, which can then be stitched together with ffmpeg into a timelapse video. [Jason] was concerned that the constant writing of images to the Pi’s SD card would cause a premature failure, so he set it up to write to a server in the house over SSHFS. Adding a USB flash drive would have accomplished the same thing, but as he wanted to do the image processing on a more powerful machine anyway this saved the trouble of having to retrieve the storage device every morning.

This isn’t the first time [Jason] has used a Pi to peer up into the heavens, and while his previous attempts might not be up to par with commercial offerings, they definitely are very impressive considering the cost of the hardware.

Continue reading “Weatherproof Pi Looks Up So You Don’t Have To”

Hackaday Links Column Banner

Hackaday Links: ???? ???? Spooky Edition, 2017

A few links posts ago, we wrote something about a company selling huge LED panels on eBay, ten panels for $50. Those panels are gone now, but a few lucky hackers got their hands on some cool hardware. Now there’s a project to reverse engineer these Barco NX-4 LED panels. Who’s going to be the first to figure out how to drive these things? Doesn’t matter — it’s a group project and we’re all made richer by the contributions of others.

Prague is getting a new hackerspace.

A year and a half ago, a $79 3D printer popped up on Kickstarter. I said I would eat a hat if it shipped by next year. Seeing as how it’s basically November, and they’re not selling a $79 printer anymore — it’s $99 — this might go down as one of my rare defeats, with an asterisk, of course. I’m going to go source some very large fruit roll-ups and do this at Supercon. Thanks, [Larry].

Speaking of bets, this week Amazon introduced the most idiotic thing ever invented. It’s called Amazon Key. It’s an electronic lock (dumb), connected to the Internet (dumber), so you let strangers into your house to deliver packages (dumbest). CCC is in a few months, so I don’t know if Amazon Key will be hacked by then, but I’m pretty confident this will be broken by March.

The Lulzbot Taz is one of the best printers on the market, and it is exceptionally Open Source. The Taz is also a great printer for low-volume production. It was only a matter of time until someone built this. The Twoolhead is a parallel extruder for the Taz 6. Instead of one extruder and nozzle, it’s two, and instead of printing one object at a time, it prints two. Of course it limits the build volume of the printer, but if you need smaller parts faster, this is the way to go.

Hey, did you hear? Hackaday is having a conference the weekend after next. This year, we’re opening up the doors a day early and having a party at the Evil Overlord’s offices. Tickets are free for Supercon attendees, so register here.

At CES this year, we caught wind of one of the coolest advances in backyard astronomy in decades. The eVscope is ‘astrophotography in the eyepiece’, and it’s basically a CCD, a ton of magic image processing, and a small display, all mounted inside a telescope. Point the scope at a nebula, and instead of seeing a blurry smudge, you’ll see tendrils and filaments of interstellar gas in almost real-time. Now the eVscope is on Kickstarter. It’s a 4.5 inch almost-Newtonian (the eyepiece is decoupled from the light path, so I don’t even know how telescope nomenclature works in this case), an OLED display, and a 10-hour battery life.

Is the fidget spinner fad over? Oh, we hope not. A technology is only perfected after it has been made obsolete. Case in point? We can play phonographs with lasers. The internal combustion engine will be obsolete in automobiles in twenty years, but track times will continue going down for forty. Fidget spinners may be dead, but now you can program them with JavaScript. What a time to be alive!

Audio tomphoolery even an idiot tech blogger can see through! I received a press kit for a USB DAC this week that included the line, “…low drop out voltage regulators running at 3.3 V, meaning the 5 V USB limit is well preserved.” Yes, because you’re running your system at 3.3 V, you won’t draw too much current from a USB port. That’s how it works, right?

[Peter Sripol] is building an ultralight in his basement. The last few weeks of his YouTube channel have been the must-watch videos of the season. He’s glassed the wings, installed all the hardware (correctly), and now he has the motors and props mounted. This is an electric ultralight, so he’s using a pair of ‘150 cc’ motors from HobbyKing. No, that’s not displacement, it’s just a replacement for a 150 cc gas engine. On a few YouTube Live streams, [Peter] did what was effectively a high-speed taxi test that got out of hand. It flew. Doing that at night was probably not the best idea, but we’re looking forward to the videos of the flight tests.

Two-Bit Astrophotography

The Game Boy Camera is a 128×112 pixel sensor from 1998 that was probably the first digital camera in many, many homes. There’s not much you can do with it now, besides replicate old Neil Young album covers and attempting and failing to impress anyone born after the year 1995. Nevertheless, screwing around with old digital cameras is cool, so [Alex] strapped one fo these Game Boy Cameras to an old telescope.

For any astrophotography endeavor, the choice of telescope is important. For this little experiment, [Alex] used a 6” Fraunhofer telescope built in 1838 at the Old Observatory of Leiden. The Game Boy with Camera was attached to the scope using a universal cell phone adapter. Apparently the ‘universal’ in this universal cell phone adapter is accurate – the setup was easy and [Alex] quickly got an image of a clocktower on his Game Boy.

Turning to the heavens, [Alex] took a look at the most interesting objects you can see with a 6-inch telescope. Images of the moon turned out rather well, with beautiful 2-bit dithering along the terminator. Jupiter was a bright white spot in a sea of noise, but [Alex] could see four slightly brighter pixels orbiting where Stellarium predicted the Galilean moons would be.

Was this experiment a success? Between cloudy nights and a relatively small telescope, we’re saying yes. These are pretty impressive results for such a terrible digital camera.

Budget Astrophotography With A Raspberry Pi

New to astrophotography, [Jason Bowling] had heard that the Raspberry Pi’s camera module could be used as a low-cost entry into the hobby. Having a Raspberry Pi B+ and camera module on hand from an old project, he dove right in, detailing the process for any other newcomers.

Gingerly removing the camera’s lens, the module fit snugly into a 3D printed case — courtesy of a friend — and connected it to a separate case for the Pi. [Bowling] then mounted he camera directly on the telescope — a technique known as prime-focus photography, which treats the telescope like an oversized camera lens. A USB battery pack is perfect for powering the Pi for several hours.

When away from home, [Bowling] has set up his Pi to act as a wireless access point; this allows the Pi to send a preview to his phone or tablet to make adjustments before taking a picture. [Bowling] admits that the camera is not ideal, so a little post-processing is necessary to flesh out a quality picture, but you work with what you have.
Continue reading “Budget Astrophotography With A Raspberry Pi”

CES2017: Astrophotography In The Eyepiece

If you’ve never set up a telescope in your back yard, you’ve never been truly disappointed. The Hubble can take some great shots of Saturn, nebulae, and other astronomical phenomena, but even an expensive backyard scope produces only smudges. To do astronomy properly, you’ll spend your time huddled over a camera and a computer, stacking images to produce something that almost lives up to your expectations.

At CES, Unistellar introduced a device designed to fit over the eyepiece of a telescope to do all of this for you.

According to the guys at Unistellar, this box contains a small Linux computer, camera, GPS, and an LCD. Once the telescope is set up, the module takes a few pictures of the telescope’s field of view, stacks the images, and overlays the result in the eyepiece. Think of this as ‘live’ astrophotography.

In addition to making Jupiter look less like a Great Red Smudge, the Unistellar module adds augmented reality; it knows where the telescope is pointing and will add a label if you’re looking at any astronomical objects of note.

While I wasn’t able to take a look inside this extremely cool device, the Unistellar guys said they’ll be launching a crowdfunding campaign in the near future.

Custom Zynq/CMOS Camera Unlocks Astrophotography

Around here we love technology for its own sake. But we have to admit, most people are interested in applications–what can the technology do? Those people often have the best projects. After all, there’s only so many blinking LED projects you can look at before you want something more.

[Landingfield] is interested in astrophotography. He was dismayed at the cost of commercial camera sensors suitable for work like this, so he decided he would create his own. Although he started thinking about it a few years ago, he started earnestly in early 2016.

The project uses a Nikon sensor and a Xilinx Zynq CPU/FPGA. The idea is the set up and control the CMOS sensor with the CPU side of the Zynq chip, then receive and process the data from the sensor using the FPGA side before dumping it into memory and letting the CPU take over again. The project stalled for a bit due to a bug in the vendor’s tools. The posts describe the problem which might be handy if you are doing something similar. There’s still work to go, but the device has taken images that should appear on the same blog soon.

Continue reading “Custom Zynq/CMOS Camera Unlocks Astrophotography”

Build This Barn Door Tracker Today, Take Stunning Shots Of The Galaxy Tonight

Think you need some fancy equipment to get stunning shots of the night sky? Surely those long-exposure shots that show the Milky Way in all its glory take expensive telescopes with complicated motor-driven equatorial mounts, right? Guess again – you can slap together this simple barn door tracker for a DSLR for a couple of bucks and by wowing people with your astrophotography prowess tonight.

Those stunning, deeply saturated shots of our galaxy require a way to cancel out the Earth’s movement, lest star trails ruin your long exposure shots. Enter the barn door tracker, a simple device to let you counter the Earth’s rotation. [benrules2]’s version of the tool is ridiculously simple – two boards connected by a hinge. A short length of threaded rod with a large handle passes through a captive nut in the upper board.

A little trig allows you to calculate how much and how often to turn the handle (by hand!) to counter the planet’s 0.25°/minute diurnal rotation. Surprisingly, the long exposure times seem to even out any jostling introduced by handling the rig, but we’d still imagine a light touch and a sturdy tripod would be best. Those of you with less patience might automate this procedure.

It seems a lot to ask of a rig that you could probably throw together in an hour from scrap, but you can’t argue with [benrules2]’s results. His isn’t the only barn door tracker we’ve covered, but it looks like the simplest by far and would be a great project to build with kids.

[via r/DIY]