Breadboard Sequencer Does A Lot With Very Little Hardware

breadboard-sequencer

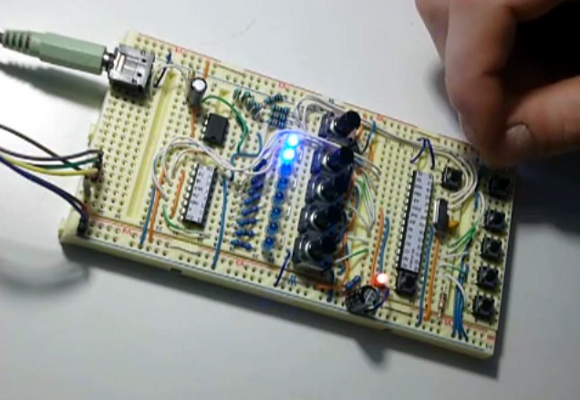
[Jan Cumpelik] squeezes a lot of performance out of very few components with his breadboard sequencer which he calls Lunchbeat. We really like his awesome breadboard which has a series of trenches perpendicular to the bus strips framing the long sides. All of our breadboards have just one trench down the middle. This, combined with his mad breadboard skills, results in a really clean prototype.

The chip nearest his hand is the ATmega328 which drives the sequencer. It takes inputs from that row of 10k trimpots as well as a series of tactile switches. Feedback is given with the row of eight LEDs. Those are driven from a 595 shift register to save pins on the microcontroller. The remaining chip is an OpAmp which works in conjunction with a 3-bit R2R ladder DAC to output audio. Turn your speakers down just a bit before taking in the demonstration below. There you will also find an image version of his schematic that we made for your convenience. It is only available as a PDF in the code repository he posted.

Continue reading “Breadboard Sequencer Does A Lot With Very Little Hardware”

ContactKey: A Portable, Battery-powered Phonebook

contactKey

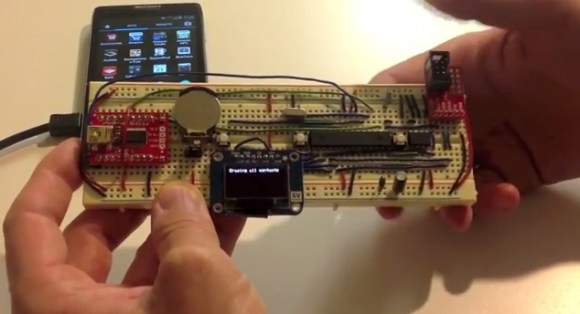
Although it’s still a prototype, [Russell] tipped us off to his battery-powered device for storing your contacts list: ContactKey. (Warning: Loud sound @ beginning). Sure, paper can back up your contact information, but paper isn’t nearly as cool to show off, nor can it receive updates directly from your Android. The ContactKey displays a contact’s information on an OLED screen, which you can pluck through by pressing a few buttons: either ‘Up,’ ‘Down,’ or ‘Reset’. Although the up/down button can advance one contact at a time, holding one down will fly through the list at lightning speed. A few seconds of inactivity causes a timeout and puts the ContactKey to sleep to conserve battery life.

This build uses an ATMega328 microcontroller and an external EEPROM to store the actual list. [Russell] wrote an Android app that will sync your contact list to the ContactKey over USB via an FTDI chip. The microcontroller uses I2C to talk to the EEPROM, while an OLED display interfaces to the ATMega through SPI. We’re looking forward to seeing how compact [Russell] can make the ContactKey once it’s off the breadboard; the battery life for most smartphones isn’t particularly stellar. Phones of the future will eventually live longer, but we bet it won’t be this one.

Continue reading “ContactKey: A Portable, Battery-powered Phonebook”

Pair Of MIDI Dongles To Inspire Some Weekend Music Hacking

pair-of-midi-dongles

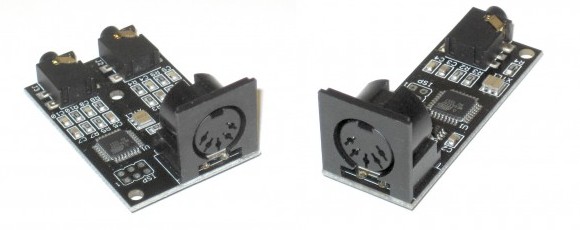
This pair of dongles is a fun way to get your feet wet working with MIDI hardware. They’re called MIDIvampire-I and MIDIvampire-II. Just plug one end into your MIDI-ready instrument and the other into a pair of speakers and you’re off and running. Mark I is a polyphonic synth, and Mark II is a drum machine, but both use basically the same hardware which you may already have on hand.

The single chip on each board is an ATmega328 often found anchoring Arduino boards. The other silicon component is an S1112B30MC voltage regulator. The rest of the components are passives, with MIDI and headphone jacks for connectivity. They’re selling these if you want the easy way out, but we thought we’d bring them to your attention in case you needed a breadboarding project this weekend. The firmware, BOM, schematic, and board artwork are all available on the Wiki pages linked in the articles above. After the break you can see a couple of demo videos which walk through all of the features.

Continue reading “Pair Of MIDI Dongles To Inspire Some Weekend Music Hacking”

Soundball Bumps To Your Tunes

soundball-blinks-to-the-music

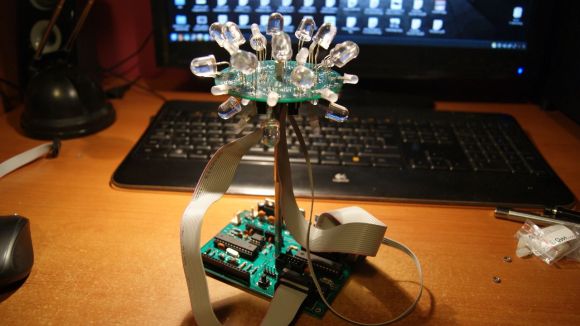
Meet soundball, a hobby electronics project when replaces a disco ball with one made of LEDs (translated) going every which way. This image shows the device before being injected into an enclosure. The final offering is a white project box with a hole in the top through which the diffuser covered blinky ball is supported.

The main board hosts a collection of the usual suspects: an ATmega328, an MSGEQ7 equalizer, a couple of TLC5940 LED drivers, and a footprint for a Bluetooth Shield. The equalizer chip provides [Cornelius] the audio analysis used to generate light patterns that go along with the music.  But he can still control the lights manually with a button on the case or by connecting to it via Bluetooth.

Swap out the LED drivers for some solid state relays and you can blink your Christmas lights to the music.

Continue reading “Soundball Bumps To Your Tunes”

Build A Bare Bones Arduino Clone Which Maximizes Its Use Of Real Estate

barebones-arduino-clone-at-home

Check out all the stuff crammed into a small swath of strip board. It’s got that characteristic look of a roll-your-own Arduino board, which is exactly what it is. [S. Erisman] shows you how to build your own copy of his YABBS; Yet Another Bare Bones Arduino (on Stripboard).

The strips of copper on the bottom of the substrate run perpendicular to the DIP chip and have been sliced in the middle. This greatly reduces the amount of jumpering that would have been necessary if using protoboard. A few wires make the necessary connections between the two tooled SIL headers that make up the chip socket. On the right hand side there a voltage regulator with smoothing caps. The left side hosts the obligatory pin 13 LED, and the crystal oscillator can be glimpsed on the far side of the ATmega328.

Pin headers along either side of the board have been altered to allow for soldering from the wrong side of the plastic frames. Note that there’s a three-pin hunk that breaks out the voltage regulator, and an ISP programming header sticking out the top to which those female jumper wires are connected.

Ringing in at as little as $2-$4.75 a piece you’ll have no problem leaving this in a project for the long hall. We can’t say the same for a $30+ brand name unit.

16 Core Computer Made Of ATMegas

Your desktop has two, four, or even eight cores, but when’s the last time you’ve seen a multicore homebrew computer? [Jack] did just that, constructing the DUO Mega, a 16 core computer out of a handful of ATMega microcontrollers.

From [Jack]’s description, there are 15 ‘worker’ cores, each with their own 16MHz crystal and connection to an 8-bit data bus. When the machine is turned on, the  single ‘manager’ core – also an ATMega328 – polls all the workers and loads a program written in a custom bytecode onto each core. The cores themselves have access to a shared pool of RAM (32k), a bit of Flash, a VGA out port, and an Ethernet controller attached to the the master core.

Since [Jack]’s DUO Mega computer has multiple cores, it excels at multitasking. In the video below, you can see the computer moving between a calculator app, a weird Tetris-like game, and a notepad app. The 16 cores in the DUO Mega also makes difficult calculations a lot faster; he can generate Mandelbrot patterns faster than any 8-bit microcontroller can alone, and also generates prime numbers at a good click.

Continue reading “16 Core Computer Made Of ATMegas”

CuteUino: Only Use The Parts Of The Arduino That You Need For Each Project

CuteUino

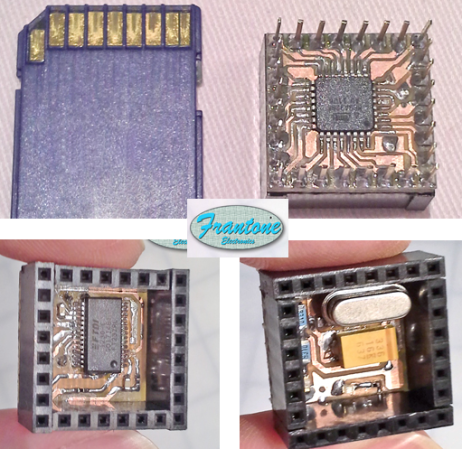
[Fran’s] been working on her own version of the Arduino. She calls it CuteUino for obvious reasons. The size of the thing is pretty remarkable, fitting within the outline of an SD card. But that doesn’t mean you won’t get the power that you’re used to with the device. She’s broken it up into several modules so you can choose only the components that you need for the project.

The main board is shown on the right, both top and bottom. It sports the ATmega328p (it’s hard to believe we could make out the label on the chip package in the clip after the break) in a TQFP-32 package soldered to the underside of what she calls the Brain Module. You can also see the extra long pins which stick through from the female pin headers mounted on the top side of the board. Inside of these pin headers you’ll find the clock crystal, status LEDs, and a capacitor. The other module is an FTDI board used to connect the AVR chip to a USB port.

You’ll definitely want to check out her prototyping post for this project. She uses a very interesting technique of combining two single-sided boards to make a 3-layer PCB. The side that was not copper clad is fitted with copper foil by hand to act as a ground plane for the vias. Neat!

Continue reading “CuteUino: Only Use The Parts Of The Arduino That You Need For Each Project”