Wi-Fi Enabled Garage Door Opener

Normally, internet-controlled household devices are a cobbled together mashup of parts. This is great for a prototype, but if you’re looking for something that will last a decade in your garage, you’ll need something a little cleaner and more robust. [Phil]’s Internet-enabled garage door opener is just that, replete with a custom-made enclosure for his Arduino powered system.

The main hardware for [Phil]’s build is a Freetronix EtherTen, an Arduino clone with a built-in Ethernet interface. Aside from that, the electronics are simple: a relay, transistor, and diode provide the connection from the EtherTen to the garage door opener.

The software for this setup consists of a main file that sets up the web page, the serial monitor, and loops through the main program. There are a bunch of classes for initializing the web page, writing passwords to the EEPROM, activating the door, and setting the MAC and IP addresses.

Opening the door with this remote is a snap: with any WiFi enabled smartphone or tablet, [Phil] only needs to log onto his network, surf on over to the page hosted on the Arduino, and enter a password. From there, opening the door is just a press of a button. Passwords and other configuration settings cane be entered with MegunoLink. This software also includes a serial monitor to log who opened the door and when.

It’s an interesting and compact system, and handy to boot. You might sometimes forget your garage door opener, but we’re thinking if you ever find yourself without your phone, a closed garage door is the least of your problems.

Turn A Decommissioned Robot Into A CNC Machine

adeptRobot

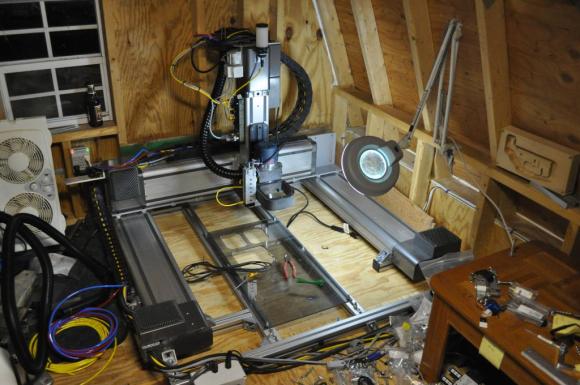
Some of us may have been accused of living in Mom’s basement – [Benjamin] kicks it up a notch by keeping an industrial robot in his parent’s attic shed loft.
[Benjamin] was tasked with stripping down some retired equipment at work. It turns out the “retired equipment” was three Cartesian robots from Adept Robotics. These are large industrial XYZ platforms capable of high speed movements (3000 IPM rapids!).

Getting from a decommissioned machine to a working CNC is never a simple path. In this case [Ben] was able to make the transition relatively easily. Each axis of the robot has a 400 Watt Yaskawa servo with a 65k encoder and brake. The original Adept servo amps and control system was still working, so he kept it. The controllers were new enough that they communicate over a daisy chained IEEE1394 (Firewire) link. That is relatively modern compared to some of the conversions we’ve seen in the past.  The final piece of the puzzle was G-code creation Translating common G-code to a format his machine could recognize. Ben chose MeshCAM for the task.

One problem [Ben] ran into was stuttering on the X-axis. The original machines only had a single sided drive system on the X-axis. Single side is fine for an assembly machine that doesn’t see any tool load. However for a CNC machine that will see spindle loads, a single side drive creates a twisting force which threatens to rack the entire frame. He used one of the drive systems from his spare robot to convert his main machine to a double-sided drive, eliminating the issue.

Continue reading “Turn A Decommissioned Robot Into A CNC Machine”

Breadboard Sequencer Does A Lot With Very Little Hardware

breadboard-sequencer

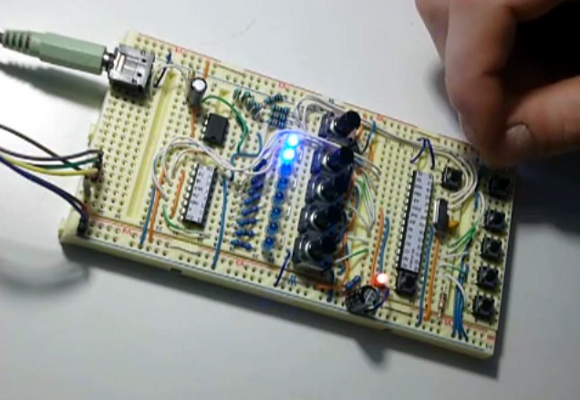
[Jan Cumpelik] squeezes a lot of performance out of very few components with his breadboard sequencer which he calls Lunchbeat. We really like his awesome breadboard which has a series of trenches perpendicular to the bus strips framing the long sides. All of our breadboards have just one trench down the middle. This, combined with his mad breadboard skills, results in a really clean prototype.

The chip nearest his hand is the ATmega328 which drives the sequencer. It takes inputs from that row of 10k trimpots as well as a series of tactile switches. Feedback is given with the row of eight LEDs. Those are driven from a 595 shift register to save pins on the microcontroller. The remaining chip is an OpAmp which works in conjunction with a 3-bit R2R ladder DAC to output audio. Turn your speakers down just a bit before taking in the demonstration below. There you will also find an image version of his schematic that we made for your convenience. It is only available as a PDF in the code repository he posted.

Continue reading “Breadboard Sequencer Does A Lot With Very Little Hardware”

Opening Up The Settings In MakerWare

ProfTweak

[Rich Olson] really likes MakerWare and the Makerbot slicer – the software package that comes with every Makerbot – but sometimes he needs to change a few settings. Makerware doesn’t allow the user access to 90% of the setting for slicing and printing, so [Rich] did something about that. He came up with ProfTweak, a tool to change all the MakerWare slicing and printing parameters, giving him precise control over every print.

ProfTweak handles common settings changes such as turning the fan on or off, adjusting the filament diameter, changing feed rate options, and turning your infills into cats. It’s a handy GUI app that should work under Windows, OS X, and Linux, so if you’re running MakerWare right now, you can get up and running with this easily.

One thing [Rich] has been using his new software for is experimenting with alternative filaments. With his Makerbot, he’s able to print in nylon, the wood and stone PLAs, flex PLA, and PET. That’s a lot more material than what the Makerbot natively supports, so we have to give [Rich] some credit for that.

Fail Of The Week: Capturing Data From A Laser Rangefinder

fotw-laser-measuring-tape

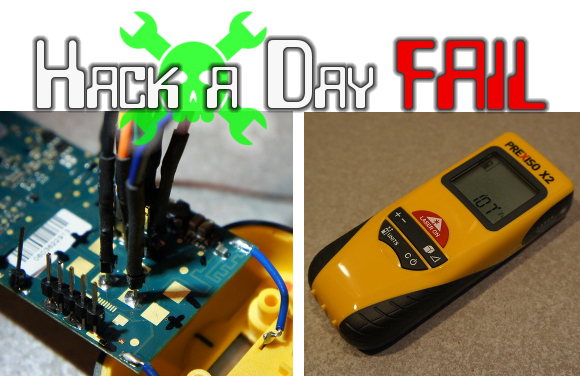
We’re changing it up this week with a reverse engineering fail which [Itay] pointed out to us. A couple of years ago [Nate] over at Sparkfun agreed to help a friend with a project that required precise distance measurement. He knew that laser rangefinders are a good way to go and mentions their use in golfing and the building trades. He picked up this handheld version billed as a laser tape measure. He put up a valiant effort to reverse engineer the PCB in hopes of finding a hook for the measurement data.

Obviously his endeavor failed or we wouldn’t be talking about it in this column. But there’s a lot to learn about his methods, and a few of the comments associated with his original post help to shed light on a couple of extra things to try.

Continue reading “Fail Of The Week: Capturing Data From A Laser Rangefinder”

Thecontrollerproject’s First Contest, With Prizes

contest-prizes

One of [Caleb]’s side projects before he left us was TheControllerProject, a place for controller and console modders to hook up with gamers with disabilities. Things must be hopping over there, because [Caleb] just announced his first contest, with prizes, even.

The goal of this contest is to make the trigger buttons on XBox and PS3 controllers able to be controlled from the top of the controller. This is a huge problem for gamers with disabilities, and no open system currently exists to solve this problem. If you can make some sort of mechanical device to turn shoulder-mounted buttons into top-mounted actuators, just host it somewhere and win a prize.

The prizes are an iFixit toolkit and magnetic mat. The first five people to send in a solution to the shoulder mounted button problem get this prize. Originally, [Caleb] thought about tearing apart these controllers and soldering extra buttons, but a snap-on mechanical solution is much easier to install.

If you design a solution to this problem, send it in (but send it to [Caleb] first!) and we’ll probably feature it too.

Continue reading “Thecontrollerproject’s First Contest, With Prizes”

Self-balancing Arduino Does It Without An IMU

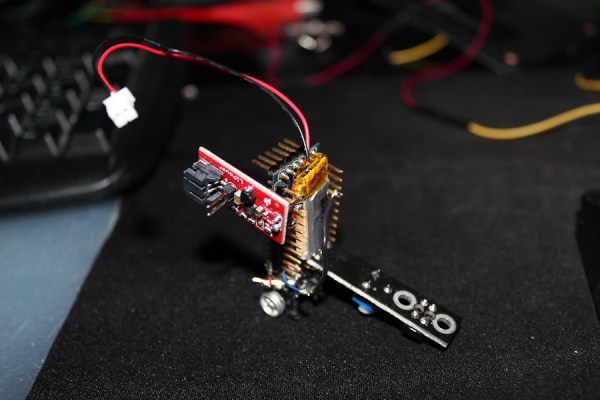
The miniscule size of this self-balancing robot makes it a cool project. It actually uses the motor and wheels from a small toy car. But when you look into how the balancing act is performed it gets way more interesting. The larger versions of this trick pretty much all use Inertial Measurement Units (IMUs) which are usually made up of an accelerometer and a gyroscopic sensor. This has neither.

The black PCB seen to the right of the robot is an IR reflectance sensor. It shines an IR led at the floor and picks up what reflects back. [Sean] added this hack because the gyro sensor he ordered hasn’t arrived yet. The board has a trimpot which is used to adjust the sensitivity. You have to tweak it until it stands on its own. See for yourself after the break.

Self balancing robot builds are a great way to teach yourself about Proportional-Integral-Derivate (PID) algorithms used in a lot of these projects.

Continue reading “Self-balancing Arduino Does It Without An IMU”