512 LED Cube

Get out the soldering iron and clear your schedule, it’s going to take you a while to assemble this 8x8x8 LED matrix which contains a total of 512 LEDs. We’ve looked in on a 3x3x3 cube, and [Chr], who is responsible for this one, has assembled a 4x4x4 cube before, but this one is quite a leap in complexity. It isn’t just physical assembly problems that increase with scale, you’ll need to consider a power supply too since one layer of a 3x3x3 cube would need at 90 mA, but a single layer of the cube above requires 640 mA to light all of the diodes. Multiplexing is handled per-layer, controlled by  ICs which share 8 data lines and are latched by a shift register. This means the display only requires 11 microcontroller pins for addressing. It is striking how well [Chr] explains the design process, and how cleanly he builds the driver circuits on protoboard. There’s a lot to look at and a lot to learn, not to mention the stunning results which can be seen in the video after the break.

Continue reading “512 LED Cube”

External RAM For An ATmega128

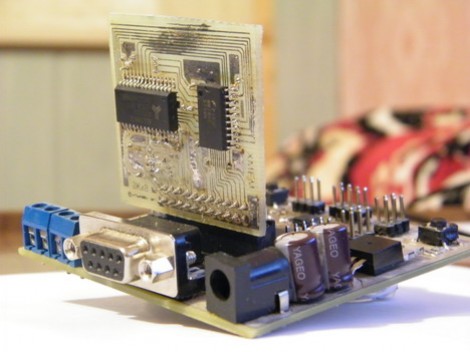
Those who are familiar with Atmel’s line of 8-bit AVR microcontrollers should already know that some of them have support for external RAM. But have you ever actually used this feature? We haven’t. Now you can learn how it’s done by reading through this guide. It touches on all of the hardware, but doesn’t dwell on it. Instead, you’ll get the background you need on how to write to, read from, and test an external module like the one sticking up in the image above. The test routine shows how to make sure everything’s working correctly with your memory mapping before you begin developing firmware around this increased capacity.

[Thanks Spman]

Make Your Own Minimalist AVR ISP

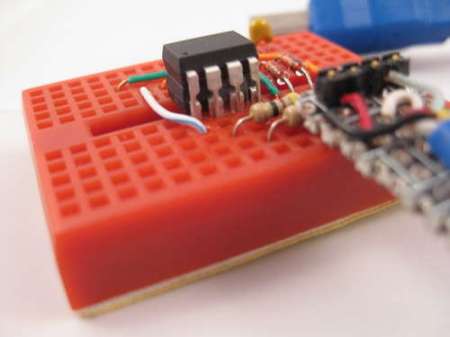
Giving a programmer is a great way to get people started in microcontrollers so If you want a cheap simple AVR programmer this might just be what you’re looking for. It combines the V-USB firmware, USBtiny software, a few resistors, and some zener diodes. An interesting trick using this programmer is if your trying to program another 8 pin ATtiny you can use some tape to isolate the USB data pins and then piggyback the target ATtiny on the programmer.

Unfortunately in order to flash the ATtiny for your programmer you need a working programmer so it’s somewhat of a catch-22.  Make sure your careful when setting the fuse bits because it will use the reset pin making it hard to reprogram without additional programming hardware. AVRs in general are a great way to start using microcontrollers so if your interested give out tutorials a go. You’ll find some tips to get started in addition to information about using an Arduino, or a DAPA cable to flash the firmware to this chip.

AVR HV Rescue Shield 2

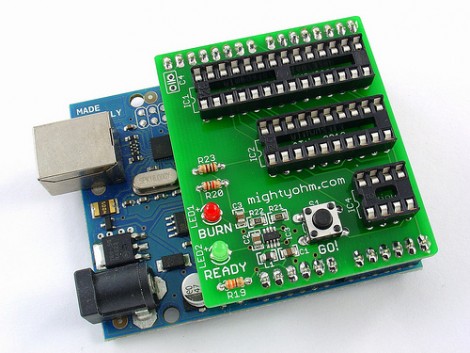
[Jeff Keyzer] has a new version of the HV Rescue Shield available. This tool allows you to use an Arduino to reset the fuse bits on AVR microcontrollers. This is necessary if you make a mistake and disable the reset pin, or choose the incorrect clock settings (this will probably happen to you at some point). In order to bring the chip back to life you’ll need to use High Voltage Programming. The last version of the shield only worked with High Voltage Parallel Programming (HVPP) but this rendition can also use High Voltage Serial Programming (HVSP) for 8-pin chips that don’t have enough inputs for parallel communications.

As we talked about in our AVR Programming Tutorials this is no replacement for a high-end programmer like the STK500 or an AVR Dragon, but if you already have an Arduino a kit will only cost you $20 (or you can etch and build it yourself). We would have liked to see a breakout header for the HVP signals for off-board use. The absence of a breakout header doesn’t preclude this, but since you need the on board boost converter for the 12V signals, and because this shield can’t be used with a breadboard due to pin spacing, it’s hard to patch into signals for non-DIP use. We also think some clever firmware hacking and this could be used for HV programming, like we needed for that LED light bulb.

VGA Interfacing AVR Microcontrollers

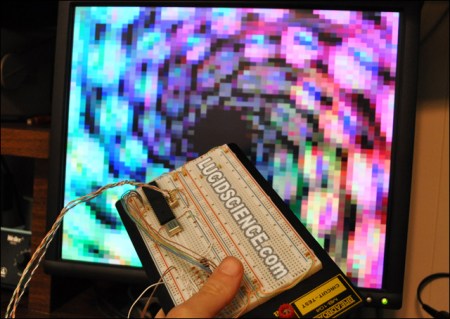
[Lucidscience] is back again, this time showing us how to push data to a VGA monitor from your AVR project.  It turns out that it is pretty simple, requiring only n open port and a few resistors and diodes. Well, it is that simple for the most basic version which gives you 56×60 pixels. Of course he couldn’t live with that and had to expand. Version 2 outputs 240×240 resolution and has additional sram and a double buffer making animations smoother and flicker free. As usual, the project is quite well documented with photos of the entire build process and schematics for you to build your own. A video of version 1 and version 2 are available after the break.

[via HackedGadgets]

Continue reading “VGA Interfacing AVR Microcontrollers”

AVR Programming 04: Writing Code, Etc.

Welcome back to this fourth and final installment of the series. The first three parts should have been enough to get you off the ground, but a few more learning examples wouldn’t hurt. It’s also a good time to discuss some of the other things these little chips can do. Join me after the break to:

  • Expand the sample code, adding features to our simple program while I challenge you to write the code yourself.
  • Discuss AVR fuse bits, how to use them, and what to watch out for
  • Touch on some of the peripherals you’ll come across in these chips

As a grand flourish to the series, I’ve used the example hardware from this final part to build a bicycle tail light. Hopefully this will inspire you to create something much more clever.

Series roadmap:

Continue reading “AVR Programming 04: Writing Code, Etc.”

AVR Programming 03: Reading And Compiling Code

In the last installment of our tutorial series we built a simple circuit on a breadboard and programmed an ATmega168 to make it run. That proves that you know how to follow directions, but the eureka moments of doing everything yourself are on the way. This time around you will get down and dirty with the datasheet, learning where each line of the sample code came from, and give your recently installed compiler a test drive. We will:

  • Talk about bitwise operators and how they work when coding for microcontrollers
  • Discuss C code shorthand
  • Review the sample code from Part 2 and talk about what each line of code does
  • Learn to compile code

If this is the first you’ve heard about our AVR Programming series, head back to Part 1 and start from the beginning. Otherwise, take a deep breath and we’ll being after the break.

Series roadmap:

Continue reading “AVR Programming 03: Reading And Compiling Code”