Repurposing A Click Wheel

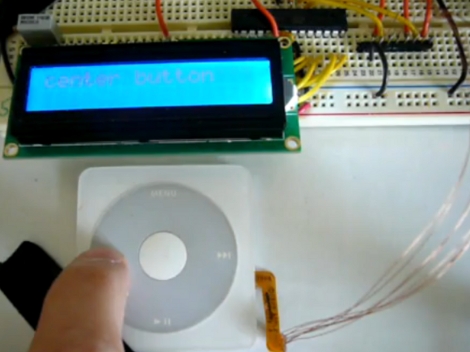
We think the click wheel is the biggest contributor to the success of the original iPods. The devices were a brick with a monochrome screen but the user interface was slick and easy to use. [Jason] decided he wanted to add a click wheel to his own project. After using a logic analyzer he discovered that it doesn’t implement a common protocol such as I2C, perhaps a deliberate move by Apple to keep the controller under wraps? He managed to get past this hurdle, as seen in the video after the break, by bit-banging the data in from the click wheel and then reverse engineering the protocol.

It’s connected to an AVR ATtiny88 with feedback shown on a character LCD screen. We’re glad that [Jason] tipped us off about this, but he doesn’t have any code available yet. We love to dive into the source so the sooner he gets it up the better! We’ve got an old 3rd generation with a bad board that is begging to have the wheel ripped out of it, not to mention the dirt-cheap replacements available on ebay. Continue reading “Repurposing A Click Wheel”

Nanotouch: A Tiny AVR Media Thing

[youtube=http://www.youtube.com/watch?v=qLOQOTa4-aY]

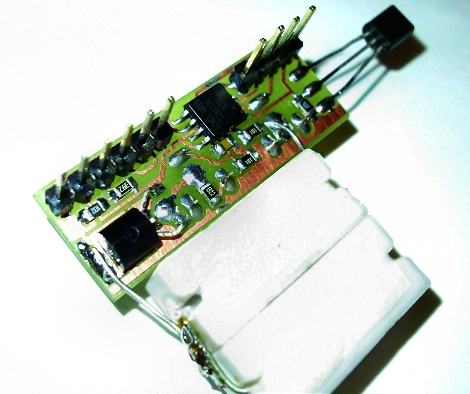
[Rossum] is at it again. This time, he has created a super tiny media device to get us drooling. You might recall him from the 8-bit device we showed you before. The Nanotouch is roughly the dimensions of a 96×64 OLED screen(slightly larger than a quarter), with about 1/3 to 1/2 of an inch of stuff packed behind it.  The screen itself is mounted atop 4 buttons. This allows you to depress the screen edges for navigation.  He does mention that this design needs a little work to prolong the life of the screen, but we really like the intuitive way of navigating.  At its heart is an ATmega32u4.

We thought his last version was fantastic, but this one has us enamored. He states he’ll publish schematics and code, as he did before. We just didn’t want to wait to share.

[thanks Joakim]

Arduino Programmer For Arduino

[youtube=http://www.youtube.com/watch?v=M-sFQNIXde8]

Wow, that title is flamebait… but give us a chance to explain. [George] wrote some code for the Arduino that allows it to program another Arduino. You may be thinking to yourself “this has already been done”. In a way it has, with the AVR ISP programming shield. But once the code has been uploaded to the Arduino, you don’t need a computer to program the next chip. This concept turns an Arduino into an in-the-field programmer. Right now his code only programs the ATmega328 and it’s a little buggy, but the concept is solid. A fully functioning independent programmer is easy to image; [George] has laid the ground work, the AVR ISP programming firmware has proven this can work with several different chips, and if your AVR has an ATmega328 there should be plenty of room to store the code you plan to flash to the target microprocessors. It’s up to you to put all the pieces together.

More AVR Tetris

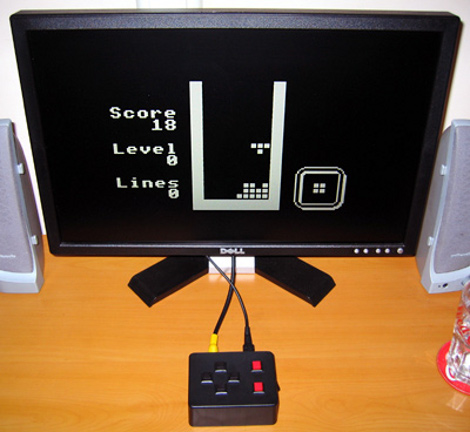
[Ben] built an AVR based Tetris game that uses a TV as the display. He linked his project in a comment from the AVR Tetris project featured last week. His work taps the power of his own tvText library to handle the composite video out. Using a TV takes all of the hardware work out of the equation, leaving just the composite jack and a few buttons to connect to the ATmega168 and its 20MHz clock. We’ve embedded the game play video after the break. It’s black and white but also clean and crisp.

[Ben] didn’t include music with his build but another commenter, [Eric], has started to work on that. We can’t help but think that they both should have tipped us off sooner about their projects.

Continue reading “More AVR Tetris”

AVR Tetris

Tetris, the timeless classic, is one of those concepts that someone will try to run on every conceivable hardware platform. I took on the challenge of programming a Tetris clone from the ground up using hardware I had on hand. At the heart of the build is an ATmega168 microcontroller. The game displays on a KS0108 128×64 LCD module with five momentary push switches to provide directional, rotational, and input controls. You can see the resulting monochrome action embedded after the break.

I had several goals in mind while writing the code for the game.  I wanted the code to be portable so that the size of the board and type of screen used could be easily changed. With that in mind I developed the trunk for a Nokia 3595 cellphone screen and a parallel branch for the graphic LCD. Originally I was working with an ATmega8 but upgraded so that I could operate at the 3.3v the cell phone screen required.

The firmware for the graphic LCD branch compiles to just over 6 kB which means it can still be run on a mega8. Also, the ATmega168 is the same processor used in the Arduino Duemilanove so another Tetris port is not out of the question. I just got a hold of my first Arduino so we’ll see if I find time to start a new branch in the code.

Continue reading “AVR Tetris”

CES Update: Atmega128RFA1

After posting about our visit and interview with [Vemund], the Atmel rep at CES. We got the feeling you needed to know some more. The thing that has got us pretty excited is the ATmega128RFA1(pdf) single-chip microcontroller and Zigbee radio module. It can be found in the ATmegaRFA1-EK1 development board. We look forward to seeing future projects and products involving this chip. How would you use this chip?

Arduino I/O Speed Breakdown

[Jee Labs] has worked out how long it takes for an Arduino to perform various I/O operations. Predictably, analogRead() takes the longest, followed by analogWrite(). Arduino really falls behind when it comes to digital pin I/O: digitalWrite() takes a whopping fifty times longer than a direct bit write to a port register!  This is something to take into consideration when you are looking to do some beefy I/O with an Arduino. Perhaps this I/O performance will be addressed in the future with Arduino 1.0.