Saving $20,000 USD With A Single LED

carrier

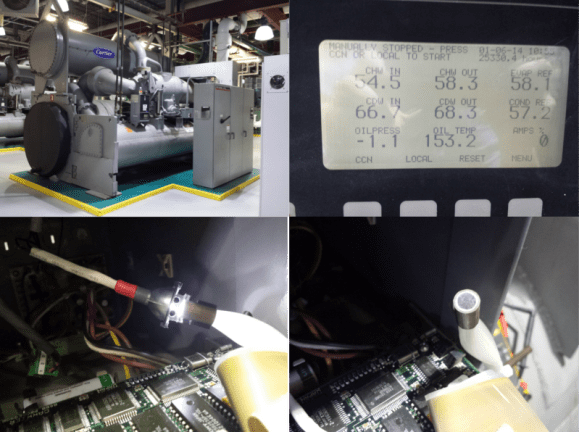
[N8Mcnasty] is a HVAC tech who works on some big machines. One of his charges is a Carrier 19EX Chiller, rated at 1350 tons of cooling. 1 ton of cooling = 12,000 BTU. This particular chiller contained an odd LCD screen. It used a fiber optic bundle and a halogen light for backlight illumination. The system worked fine for over a decade. Now though, the halogen bulb has begun melting the glue on the fiber bundle, causing a dim display. The display in question shows some very important operating parameters, such as oil temperature, current draw, and process temperatures. Since they couldn’t easily see the display, the machine’s operators weren’t running the machine, placing stress on the other chillers in the building’s physical plant. [N8Mcnasty] tried repairing the bundle, however the glue kept melting.

A replacement display was no longer available, meaning that the entire chiller control system would have to be upgraded to a newer system. The new control system uses different sensors than the old one. This is where things start getting expensive. Replacing the sensors would also require draining the 15-20 gallons of oil, 4500 lbs of R134a refrigerant, and bringing the whole system down for almost two weeks, a $20,000 job. Rather than go this route, [N8Mcnasty] found an alternative. LED’s have come a long way since 1996, when the chiller was built. He simply replaced the halogen bulb with an LED and appropriate resistor. [N8Mcnasty] was even able to reuse the halogen bulb bracket. A bit of heat shrink tube later, and the fix looks like it was a factory option. He’s documented his fix here on reddit.

Laptop Keyboard EL Panel Backlight

keyboard-el-panel-backlight

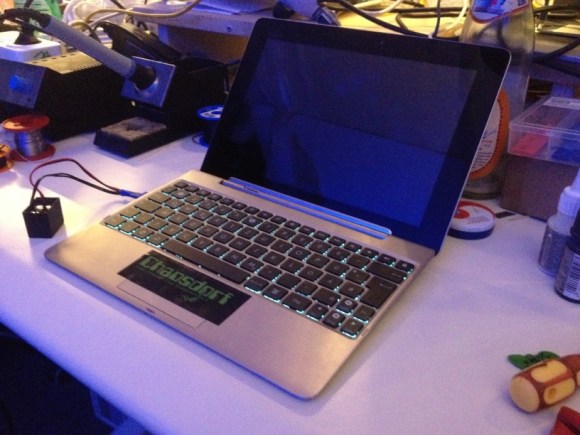
[nullpointr] wanted a backlit keyboard for his Asus Transformer Prime so that it would be a bit easier to use in low-light situations. He considered a few different options and ended up adding electroluminescent panels behind the keys.

Those paying close attention might wonder why we called this a laptop in the title. Well, it’s a tablet with a keyboard dock and that’s a mouthful. This actually really helps to simplify the modifications because the motherboard and other bits are all in the screen portion of the device. EL panels are also a nice choice because you can cut them to size and they still function. With a bit of case work, three panels were made to fit side-by-side.

The part that just isn’t going to make it in the original enclosure is the inverter that drives the panels. It’s the black box to the left. [nullpointr] added a USB-form-factor jack to the side of the case that allows the inverter to be disconnected quite easily. This way the Transformer Prime can still go with him on the road, it just won’t light up unless he also hauls around that add-on.

Way way back we saw someone do this with fiber optics and an LED. Unfortunately that project link seems to be dead so we figure it’s about time someone revisited the concept.

Auto Dimmer Hacked Into Keyboard Backlight

keyboard-backlight-auto-adjustment

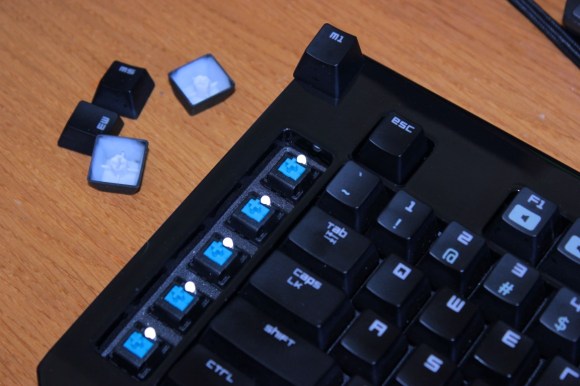
As the title says, [José Faria] added the ability to adjust his keyboard backlight based on ambient light levels. But that’s just one of the things he did during his hacking extravaganza with this Razer BlackWidow Ultimate.

When he first received the peripheral he didn’t like the blue LEDs used as backlights. So he removed all of them and put in white ones. He doesn’t talk too much about that but we’d image it was a ton of work. The new color was pleasing, but then the ability to adjust their brightness started to irritate him. There are four predefined levels and that’s all you get. Even the GUI which has a slider for adjustment couldn’t go outside of those levels.

His solution was to augment the controller with his own. He patched in an AVR chip to the transistor which controls the low side of the LED circuits. While at it he also noticed that the keyboard case was actually translucent. This let him hide a photosensor inside which automatically adjusts the light levels. But he did it in a way that still allows him to use the original functionality with the flip of a switch. See for yourself after the break.

Continue reading “Auto Dimmer Hacked Into Keyboard Backlight”

Laptop Backlight Converted From CCFL To LED

ccfl-to-led-backlight-conversion

[Lee Davison] acquired an Acer laptop that didn’t have a display anymore. He had enough parts on hand to add in an LCD panel and give it a CCFL backlight. But when he started looking for an inverter to drive the backlight he couldn’t find one. What he did have on hand were some smashed screens that had LED backlights and so the CCFL to LED backlight conversion project was born.

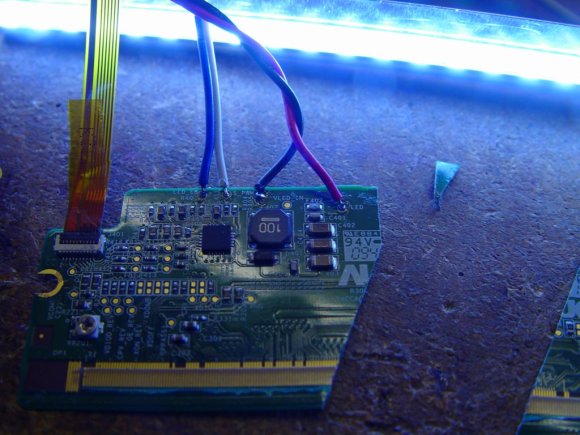
He tore into the LED display and found the driver board. Unfortunately he didn’t locate the datasheet for the exact LED driver, but he found one that was similar and was able to trace out the support circuitry on the PCB. This let him cut away the unneeded parts of the board without damaging the driver. He didn’t want to pull out the CCFL tubes until he was sure the LED conversion would work so he tried it out on another smashed panel (where does he come up with all these parts) and it worked great. Once he got everything in place he was very happy with the results. The only drawback to the system is that he doesn’t have the ability to dim the backlight.

Adding A Backlight To The ‘ol Game Boy Brick

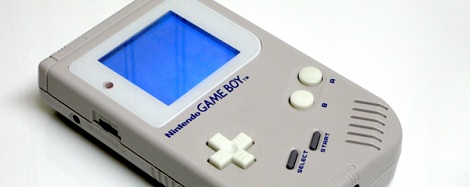
For being more than 20 years old, [Max]’s old brick-sized Game boy still has a lot of life left in it. Even though his Game Boy was still in good condition, there were a few vertical lines in the display, making it a perfect candidate for a restoration. While he had his DMG-01 open on his work bench, [Max] also decided to put in a back light.

After researching the blank vertical lines in his Game Boy’s display, [Max] learned the problem was probably a loose solder connection. [Max] whipped out his tri-wing screwdriver, disassembled his classic plastic friend, took a soldering iron to the LCD’s flex connector, and fixed the problem easily.

Since his Game Boy was already taken apart, he decided to add a 3rd party backlight. The installation was a snap – [Max] only removed the reflective LCD backing and shoved an edge-lit backlight panel into the Game Boy.

If you’re wondering why anyone would still be interested in a 20+ year-old Game Boy, the DMG-01 is highly regarded in the chiptune scene when paired with Little Sound DJ, in part because of the noisy amplifiers and unique sound. Anything that keeps these wonderful machines out of the garbage is alright in our book, so we’ve got to hand it to [Max] for putting together this wonderful tutorial.

Reverse Engineering Old PDA Software

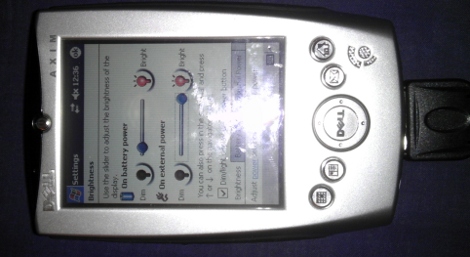
[Troy Wright] acquired a lot of twenty broken Dell Axim PDAs. This type hardware was quite popular a decade ago, but looks archaic when compared to a modern cell phone. That’s why he was able to get them for a song. After a bit of work he managed to resurrect eight of the units, but was dismayed to find there’s no published method for controlling the back light from software. For some reason this is a deal-breaker for his project. But he knew it was possible because there are some apps for the device which are able to set the back light level. So he found out how to do it by reverse engineering the software.

The trick is to get a hold of the code. Since it’s not open source [Troy] used IDA, a graphical disassember and debug suite. He had some idea of what he was hunting for as the Windows CE developer documentation does mention a way to directly control the graphical hardware independently from the display driver. A few hours of pawing through assembly language, setting break points, and testing eventually led him to the solution.

LED Backlight Conversion Using Recycled CCFL Inverter Parts

inverter_repair

[Ammon] repairs busted LCD monitors as a side hobby, so replacing burned out CCFLs and inverter circuits is something he can do in his sleep. One Dell monitor he received had him so perplexed, that he simply gave up on trying to repair the inverter circuit. He still wanted to get it working, so he had some narrow PCBs made and started working on his LED replacement backlight.

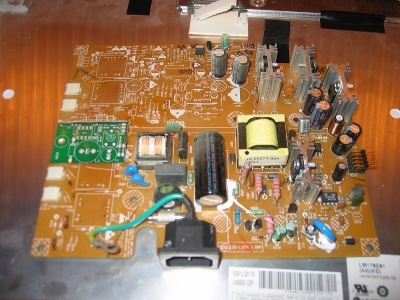
He built a driver board for the LEDs, populated with left over components that he stripped from the LCD panel’s inverter circuit. He needed space to insert his driver board, so he simply cut out a chunk of the inverter board and slipped his replacement driver board in its place. As you can see in the picture above, his board (in green) takes up far less space than the original inverter circuit it replaces.

He provides a schematic for his circuit as well as a PCB layout file, so it should be fairly easy to replicate his work. He has not posted schematics or layout information for his LED strips, but we’re betting he will if someone asks nicely.

Check out this pair of posts if you are interested in reading more about replacing your burned out CCFL with LEDs.