Valve Reluctantly Shows How To Mod The Steam Deck

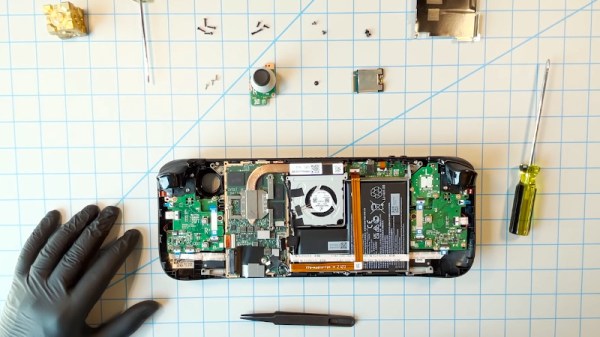
As the narrator in this official instructional video from Valve reminds the viewer several times, the gaming company would really rather you not open up your brand new Steam Deck and start poking around. They can’t guarantee that their software will function should you start changing the hardware, and since there’s no source for replacement parts yet anyway, there’s not much you can do in the way of repairs.

That said, Valve does believe you have the right to take apart your own device, and has produced the video below as an aid to those who are willing risk damaging their new system by opening it up. Specifically, the video goes over how to replace the most likely wear items on the handheld, namely the thumb sticks and the SSD. It seems inevitable that the stock thumb sticks will wear down after a couple years of hard use, so we’re glad to see they are easily removable modules. As for the SSD, it stands to reason that users would want to swap it out for faster and higher capacity models as they become available in the coming years.

Sooner or later, these are going to need to be replaced.

Now to be clear, we appreciate Valve making this video, and would love to see other manufacturers be so forthcoming. But we have to admit that some of its messaging does seem a bit heavy handed. The narrators admonition that users who open their Steam Deck are literally taking their lives into their own hands due to the danger of potentially rupturing the system’s lithium-ion battery is a bit hyperbolic for our tastes. The constant reminders of how badly you could bungle the job just comes off as overly preachy, though to be fair, we probably aren’t the intended audience.

Outside of its obvious gaming functions, we’re excited too see what the community can do with the Steam Deck. With official reference material like this, perhaps we’ll even start seeing some hardware modifications before too long. Though we wouldn’t blame you for hitting the Mute button halfway through.

Continue reading “Valve Reluctantly Shows How To Mod The Steam Deck”

Software Challenge’s Solution Shows Reverse Engineering In Action

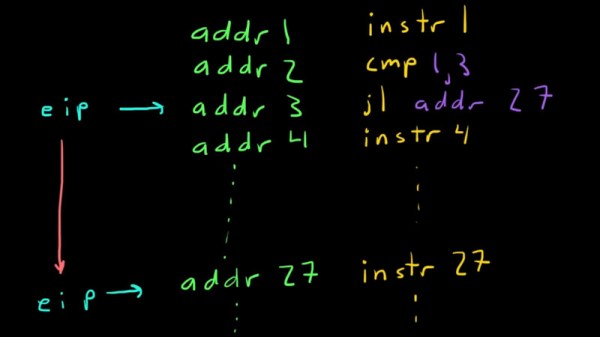
[0xricksanchez] participated in a software reverse-engineering challenge and recently wrote up the solution, and in so doing also documented the process used to discover it. The challenge was called Devil’s Swapper, and consisted of a small binary blob that output a short message when executed. The goal of the challenge? Discover the secret key and the secret message within. [0xricksanchez]’s writeup, originally intended just as a personal record, ended up doing an excellent job of showing how a lot of reverse engineering tools and processes get applied to software in a practical way.

What’s also great about [0xricksanchez]’s writeup is that it uses standard tools and plenty of screenshots to show what is being done, while also explaining why those actions are being chosen and what is being learned. It’s easy to follow the thought process as things progress from gathering information, to chasing leads, and finally leveraging what’s been learned. It’s a fascinating look into the process of applying the reverse engineering mindset to software, and a good demonstration of the tools. Give it a read, and see how far you can follow along before learning something new. Want more? Make sure you have checked out the Hackaday 2020 Remoticon videos on reverse engineering firmware, and doing the same for PCBs.

Peek Into The Compiler’s Code — Lots Of Compilers

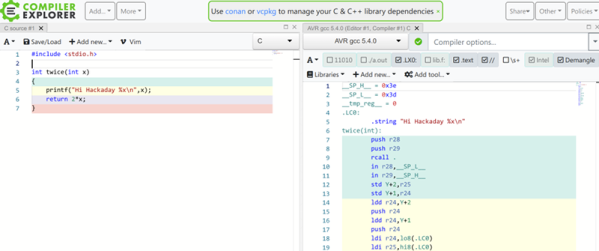
We don’t know what normal people argue about, but we know we spend a lot of time arguing about the best microcontroller, which editor is the best, and what language or compiler does the best job. The problem with all those compilers is getting them loaded and digging into the generated code. If you too spend your time thinking about those things, you ought to have a look at [Matt Godbolt’s] Compiler Explorer. We know that hosting an IDE-like web page and compiling code is old hat — although [Matt’s] site has been around quite some time. But [Matt’s] doing it differently. The code you build on the left hand pane shows up as assembly language on the right hand side.

There are plenty of options, too. For example, here’s a bit of C code from the site’s example:

int square(int num) {
   return num * num;
}

Here’s the corresponding assembly from gcc 9.2 for x86-64:

square:
  push rbp
  mov rbp, rsp
  mov DWORD PTR [rbp-4], edi
  mov eax, DWORD PTR [rbp-4]
  imul eax, eax
  pop rbp
  ret

Continue reading “Peek Into The Compiler’s Code — Lots Of Compilers”

Hail To The King, Baby: Reverse Engineering Duke

If you’re a fan of DOS games from the 1990s, you’ve almost certainly used DOSBox to replay them on a modern computer. It allows you to run software in a virtual environment that replicates an era-appropriate computer. That’s great for historical accuracy, but doesn’t do you much good if you’re trying to leverage modern computing power to breathe some new life into those classic titles. For that, you need to dig in a little deeper.
For the last two and a half years, [Nikolai Wuttke] has been doing exactly that for 1993’s Duke Nukem II. The end result is RigelEngine, an open source drop-in replacement for the original game binary that not only runs on a modern Windows, Linux, or Mac OS machine, but manages to improve on the original in a number of ways. An accomplishment made even more impressive once you learn that the original source code for the game has been lost to time, and that he had to do everything blind.

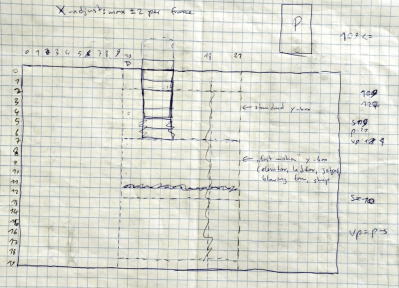
In a blog post chronicling his progress so far, [Nikolai] explains the arduous process he used to make sure his re-implementation was as accurate as possible to the original game. He spent untold hours studying the original game’s disassembled code in Ida Pro, handwriting out pages of notes and pseudocode as he tried to understand what was happening behind the scenes. Once a particular enemy or element of the game was implemented in RigelEngine, he’d record the gameplay from his version and compare it to the original frame by frame so he could fine tune the experience.

So what’s the end result of more than two years of work and over 25K lines of code? Thanks to the incredible advancements in computing power since the game’s release nearly 30 years ago, [Nikolai] has managed to remove the need for loading screens. His engine is also capable of displaying an unlimited number of particle effects on the screen at once, and multiple sound effects can now be played simultaneously. In the future he’s looking to implement smooth character movement (in the original game, movement was in 8 pixel increments) and adaptive volume for sound effects based on their distance from Duke. Ultimately, RigelEngine should be able to replace the original graphics with new high resolution textures once some issues with the rendering buffer gets sorted out.

It’s hard to overstate how important some of these classic games are to those who grew up playing them. With John Romero still releasing DLC for the original DOOM and hackers disassembling nearly 40 year old games to fix bugs, it doesn’t seem like they’re in any danger of being forgotten.

Continue reading “Hail To The King, Baby: Reverse Engineering Duke”

Learn To Reverse Engineer X86_64 Binaries

Opening up things, see how they work, and make them do what you want are just the basic needs of the average hacker. In some cases, a screwdriver and multimeter will do the job, but in other cases a binary blob of random software is all we have to work with. Trying to understand an unknown binary executable is an exciting way to discover a system’s internal functionality.

While the basic principles of software reverse engineering are universal across most platforms, the details can naturally vary for different architectures. In the case of the x86 architecture, [Leonora Tindall] felt that most tutorials on the subject focus mostly on 32-bit and not so much on the 64-bit specifics. Determined to change that, she ended up with an extensive introduction tutorial for reverse engineering x86_64 binaries starting at the very basics, then gradually moving forward using crackme examples. Covering simple string analysis and digging through disassembled binaries to circumvent fictional security, the tutorial later introduces the Radare2 framework.

All example source code is provided in the accompanying GitHub repository, although it is advised to avoid looking at them to keep it more interesting and challenging. And in case you are looking for more challenges later on, or generally prefer a closer connection to the hardware, these MSP430 based capture the flag online challenges might be worth to look at next.

Reverse Engineering Guitar Hero

What do you do when a ten-year-old video game has a bug in it? If you are [ExileLord] you fix it, even if you don’t have the source code. Want to know how? Luckily, he produced a video showing all the details of how he tracked the bug down and fixed it. You can see the video below. You may or may not care about Guitar Hero, but the exercise of reverse engineering and patching the game is a great example of the tools and logic required to reverse engineer any binary software, especially a Windows binary.

The tool of choice is IDA, an interactive debugger and disassembler. The crash thows an exception and since [ExileLord] has done some work on the game before, he was able to find a function that was creating a screen element that eventually led to the crash.

Continue reading “Reverse Engineering Guitar Hero”

Completely Owning The Dreamcast Add-on You Never Had

If you’ve got a SEGA Dreamcast kicking around in a closet somewhere, and you still have the underutilized add-on Visual Memory Unit (VMU), you’re in for a treat today. If not, but you enjoy incredibly detailed hacks into the depths of slightly aged silicon, you’ll be even more excited. Because [Dmitry Grinberg] has a VMU hack that will awe you with its completeness. With all the bits in place, the hacking tally is a new MAME emulator, an IDA plugin, a never-before ROM dump, and an emulator for an ARM chip that doesn’t exist, running Flappy Bird. All in a month’s work!

The VMU was a Dreamcast add-on that primarily stored game data in its flash memory, but it also had a small LCD display, a D-pad, and inter-VMU communications functions. It also had room for a standalone game which could interact with the main Dreamcast games in limited ways. [Dmitry] wanted to see what else he could do with it. Basically everything.

We can’t do this hack justice in a short write-up, but the outline is that he starts out with the datasheet for the VMU’s CPU, and goes looking for interesting instructions. Then he started reverse engineering the ROM that comes with the SDK, which was only trivially obfuscated. Along the way, he wrote his own IDA plugin for the chip. Discovery of two ROP gadgets allowed him to dump the ROM to flash, where it could be easily read out. Those of you in the VMU community will appreciate the first-ever ROM dump.

On to doing something useful with the device! [Dmitry]’s definition of useful is to have it emulate a modern CPU so that it’s a lot easier to program for. Of course, nobody writes an emulator for modern hardware directly on obsolete hardware — you emulate the obsolete hardware on your laptop to get a debug environment first. So [Dmitry] ported the emulator for the VMU’s CPU that he found in MAME from C++ to C (for reasons that we understand) and customized it for the VMU’s hardware.

Within the emulated VMU, [Dmitry] then wrote the ARM Cortex emulator that it would soon run. But what ARM Cortex to emulate? The Cortex-M0 would have been good enough, but it lacked some instructions that [Dmitry] liked, so he ended up writing an emulator of the not-available-in-silicon Cortex-M23, which had the features he wanted. Load up the Cortex emulator in the VMU, and you can write games for it in C. [Dmitry] provides two demos, naturally: a Mandlebrot set grapher, and Flappy Bird.

Amazed? Yeah, we were as well. But then this is the same guy emulated an ARM chip on the AVR architecture, just to run Linux on an ATMega1284p.