Flimsy Pi Case Still Provides A Level Of Protection

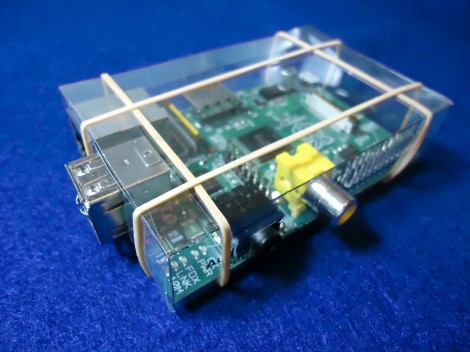
This flimsy case isn’t going to protect your Raspberry Pi if you knock it off the workbench. It will provide a level of protection against shorting out from contact with metal objects, or from liquids spilled in the near vicinity. [CGPatterson] ended up making this case from a single sheet of transparency film.

The project is basically papercraft. He started with the dimensions published on the Raspberry Pi FAQ, which turned out to be wrong. Not having a caliper available to help with the precision of the measurements, he grabbed his ruler and did the best he could. The first two cases were a poor fit, but as you can see the third is like a glove. Luckily you don’t have to go through this same trial and error as he release the design. Both A4 and US Letter sized PDFs are available for download. Print them out on the transparency, cut along the lines, apply transparent double-sided tape to the tabs and you’re in business. If you wish to alter the design he has also posted the SVG source he made in Inkscape.

This is certainly a good option for those of us without the ability to produce laser cut parts.

Building Better Cases With A Laser Cutter

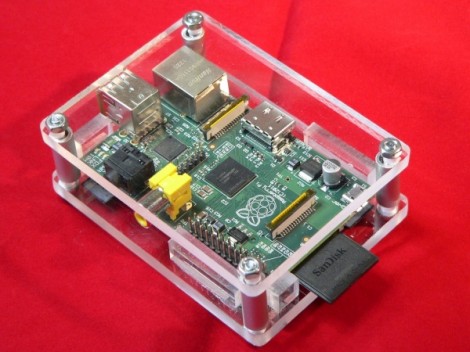
[Ryan] just got his Raspberry Pi, and what better way to add a new toy to your workbench than by building a case for it? Using a laser cutter and 3D printer, [Ryan] managed to make a case that is sure to be the envy of all the other tinkerers at his hackerspace.

The build started off with a piece of dark red acrylic in a laser cutter. After cutting the Raspberry Pi logo out of this acrylic, [Ryan] cut the same logo – a little bit larger – out of plywood. Because he was very careful to measure the kerf (or the width of the laser beam/saw blade/what have you), the wooded version of the Raspi logo fit snugly inside the acrylic cut out.

The sides of the enclosure are a single piece of plywood with a kerf bend, making for a very attractive rounded case. Finally, the Raspberry Pi is mounted on a Pi plate printed on a Ultimaker.

For as many builds we see using a laser cutter here on Hackaday, there’s surprisingly little information on exploiting the true potential of these machines with marquetry, intarsia, or fretwork. Enclosures are always cool, so if you have a very elegant laser cut box, send it in and we’ll put it up.

Kindle Fire Cover From A Moleskine Journal

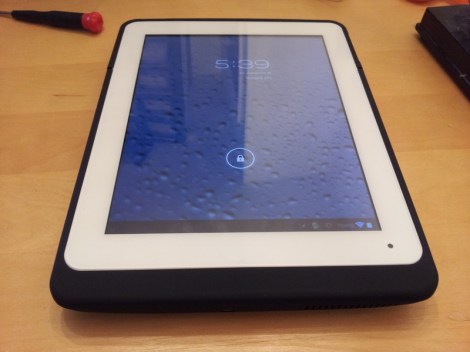
[Kevin Haw] is the proud owner of a brand new Kindle Fire. But to protect the investment he wanted a nice looking case and decided that DIY was the way to go. He ended up repurposing a Moleskine journal as a table cover.

You can do this one yourself in under an hour. Most of the pages in these journals are sewn in place and [Kevin] started by cutting the strings with a hobby knife. Once removed, he used a utility knife to separate the pages that were glued to the cover; this leaves you in the state seen above.

Obviously this unfinished look just won’t do. [Kevin] used some red duct tape duct tape to cover the unsightly spine. This adds strength, and does the job of cleaning up the area, but we might have also applied felt (or microfiber cloth) to the entire inside area for a bit more finished look. The final part is mounting the tablet which was accomplished with adhesive Velcro strips. These can be removed from the back of the Kindle Fire later on if you decided to use a different enclosure.

A Wooden Computer Case, Monitor Stand, And Keyboard

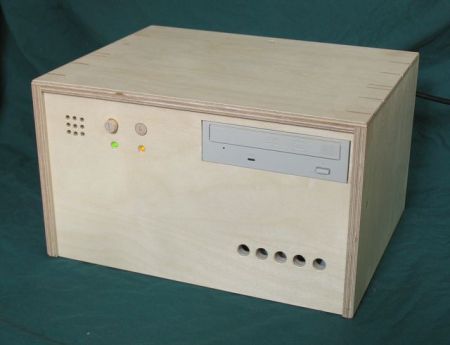
Wood and electronics don’t generally mix nowadays, but if you yearn back to a time when radios and the like had a nice wooden finish, this wooden computer case may be for you. Combine that with a Wooden keyboard enclosure, and maybe even a LCD monitor stand and you’ll have a setup that should fit in with any wood-themed decor!

The wooden computer case is actually more of a cover in that it uses most of the stock case to house all of the components.  It would definitely be a pain, and possibly a fire-hazard, to make a back mounting plate for all the components out of wood. To go along with this, the LCD monitor stand was engineered for a 21″ monitor when the owner of it wasn’t satisfied with the stability of the stock stand.  In the end, he ended up building something quite sturdy and nice looking to replace it.

The highlight for many for the keyboard would be that it was made, in part at least, out of a desire for a Commodore-64 keyboard.  It appears to function well andlooks great, so be sure to check out the other pictures after the break! Continue reading “A Wooden Computer Case, Monitor Stand, And Keyboard”

Portable Light Box For Photographers On-the-go

Looking to make a quality light box more portable, [Hharry] designed a collapsible version complete with adjustable side lighting.

Light tents are used by photographers as a stage for photographing small items. The use of multiple light sources, and a fabric that will diffuse them, means a reduction in shadows that might otherwise ruin a picture. This design starts with an MDF base in the form of a shallow box with a few baffles running left to right. Drawer slides connect the lamp poles to these baffles, making it easy to pull each of the four light sources out when setting up the tent.

The white fabric that makes up the stage has pockets sewn into the edges to accept dowel rods. These are not anchored permanently. They pull against the fabric when wedged in place to keep the tent taut, but easily fold down for storage in the cavities of the base. Finally, the top of the carrying case folds down and a drawer pull serves as the carrying handle.

A light tent isn’t the only way to battle shadows in your pictures. Check out this method that uses mirrors to adjust lighting conditions.

[Thanks David]

PC Case Using CNC Router And Home Building Products

[Reinventing Science] needed a project that he could use to test out his skills on a new CNC routing machine he recently acquire. He settled on building a PC case using easily obtained materials. What he ended up with is the clean-looking case seen above that was machined from materials you can pick up at the home store.

The bulk of the case is made from extruded PVC which is designed to perform like solid wood trim. He picked up one piece of the ‘lumber’ and cut out the front, back, top, bottom, and drive bay bezel. We expected the joints between the horizontal and vertical pieces to either be butt joints, or rabbits. But [Reinventing Science] wanted a cleaner look and managed to mill mortise and tenon joints. These are strong joints that leave a very nice finished look. Since the material is designed as a lumber replacement it shouldn’t be too surprising to see drywall screws used as the fasteners.

In addition to joinery, some other CNC tricks were used. The sides of the case were cut from clear acrylic, with a decorative bead milled in the surface. There’s also fan ports cut in the top and vents on the bottom, as well as some engraving with the name of the project just above the optical drive. The wood-grain embossing makes for an interesting final look; we’d like to see how this takes a few careful coats of paint.

If you’re interested in the CNC hardware used, take a look at the unboxing post that shares a few details.

On-the-go Desktop

Here’s a desktop you can take with you. [Rbean] built it at a hackerspace in Milwaukee, Wisconsin (go Badgers!) using very basic materials and techniques. The utilitarian construction of the wooden body reminds us of Cub Scout tool box projects. It features an open space in the top which house the keyboard and mouse during travel. The blue strap lets you sling all forty pounds over one shoulder, but we’d also love to see a thick dowel to go along with the toolbox concept we’ve got stuck in our mind.

The lower half of the case is removable, serving as the mounting area for what looks like a mini ITX motherboard, hard drive, and full-sized power supply. As you can see the LCD screen mounts to the side of the box which allows you to rest the unit on its side and protects the display if the whole thing were to be knocked over. [Rbean] mentions that he’d like to try another revision using aluminum instead of wood, but we like this version. The only thing we’d want to see added is a set of speakers mounted inside the case on either side of the monitor.