The Coin Cell Emulator CR2016/CR2032 by [bobricius] homes in on a problem some hardware developers don’t realize they have: when working on hardware powered by the near-ubiquitous CR2016 or CR2032 format 3V coin cells, power can be a bit troublesome. Either the device is kept fed with coin cells as needed during development, or the developer installs some breakout wires to provide power from a more convenient source.
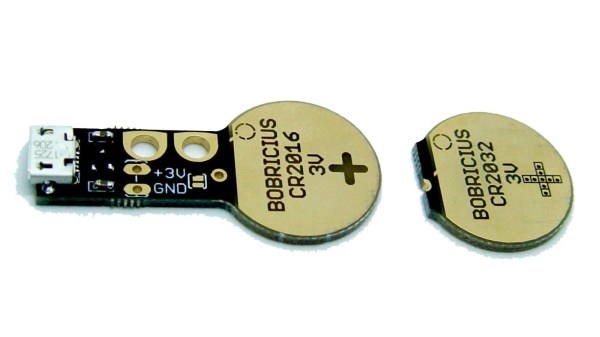
[bobricius]’s solution to all this is a small PCB designed to be inserted into most coin cell holders just like the cell itself. It integrates a micro USB connector with a 3V regulator for using USB as an external power source. The board also provides points for attaching alligator clips, should one wish to conveniently measure current consumption. It’s a tool with a purpose, and cleverly uses the physical shape of the PCB itself as an integral part of the function, much like another of [bobricius]’s projects: the Charlieplexed 7-segment LED display.