DVD Laser Diode Used To Build A Laser Engraver

[Johannes] has been reading Hackaday for years but this is the first project he’s tipped us off about. It’s a laser engraver built from a DVD burner diode (translated). It turned out so well we wonder what other projects he’s forgotten to tip us off about?

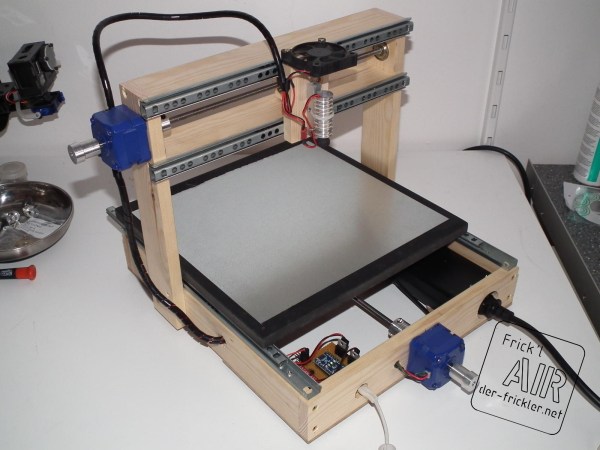
This is the second CNC machine he’s seen through from start to finish. It improves upon the knowledge he acquired when building his CNC mill. The frame is built from pine but also uses bits of plywood and MDF. It can move on the X and Y axes, using drawer sliders as bearings. The pair of blue stepper motors drive the threaded rods which move the platform and the laser mount. Just above the laser he included a small DC fan to keep it from burning up. The control circuitry is made up of an Arduino Nano and a stepper motor driver board. Catch a glimpse of the engraver cutting out some stencil material after the break.

There must be something about Spring that brings out the urge to work with laser diodes. We just saw a similar 1W cutter last week.

Continue reading “DVD Laser Diode Used To Build A Laser Engraver”

DIY Laser Cutter Built To Make Stencils

It was time for some new T-shirts so [Andreas Hölldorfer] built a laser cutter. Wait, what? That’s the excuse he’s going with, and in the end this scratch built laser cutter did come in handy by cutting stencils to use when decorating his garments.

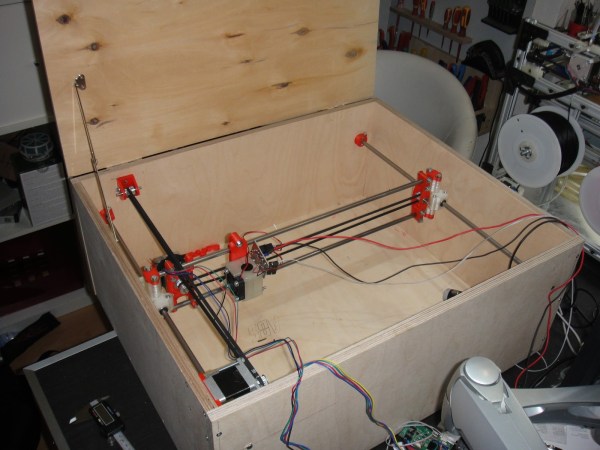
The first thing we thought when looking at the cutter is where’s the tube? [Andreas] didn’t use a CO2 laser, so this ends up being rather low-powered. The cutting head is a 1W blue laser diode which manages to slice the three-ring binder separator pages he’s using for the stencils. The two-axis machine is mounted inside a wooden box to protect his eyes while it’s cutting. He plans to add a drawer later on so that the cutting bed will slide in and out to swap out material for the next project. He already does a lot of 3D printing work and had an old RepRap driver board on hand to use for this projects. He designed and printed the red mounting brackets which make all of the junk-bin components work together. Not bad!

If you’d like to try this out on a smaller scale try using optical drive parts for the axes.

DVD Power Supply Repair Tips

bridge-rectifier-repair

This demonstration fixes the power supply of a DVD player, but the skills transcend this one application. [Alan] walks us through the process of repairing a power supply (translated) on a simple consumer electronics unit.

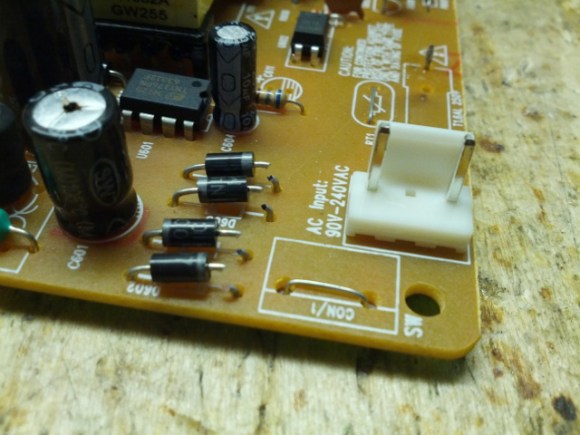
Obviously this starts by cracking open the dead device and verifying that the culprit is the power supply. [Alan] then removes that board from the chassis and gets down to work with a visual inspection. He’s got several images which illustrate things to look for; blistered electrolytic capacitors, cracked solder joins, scorch marks, etc. In his case there’s obviously a burnt out fuse, but that merely protects the hardware from further damage, it’s not the cause. Next he examines the diodes of the bridge rectifier. These need to be removed from the system to do so, which he accomplishes by clipping one end of each as seen above. He found that two diodes on one side of the bridge had broken down. After replacing them he tries a new fuse which immediately burns out. But a quick swap of the capacitors and he gets the thing back up and running.

We perk up every time we see this type of repair hack. We figure if we can build our own hobby electronics we should be able to fix the cheap devices like this one.

Laser Charged Glowing Display

Here’s one of the best takes on a glowing display that we’ve ever seen. Currently [H] is using his creation as a fuzzy clock, but it is certainly capable of displaying just about any messages.

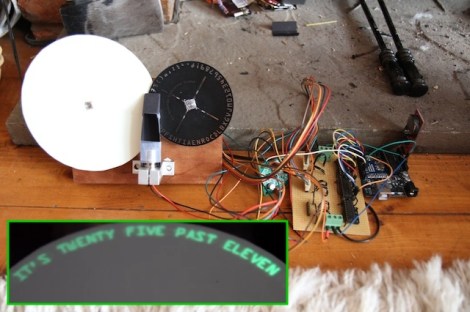
The project uses a wheel of luminous paper as the display surface. This has a glow-in-the-dark quality to it which can be charged up using a bright light source. In this case a UV laser diode was used. This is perhaps the best possible source as its intensity will allow for very quick charging. The innovation here is the use of a second disk as a stencil. Look closely in the image above and you will see that the laser diode is mounted perpendicular to the display surface itself. A mirror reflects — and we believe slightly spreads — the laser dot. It then passes through a cut-out on the black wheel which is shaped as the desired character. As you can see in the video after the break, this results in a crisp and clear glowing letter.

Compare this project to the one that moves the diode itself like a plotter and we think you’ll agree this is a simpler implementation which still looks great!

Continue reading “Laser Charged Glowing Display”

NES Light Gun Gets A Burning Laser Upgrade

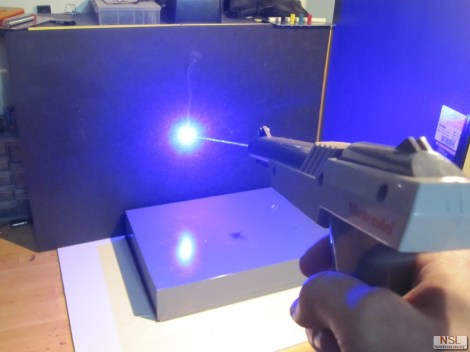
The Nintendo Light Gun makes a perfect burning laser. Of course it’s been gutted to make this happen. Nonetheless, the retro look can’t be beat, and the gun form factor is just what you need in a laser weapon.

This will literally burn your eye out of your head, so [Justin] and his buddies over a North Street Labs are all wearing protective goggles designed for this laser’s wavelength. But they also built a safety into the zapper itself. At the beginning of the video clip (embedded after the break) you will see there’s a key lock mounted in the butt. This lock completes the circuit between the battery and driver board. The 2W output is achieved by a 445nm M140 diode. A lot went into the heat sink and mounting cylinder to make sure the diode doesn’t just burn up after a few seconds of use.

Continue reading “NES Light Gun Gets A Burning Laser Upgrade”

Laser Diode Controller For A CNC Mill

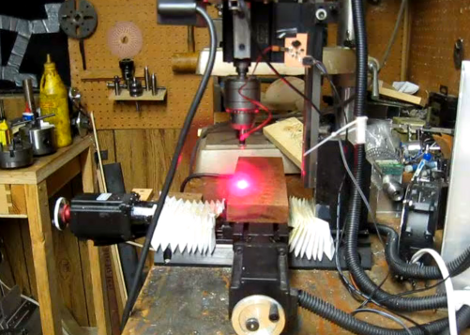
[Smells of Bikes] wanted to add laser etching to the list of tricks his home CNC setup is capable of. He has a diode which will work for the task, but he needed a driver that could be interfaced with the CNC system. He ended up designing a driver board based around the LM3402 chip.

Now driving one of these laser diodes isn’t all that different from driving a Light Emitting Diode. He chose to use the LM3402 chip because he’s the TI engineer who designed the official evaluation board for the part. It’s meant for high-power LED applications, and the 700 mA he needs for the laser is within spec. Since he’s soldering by hand, and this part has a ground pad on the bottom, he shares his soldering technique in detail. Once the driver board is ready, he uses a ‘sed’ command to replace the g-code Z axis commands with digital on/off commands to switch the diode.

Check out the demo video after the break. He uses a diffuse beam since the cutting beam is bright enough to damage his camera.

Continue reading “Laser Diode Controller For A CNC Mill”

Laser Light Painting Includes Camera Control

This laser light painting setup can even control the camera. But it probably will not work with your average point-and-shoot. The exposure time used is somewhere around 2 seconds long, a feature which is hard to find on anything but DSLR cameras.

The setup relies on a red laser diode to do the painting. When viewed in real time you only see a dot tracing out a cryptic pattern and occasionally switching on and off. But with a long exposure the intense light persists to achieve an image like the one seen above. Note the ghosting around the rig as it has moved while the shutter was open.

The Arduino controlled device consists of a base which pivots the diode horizontally, with a servo for aiming on the vertical axis. Since the sketch is divided up by letter, we wonder how hard it would be to adapt this for use with a point-and-shoot? Perhaps you could capture one letter at a time and layer the frames in post production?

It seems this is a lot easier to build than some of the LED plotters we’ve looked at. If you do make your own don’t forget to send a link our way.

Continue reading “Laser Light Painting Includes Camera Control”