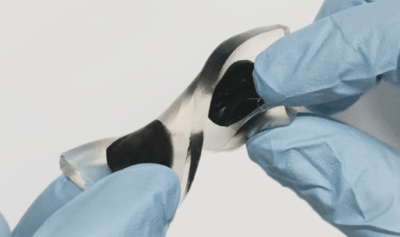
Tired With Your Robot? Why Not Eat It?

Have you ever tired of playing with your latest robot invention and wished you could just eat it? Well, that’s exactly what a team of researchers is investigating. There is a fully funded research initiative (not an April Fools’ joke, as far as we know) delving into the possibilities of edible electronics and mechanical systems used in robotics. The team, led by EPFL in Switzerland, combines food process engineering, printed and molecular electronics, and soft robotics to create fully functional and practical robots that can be consumed at the end of their lifespan. While the concept of food-based robots may seem unusual, the potential applications in medicine and reducing waste during food delivery are significant driving factors behind this idea.
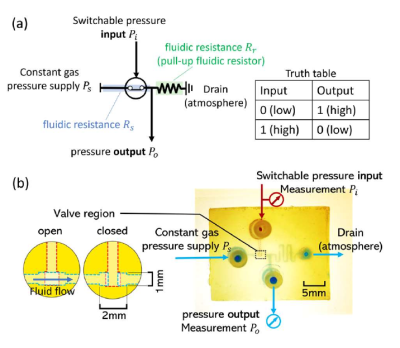
The Robofood project (some articles are paywalled!) has clearly made some inroads into the many components needed. Take, for example, batteries. Normally, ingesting a battery would result in a trip to the emergency room, but an edible battery can be made from an anode of riboflavin (found in almonds and egg whites) and a cathode of quercetin, as we covered a while ago. The team proposed another battery using activated charcoal (AC) electrodes on a gelatin substrate. Water is split into its constituent oxygen and hydrogen by applying a voltage to the structure. These gasses adsorb into the AC surface and later recombine back into the water, providing a usable one-volt output for ten minutes with a similar charge time. This simple structure is reusable and, once expired, dissolves harmlessly in (simulated) gastric fluid in twenty minutes. Such a device could potentially power a GI-tract exploratory robot or other sensor devices.

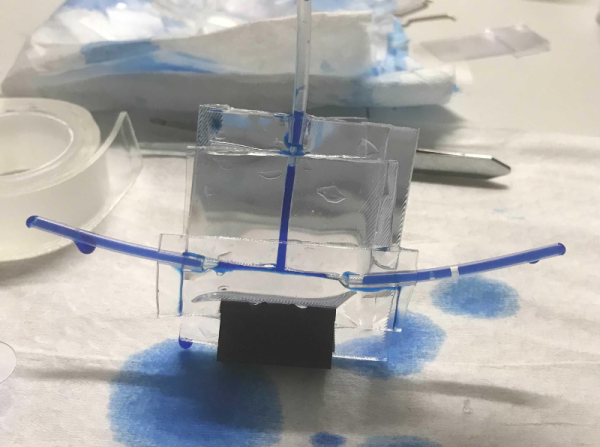
But what use is power without control? (as some car tyre advert once said) Microfluidic control circuits can be created using a stack of edible materials, primarily oleogels, like ethyl cellulose, mixed with an organic oil such as olive oil. A microfluidic NOT gate combines a pressure-controlled switch with a fluid resistor as the ‘pull-up’. The switch has a horizontal flow channel with a blockage that is cleared when a control pressure is applied. As every electronic engineer knows, once you have a controlled switch and a resistor, you can build NOT gates and all the other logic functions, flip-flops, and memories. Although they are very slow, the control components are importantly edible.

Edible electronics don’t feature here often, but we did dig up this simple edible chocolate bunny that screams when you bite it. Who wouldn’t want one of those?

A line-art diagram of the microfluidic device. On the left, in red text, it says "Fibrillization trigger (CPB pH 5.0). There is a rectangular outline of the chip in grey, with a sideways trapezoid on the left side narrowing until it becomes an arrow on the right. At the right is an inset picture of the semi-transparent microfluidic chip and the text "Negative Pressure (Pultrusion)." Above the trapezoid is the green text "MaSp2 solution" and below is "LLPS trigger (CPB pH 7.0)" in purple. The green, purple, and red text correspond with inlets labeld 1, 2, and 3, respectively. Three regions along the arrow-like channel from left to right are labeled "LLPS region," "pH drop," and in a much longer final section "Fiber assembly region."

Synthetic Spider Silk

While spider silk proteins are something you can make in your garage, making useful drag line fibers has proved a daunting challenge. Now, a team of scientists from Japan and Hong Kong are closer to replicating artificial spider silk using microfluidics.

Based on how spiders spin their silk, the researchers designed a microfluidic device to replicate the chemical and physical gradients present in the spider. By varying the amount of shear and chemical triggers, they tuned the nanostructure of the fiber to recreate the “hierarchical nanoscale substructure, which is the hallmark of native silk self-assembly.”

We have to admit, keeping a small bank of these clear, rectangular devices on our desk seems like a lot less work than keeping an army of spiders fed and entertained to produce spider silk Hackaday swag. We shouldn’t expect to see a desktop microfluidic spider silk machine this year, but we’re getting closer and closer. While you wait, why not learn from spiders how to make better 3D prints?

If you’re interesting in making your own spider silk proteins, checkout how [Justin Atkin] and [The Thought Emporium] have done it with yeast. Want to make your spider farm spiders have stronger silk? Try augmenting it with carbon.

Discount Microfluidics From A $9 Spree At The Dollar Store

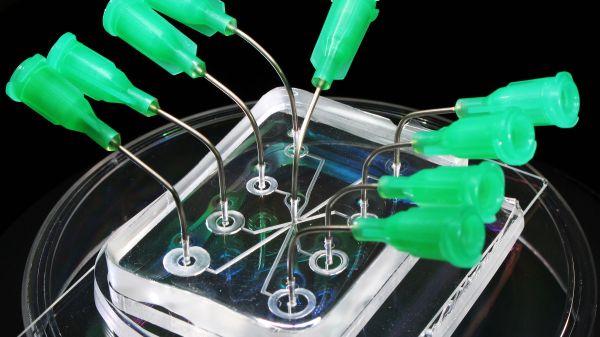
Microfluidics — working with tiny volumes of fluids in tiny channels — isn’t something you’d think would be inexpensive. Unless you read [Alexander Bissells’] post on how he created microfluidic devices using stuff from the dollar store. The channels in these devices can be much smaller than a millimeter and the fluid volumes are sometimes measured in femtoliters. At those scales, fluids don’t work like we intuitively think they will.

The parts list included gel tape, baby droppers, and some assorted containers and tools. Total price at the dollar store $9. One of the key finds in the dollar store was some small spray bottles. They weren’t important themselves, but they contain small lengths of silicone tubing and that was useful. Plastic fresnel lenses along with the tubing and gel tape worked to make “chips.” The gel tape also gets cut to make the channels. An eyedropper with some modifications makes a reasonable syringe.

We aren’t sure what you can practically do with any of these, but the T-junction looked pretty interesting. If you want some ideas on how these devices work in biology, including COVID-19 testing, check out this article. And just last week [Krishna Sanka] hosted a Hack Chat on microfluidics in biohacking, you can find the transcript on the project page. If you need a pump, this one uses 3D printer firmware to control it.

Microfluidics For Biohacking Hack Chat

Join us on Wednesday, July 7 at noon Pacific for the Microfluidics for Biohacking Hack Chat with Krishna Sanka!

“Microfluidics” sounds like a weird and wonderful field, but one that doesn’t touch regular life too much. But consider that each time you fire up an ink-jet printer, you’re putting microfluidics to work, as nanoliter-sized droplets of ink are spewed across space to impact your paper at exactly the right spot.

Ink-jets may be mundane, but the principles behind them are anything but. Microfluidic mechanisms have found their way into all sorts of products and processes, with perhaps the most interesting uses being leveraged to explore and exploit the microscopic realms of life. Microfluidics can be used to recreate some of the nanoscale biochemical reactions that go on in cells, and offer not only new ways to observe the biological world, but often to manipulate it. Microfluidics devices range from “DNA chips” that can rapidly screen drug candidates against thousands of targets, to devices that can rapidly screen clinical samples for exposure to toxins or pathogens.

There are a host of applications of microfluidics in biohacking, and Krishna Sanka is actively working to integrate the two fields. As an engineering graduate student, his focus is open-source, DIY microfluidics that can help biohackers up their game, and he’ll stop by the Hack Chat to run us through the basics. Come with your questions about how — and why — to build your own microfluidics devices, and find out how modern biohackers are learning to “go with the flow.”

join-hack-chatOur Hack Chats are live community events in the Hackaday.io Hack Chat group messaging. This week we’ll be sitting down on Wednesday, July 7 at 12:00 PM Pacific time. If time zones have you tied up, we have a handy time zone converter.

[Featured image: Cooksey/NIST]

An Open-Source Microfluidic Pump For Your Science Needs

When it comes to research in fields such as chemistry or biology, historically these are things that have taken place in well-financed labs in commercial settings or academic institutions. However, with the wealth of technology available to the average person today, a movement has sprung up of those that run advanced experiments in the comfort of their own home laboratory. For those needing to work with very tiny amounts of liquid, [Josh’s] microfluidics pump may be just the ticket.

Consisting of a series of stepper-motor driven pumps, the hardware is inspired by modern 3D printer designs. The motors used are all common NEMA items, and the whole system is driven by the popular Marlin firmware. The reported performance is impressive, delivering up to 15 mL/min with accuracy to 0.1uL/min. That’s a truly tiny amount of fluid, and the device could prove highly useful to those exploring genetics or biology at home.

The great thing about this build is that it’s open source. [Josh] took the time to ensure that it was easily moddable to work with different tubing and materials, such that others could spin up a copy using whatever was readily available in their area. Performance will naturally vary, but if you’re experienced enough to build a microfluidic pump, you’re experienced enough to calibrate it, too. Design files are on Github for those keen to build their own.

We’ve seen other builds in this area before, too. We look forward to seeing some fun science done with [Josh]’s build, and look forward to seeing more DIY science gear in the future!

This Camera Captures Piezo Inkjet Micro-Drops For DIY Microfluidics

In microfluidics, there are “drop on demand” instruments to precisely deposit extremely small volumes (pico- or nano-liters) of fluid. These devices are prohibitively expensive, so [Kyle] set out to design a system using hobbyist-level parts for under $1000. As part of this, he has a fascinating use case for a specialized camera: capturing the formation and shape of a micro-drop as it is made.

There are so many different parts to this effort that it’s all worth a read, but the two big design elements come down to:

  1. Making the microdrop using a piezo element
  2. Ensuring the drop is made correctly, and visually troubleshooting
Working prototype. The piezo tube is inside the blue piece at the top. The camera is to the right, and the LED strobe is on the left.

It’s one thing to make an inkjet element in a printer work, but it’s quite another to make a piezoelectric element dispense arbitrary liquids in a controlled, repeatable, and predictable way. Because piezoelectric elements force liquid out with a mechanical motion, different liquids require different drive signals and that kind of experimentation requires a way to see what is going on, hence the need for a drop observation camera.

[Kyle] ended up taking the lens assembly from a cheap USB microscope and mating it to his Korukesu C1 USB Camera with a 3D printed assembly. Another 3D printed enclosure doubles as a lightbox, holding the piezo tube in the center with the LED strobe and camera on opposite sides. The whole assembly had a few false starts, but in the end [Kyle] seems pretty happy with his results. The device is briefly described at a high level here. There are some rough edges, but it’s a working system.

Inkjet technology has been around for a long time (you can see a thirty-plus year old inkjet printer in action here) but it’s worth mentioning that not all inkjet heads are alike. Most inkjet printer heads operate thermally, which means a flash of heat vaporizes some ink to expel a micro-drop. These heads aren’t very suitable for microfluidics because not only do they rely on vaporizing the liquid, but they also don’t work well with anything other than the ink they’re designed for. Piezoelectric print heads are less common, but are more suited to the kind of work [Kyle] is doing.

Hackaday Podcast 016: 3D Printing With Steel, Molding With Expanded Foam, QUIP-Package Parts, And Aged Solder

Join Editors Elliot Williams and Mike Szczys to recap the week in hardware hacking. This episode looks at microfluidics using Shrinky Dinks, expanding foam to build airplane wings, the insidious effect of time on component solder points, and Airsoft BBs used in 3D printing. Finishing out the episode we have an interview with two brothers who started up a successful business in the Shenzhen electronics markets.

Take a look at the links below if you want to follow along, and as always, tell us what you think about this episode in the comments!

Take a look at the links below if you want to follow along, and as always, tell us what you think about this episode in the comments!

Direct download (60 MB or so.)

Continue reading “Hackaday Podcast 016: 3D Printing With Steel, Molding With Expanded Foam, QUIP-Package Parts, And Aged Solder”