Plywood Camera Dolly

DIY Plywood Camera Dolly Looks Professional

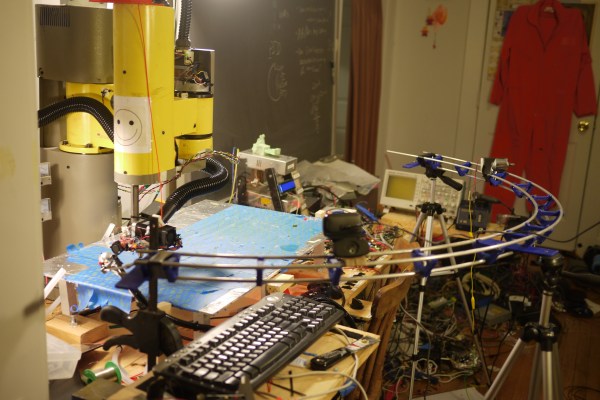
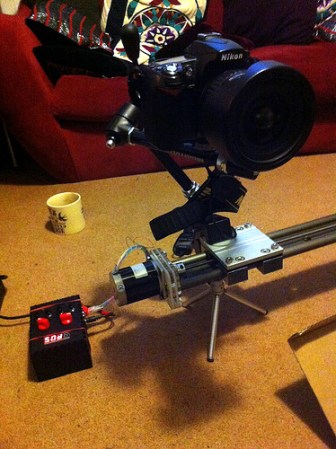
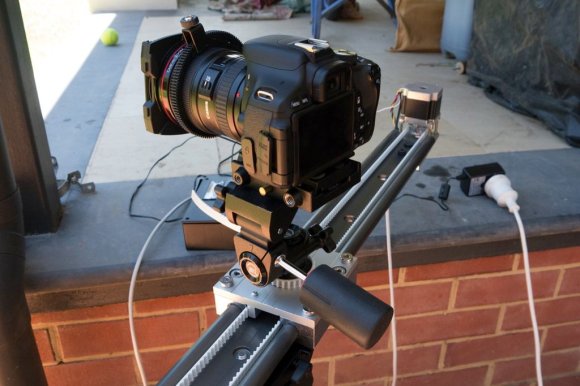
While [Ted] was poking around the ‘net, he came across a neat little product called a camera dolly. These are used to add an artistic flair to filming. They are similar to a camera slider but can roll around on the floor or a table and do not need to follow a track. [Ted] wanted a camera dolly but the cost of a professional product seemed too expensive for what he’d actually be getting, so he set off to make his own.

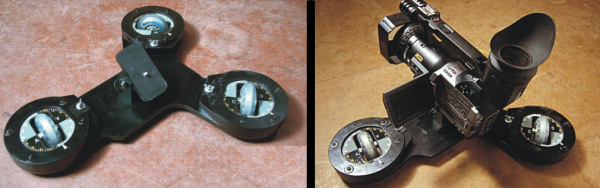
[Ted] first designed the dolly in a CAD software and printed out templates for the parts. Those templates were then transferred to plywood and cut out with a jig saw. Three inline skate wheels support the frame and allow the unit to roll around. Mounted in the center of the frame is a pan and tilt camera mount.

The extraordinary part of the build is that the angle of each wheel can be adjusted independently.  This allows the dolly to do anything from rolling in a straight line to gradually traveling around a curve or even just spinning the camera in place. Each wheel mount has degree indications so that they can be adjusted very precisely as well as be returned to a previously recorded position.

Bending And Printing A Curved Camera Dolly Track

How lucky is [Transistor Man] that he found the materials for the tracks of this curved camera dolly just lying around the shop? The three rails making up the system are quarter-inch diameter and he was able to bend them by hand with the help of a 55 gallon drum. But to hold them in place so that the camera dolly would run smoothly he had to find a way to precisely space the tracks.

The robot arm you see in the picture above is a 3D printer which ended up being the easiest solution to the problem. With a bit of trial and error he found a design that holds the tracks in place without interfering with the camera sled’s progress. From there he devised a mounting system which uses three camera tripods to hold the track. You can see a test video shot from the dolly track embedded after the jump. It’s the opposite of the bullet time rigs [Caleb’s] been working on lately.

We figure the spacers would work for any track shape, but if you’re going for a complicated route you need some type of pipe bender to help out.

Continue reading “Bending And Printing A Curved Camera Dolly Track”

Time-lapse Dolly Uses Some Stock Parts And A Bit Of Machining Work

linear-carriage-for-time-lapse-photography

[Ben] just finished building this time-lapse dolly and decided to share his experience. We think he struck just the right balance of diy and commercially available materials to create a rig that is stable yet relatively inexpensive.

The project was inspired by Project Chronos. It gives a lot of details about the drive electronics and code used, but there are some gaps in the instructions for building the track itself. [Ben] forged ahead, purchasing linear bearings and a double-guide rail from IGUS. He didn’t mention the price on that item but we found 1000mm of the stuff (about 40 inches) for under $75 so it’s not outrageous. The part he couldn’t get for a reasonable price was precision thread bar. He ended going with regular threaded rod and a couple of nuts combined with a spring mechanism to keep the sled steady. That seems to work just fine. You can see the rod bouncing a bit in the clip after the break but it doesn’t harm the stability of the captured images.

The end stops including the one to which the stepper motor is mounted are his own work. It sounds like they required a bit more fabrication work than he was planning on but we figure if you don’t challenge your skill set you never get any better.

Continue reading “Time-lapse Dolly Uses Some Stock Parts And A Bit Of Machining Work”

Versatile Motion Dolly For Time Lapse Photography

time-lapse-motion-system

This beautiful build is a motion dolly for making time-lapse videos. It is at a point where you could consider it complete. After all, the segments featured in the video after the break look marvelous. But [Scottpotamas] has a few additions planned and it sounds like it won’t belong before he accomplishes his goals.

The build is a linear rail on which the camera rides. In the image above you can see the stepper motor which moves the camera mounted at the far end of the rig. This is controlled by an Arduino. Currently the camera is responsible for timing the capture of the images, but [Scottpotamas] says the firmware is nearly ready to hand this responsiblity over to the Arduino. The system is modular, with a simple setting for the length of the track. This way he can swap out for a longer or shorter rail which only takes about five minutes. He also included support for a panning mount for the camera. It allows the control box can be programmed to keep the subject centered in the frame as the camera slides along the track.

Continue reading “Versatile Motion Dolly For Time Lapse Photography”

Taking Moving Time-lapse Images Over Days At A Time

It’s neat to watch these lilies open and close during the time-lapse movie. But what makes it even better is to see the camera slowly move during the time-lapse event. It’s thanks to a special dolly which the photographers built for this purpose.

The system is based on two curved and inclined pipes which make up the rails of the system. The dolly that rides along the rails has a geared motor on it which turns at 2 RPM. This is used as a winch, spooling a string that is tied to the high-end of the rail system. As the winch winds the string, the dolly slowly moves along the track.

To make this work over multiple days they covered all of the windows in foil and lighted the room with fluorescent fixtures. An intervalometer was used to trigger the camera every three minutes. An Arduino monitors the camera’s shutter LED via a light dependent resistor. Sixty seconds after an image is take the Arduino will drive the dolly motor for a few seconds

The finished video, as well as a hardware show-and-tell, can be seen after the break.

Continue reading “Taking Moving Time-lapse Images Over Days At A Time”

Camera Dollies Hacked Together By Stop Motion Filmmakers

A little bit of technology goes a long way when it comes to stop motion animation. In this case it’s a trio of simple camera dollies built during production of a short film called The Maker.

A Dolly is a method of mounting the camera so that it can be moved smoothly during a shot. Of course with stop motion the movement actually happens between the shots so it’s even more important that the camera be moved accurately. The video after the break shows off how they added CNC control for the camera. The first dolly was built from a pair of PVC pipes with a sled that moves along them. A motor moves a loop of 35mm film which is attached to the dolly. This is a great choice of materials since it doesn’t stretch and it’s free (one of the filmmakers is a projectionist). The next dolly is made from a flatbed scanner, and the final offering is seen above. Built from a bicycle wheel it provides a stationary platform above the hub for the models, while the camera rotates on an arm attached to the wheel. You can watch the complete film here.

If you’re looking for more inspiration check out this dual-axis PVC dolly project.

Continue reading “Camera Dollies Hacked Together By Stop Motion Filmmakers”

DIY Camera Dolly Frees Up Your Hands To Take Care Of The Important Stuff

diy_camera_dolly

Documenting your build process can sometimes be an incredible pain, as it’s quite difficult to take pictures or video while you are in the middle of soldering. Professionals who demonstrate things on TV for a living have the benefit of a camera crew and special rigs to catch the action from every angle – the rest of us don’t have that luxury.

[Steve] felt the same frustrations as many of us do, and decided to do something about it. He built a movable camera dolly that can be suspended from the ceiling above his work surface for less than $30. The bulk of his camera dolly is built from PVC piping, with assorted bolts and washers holding things together. Skateboard bearings were used as rollers to provide smooth 2-axis motion for the entire rig, then he hung the entire apparatus from the ceiling joists over his workspace.

According to [Steve], the build process seems relatively easy and should take no more than an hour or so, and it can support pretty much any full-size DSLR camera you can find.

Stick around for a quick video tour of his camera dolly build.

[via Make]

Continue reading “DIY Camera Dolly Frees Up Your Hands To Take Care Of The Important Stuff”